
![]()
Clear Prop! 1/72 I-16 type 5 In Finnish Service
By Matt Bittner
Overview
I will let the reader check on what's in the boxes via my First Looks: first on the I-16 Type 5 (1938-1941) then on the kit in this article.
Construction
Naturally and with most aircraft models, construction starts in the cockpit. The detail out-of-the-box is wonderful. While I could have used the decal seat belts, I decided to replace those from Eduard. I added the bar above and behind the seat out of wire, to which the shoulder belts overlapped and added after the cockpit was in and the fuselage halves assembled. I did add the instrument panel decal over the raised, plastic instrument panel and I think it came out very nice. At the end of construction I then added a drop of a Future-equivalent to each dial to give it a representation of glass. Difficult to see, though. Because I left the cockpit mostly out-of-the-box I closed the cockpit side door. My next build will include the Clear Prop! photoetch set and then I'll leave that door opened.
|
Although for my build this next step came later, I thought I would share it now since I'm talking about cockpit assembly. I had to cut all of the cockpit pieces that attach to the lower wing, parts B25, B26 and B29. I had to remove enough from all ends of those three pieces for the wing to fit snugly. Thankfully none of the removal shows and improves the fit.
Next was adding the small parts to the fuselage side for the cockpit, which included decals applied over a couple of them. Again, the detail is outstanding for out-of-the-box but it will be interesting to see how the photoetch improves it with the next build. Important things to keep in mind during cockpit painting and assembly. Part X3 - the upper fuselage in front of the cockpit - is a clear piece because the I-16 had "port holes" in this part to help with seeing the instrument panel, since it was a ways into the fuselage. If you picked up masks from Clear Prop! for their I-16s it includes small circle-masks for these port holes, but in the end for the outside. Use thse on the inside prior to painting the interior of part X3.
|
Construction continues. It was very nice that Clear Prop! includes a separate lower wing for the ski version meaning you don't have to worry about fitting the gear doors. The cockpit assembly is added to the lower wing and the upper wings glued to it.
I had to add a little bit of putty to the underside where the wing met the fuselage and a little bit of Perfect Plastic Putty - which meant no sanding - to the wing root seams and the horizontal tail seams. Once I figured out the cockpit pieces needed some plastic removed the wing fit very snug.
|
When I painted the cockpit and its parts I also sprayed the engine. After hand painting the rest of the engine, I did assemble the forward fuselage pieces and added the engine as well which is a must to keep everything aligned. Before I started painting the rest of the model I cut out a large enough circle-mask to fit over the bulk of the engine, not entirely concerned with the end of the cyclinders. Because you can pose the cooling vane - in front of the engine and behing the cowl - in any configuration, I thought I would almost close them so little of the engine will be seen in the end. There was a little putty needed in the forward fuselage area after all parts were brought together, but it wasn't much except for the top-most seam. That required a couple of applications to get smooth.
|
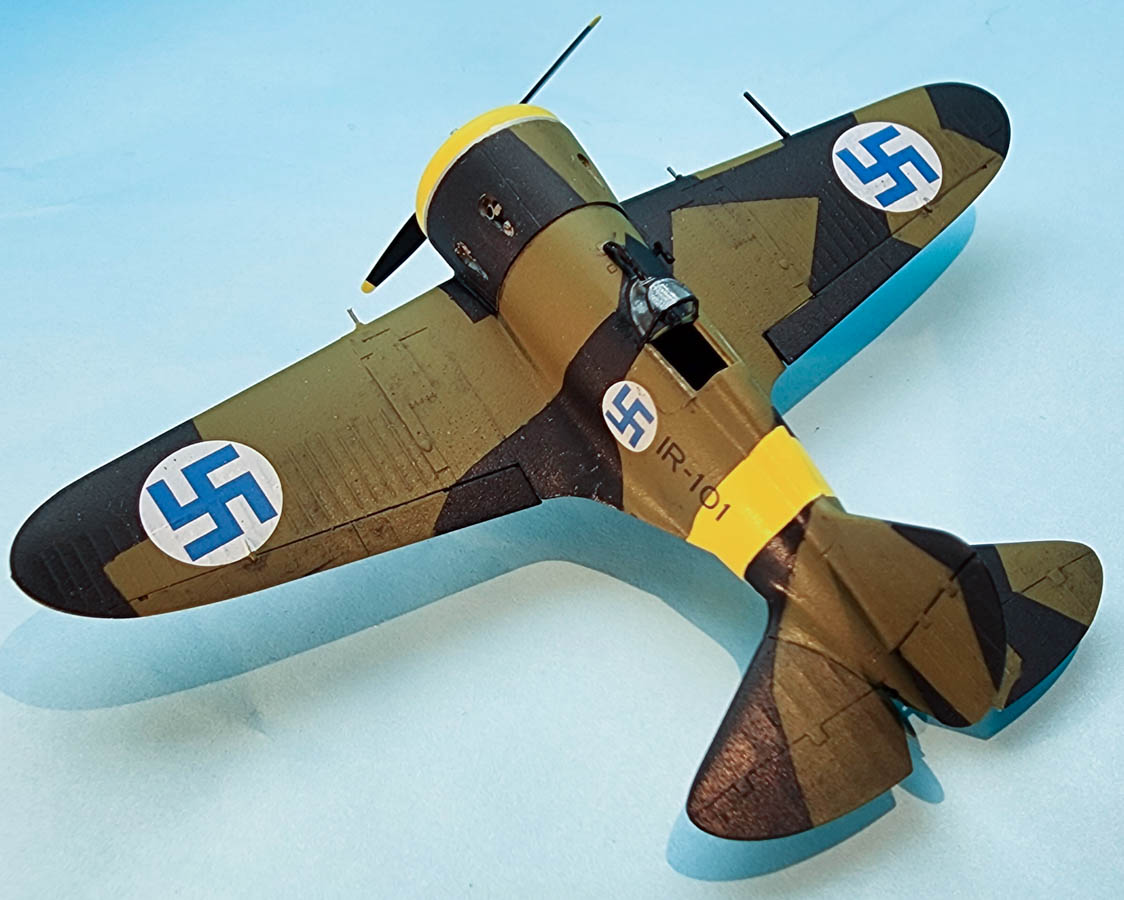
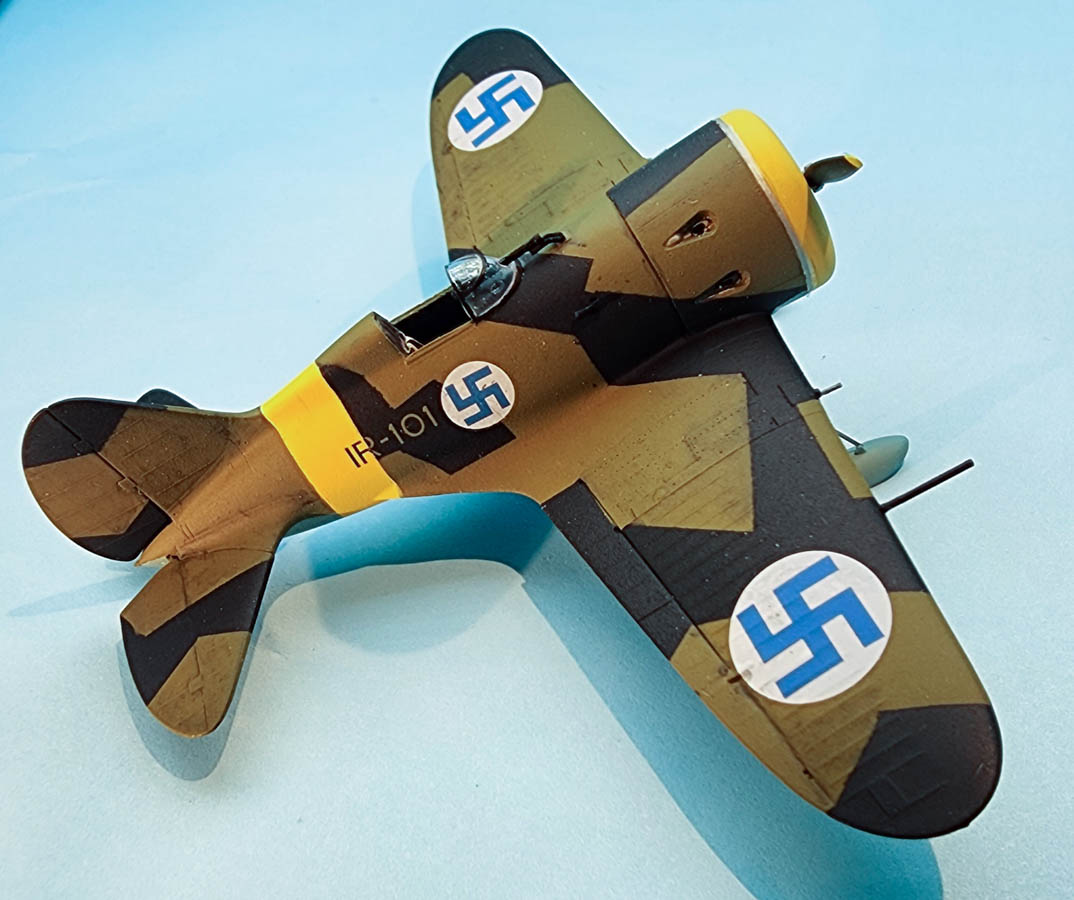
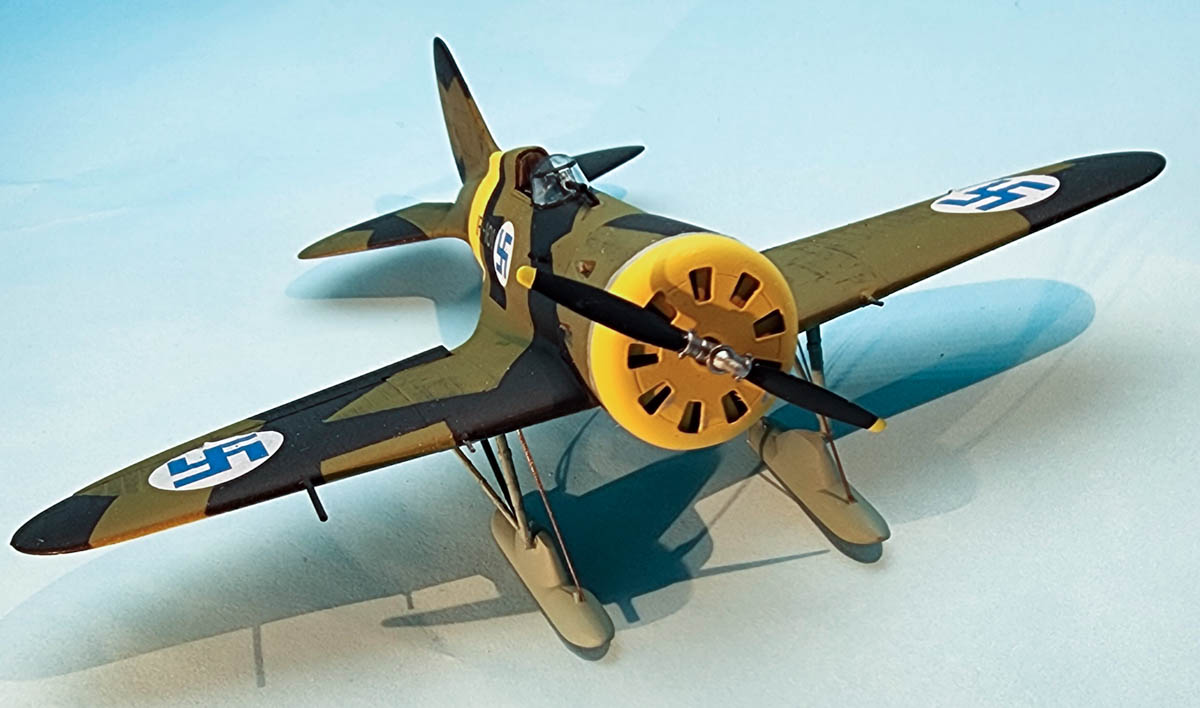
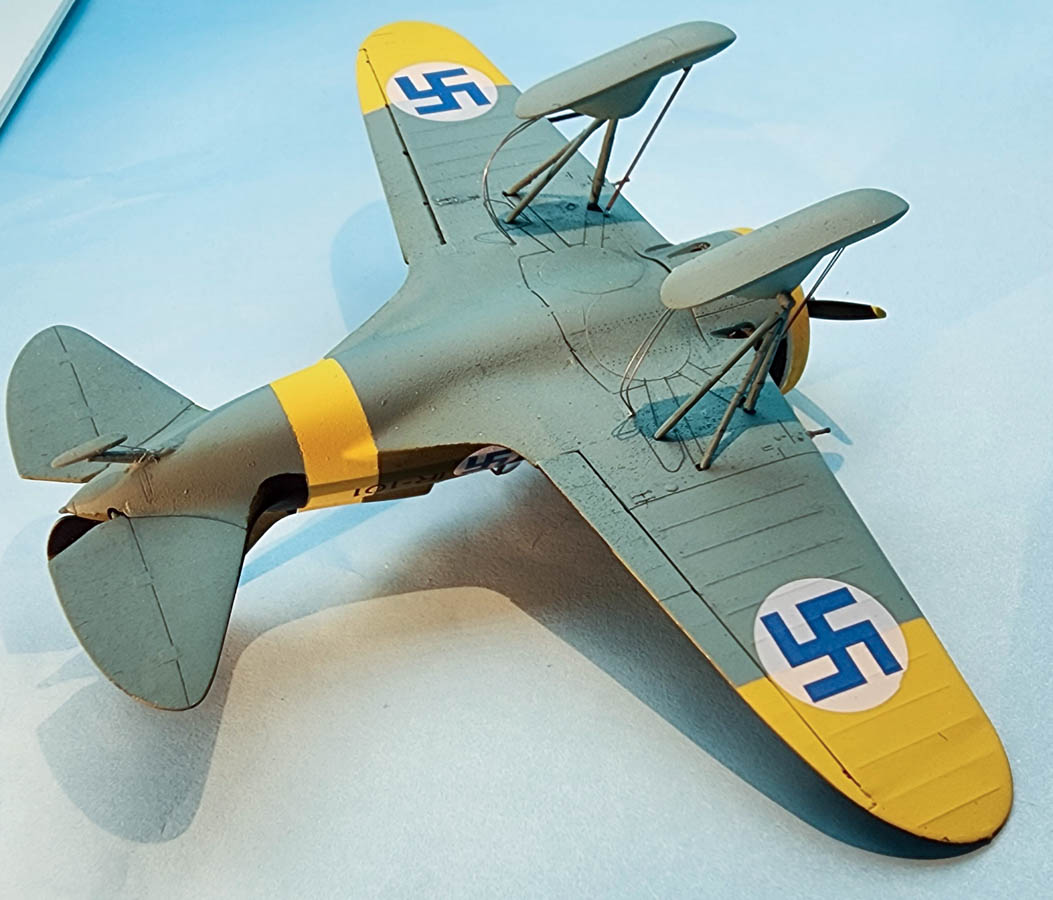
It's very nice that Clear Prop! proivdes the ailerons and rudder as separate parts, meaning you can pose those in different configurations. It would have been nice to have the stabs poseable as well, but two out of three isn't bad. These were glued on in differnt poses to give the model some "life". In one good and one bad decision I decided to leave the separate exhausts off until the end, but decided to glue the skis and their struts to the model prior to painting. A definite bad decision as I broke a couple of struts during masking and it made masking problematic. Do not follow my lead. I ended up replacing the guns with Albion tubing and the pitot with a piece of plastic rod, instead of trying to clean up the kit's pitot tube. Note that Clear Prop! has a brass-turned pitot as aftermarket.
|
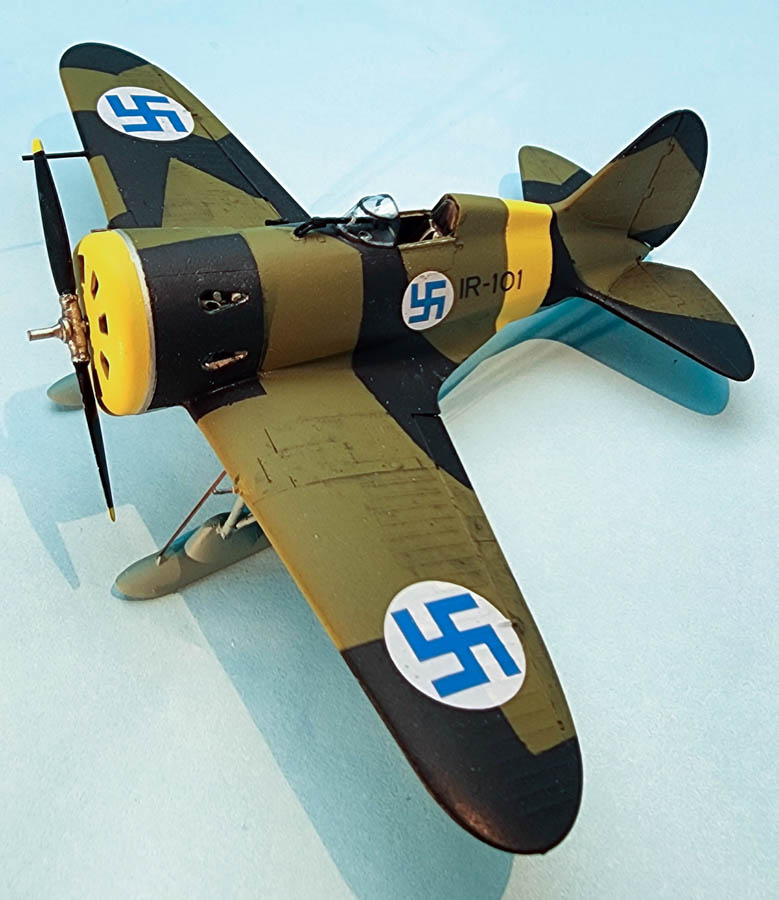
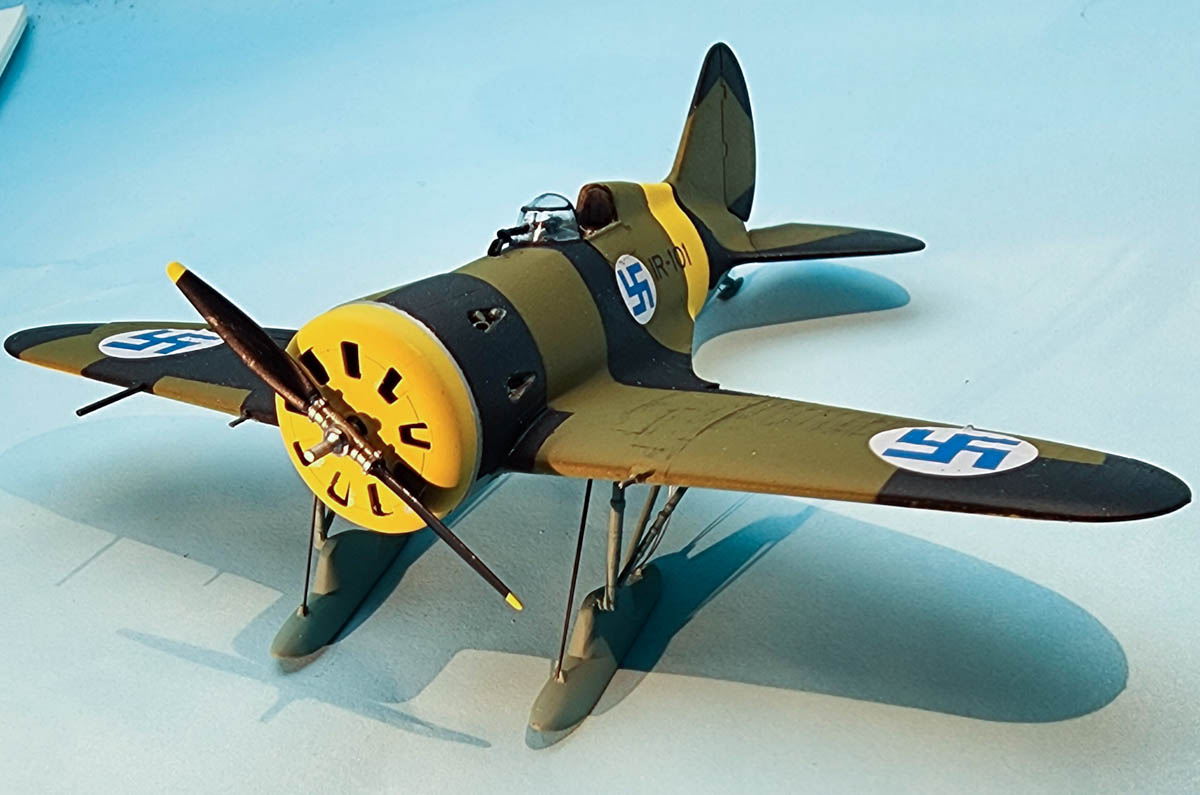
Painting started with priming with white, since there was a lot of yellow to spray. Once cured a few days Vallejo RLM 07 was sprayed for the yellow cowl, cooling vanes, underside wing tips and fuselage side stripes. Once those were cured I masked them (some of that being moot later) and sprayed the underside blue with Vallejo RLM 65. This was also masked and then the first upper color of Polly Scale Fr Khaki Green was sprayed, masked after curing then Vallejo black sprayed as the final color. Unfortunately some of the masks over the yellow came loose while spraying and I didn't notice until after the black was sprayed, of course. So, I had to mask around the yellow fuselage stripes, re-spray first with white and then the RLM 07. Much better.
A coat of Quick Shine was sprayed overall and once cured, decals applied. Unfortunately the weekest part of this kit are the Finnish national markings because the white wasn't opaque enough, allowing the underside color to show through. Even with this, I still continued and accepted it as is.
|
After spraying a satin overcoat after applying the decals, the next step was weathering. I wanted to keep this model relatively clean so only applied a light weathering, mainly in the panel lines and a little exhaust staining. At the very last the most difficult part of the construction was accomplished, that being the addition of the "cords" (or wires) supporting the skis. I didn't make them as accurate as they should be and just added a fascimile of how they looked. But even so, the "cords" definitely add a layer of realism.
Conclusion
Overall this was a nice and fun build, aside from having to modify the cockpit pieces and adding the "cords" for the skis. But even with those areas the model is a winner and I highly recommend building at least one of the Clear Prop! Ratas. Note that Clear Prop! also has aftermarket for their I-16 so look to that if you're so inclined.
Huge thanks to Clear Prop! for supplying the review kit. I am truly looking forward to working on another. I also hope that Clear Prop! continues their line of I-16s into the later types, especially the Type 10, a Type that has never been kitted before in 1/72.