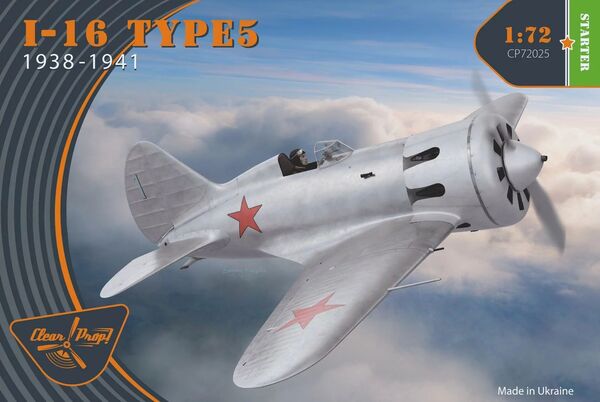
Clear Prop 1/72 I-16 Type 5 (1938-1941)
By Matt Bittner
Overview
The Polikarpov I-16 I think is pretty well known, so I won't go into much detail on it. I will mention that there were approximately 11,000 built across many sub variants, the Type 5 being one of the earliest and used pre-WW2 as well during the early stages of the war.
The Kit
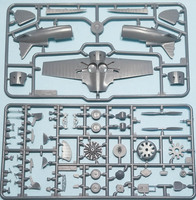
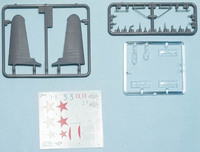
The Clear Prop 1/72 I-16 Type 5 consists of 102 pieces of gray, injected plastic, including a sprue of eight clear pieces. Decals are for nine Ishaks, and appear in register with excellent colors:
- I-16 type 5, 10 IAP, Siauliai. Baltic Military District, 1941
- I-16 type 5, from the movie "Fighter". Kyiv, Kyiv military district, 1939
- I-16 type 5, 46 IAP, Mlynow. Kyiv military district, 1941
- I-16 type 5, 20th GARDEN. Odessa military district, June 1941
- I-16 type 5, 2 AE. 26th IAP. Soviet-Finnish war, February 1940
- I-16 type 5, 2 AE. 26th IAP. Soviet-Finnish war, February 1940
- I-16 type 5, 43 IAD, Orsha. Western military district, 1941
- I-16 type 5, 33 IAP, Pruzhany. Western military district, 1941
- I-16 type 5, One of the aviation schools of the Western Military District. Bobruisk, June 1941

|
Clear Prop has really produced a beautiful model. The detail in the cockpit – out of the box – is to be seen to be believed. But this does mean you'll need to take care when removing small parts from the sprue. For parts removal, you definitely want to use a saw. Build the cockpit sub-assembly - painted, of course - and then add structure to the inside of the lower wing section. Note that this release does not contain photoetch so you'll need to source your own seat belts. Once all the structure is in place in the lower wing part and painted, then add the cockpit sub-assembly and glue the upper wing pieces to the one-piece lower wing.
Now you add detail to the sides of the cockpit, inside the fuselage. Again, there are plenty of small pieces so do take care. Once all that glorious detail is added and painted, then assembly will go quickly. Glue the seat back and instrument panel into the right fuselage half, glue the halves together, and add the separate rudder, upper nose piece (dependent on the variant being modeled) and glue the wings to the fuselage.
It's the time in the instructions where you work on the front of the fuselage. The instructions show that you glue the forward, fuselage sides to the engine, and then that to the fuselage so take care here and don't forget the items for the prop (which, as a matter of fact, will let the prop spin, if you like that sort of thing).

|
Glue the stabs to the fuselage and the ailerons to the wing (awesome that Clear Prop provides separate rudder and ailerons; bummer they don't supply separate stabs), the cooling vanes to the engine and then the front of the cowling to the entire assembly. Now you have what looks like an I-16.
The last steps of the instructions are about the exhaust stubs; prop and spinner; landing gear (each side consists of seven pieces including the wheel); gluing all that to the model, along with the tail skid, gun stubs and windscreen and cockpit door, and now you have a built I-16 Type 5 waiting for paint.
Conclusion
This is truly a stunning model. I was extremely impressed with the Clear Prop Hawks 75s but their I-16s up that standard even further. I can not wait to start building this kit as it will make a great looking I-16 on the shelf. I truly hope Clear Prop includes all the other I-16 variants, especially the I-16 Type 10 as that type has never been kitted before in 1/72.
Huge, HUGE thanks to Clear Prop for the review kit.
