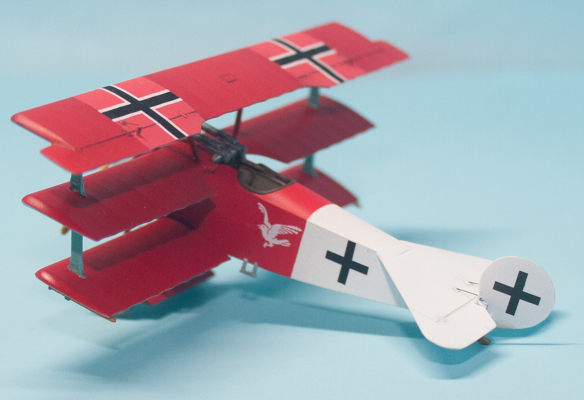
Eduard 1/72 Fokker Dr.I Weekend Edition
By Matt Bittner
Introduction
With taking the last couple of years to get my "modeling mojo" back, I knew I eventually wanted to get back to one of my modeling passions: 1/72 "biplanes". My number one "love" in modeling is WWI aircraft in 1/72 and it had been quite a long time since I finished a "biplane" of any sort. Yes, I know the Fokker Dr.I is not technically a "biplane", but it is a WWI aircraft and definitely has more than one wing, so I'll take it. I wanted something that wasn't going to be too difficult as a new build, but also something I would enjoy building. So, I had this kit laying around for some time so thought "why not". I'm not one to usually build a WWI aircraft out of the box but this seemed like a good choice, anyway. But, I will at some point in the future replace the items that I think should be replaced: definitely the engine and the Spandau guns. For now, though, it's an out-of-the-box build.
Construction
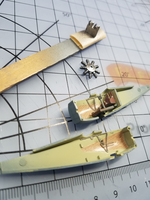
Naturally, as with most airplane models, construction starts in the cockpit. I kept everything out-of-the-box except for the addition of wood-grain decals (from Propagteam) for the forward, interior sides of the fuselage. I even used the decal seat belts which weren't horrible, but a more 3D-like appearance would have been better.
|
Once the cockpit was built it was then added to one fuselage half and the fuselage halves glued together. As I was painting parts for other models in some sort of metallic shade, I also sprayed the engine and gun ammo boxes at the same time, so those were out of the way quickly. I did not glue the ammo box to the middle wing yet, as I had a plan for the rest of assembly.
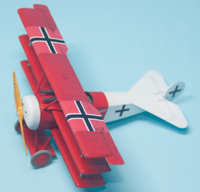
First was gluing the lower wing to the fuselage. I strayed from the instructions and left the middle wing off, knowing that spraying it off the model would be better, even with masking the interplane struts.
|
Having built the Eduard Dr.I in the past (as well as converting it to the pre-production F.I), I knew there were gaps in the middle wing where the struts pass through. So, I wanted to glue those to the middle wing to eliminate those gaps. I taped the middle wing to the fuselage then after passing the struts through the middle wing, placed them in the holes of the lower wing. I then gently added the upper wing to the struts and once everything was lined up, I glued the struts to the middle wing using Tamiya Extra Thin Cement. After letting it sit for some time, I then removed the upper and middle wings from the assembly and continued.
|
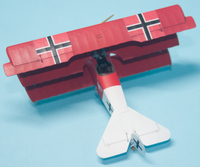
As I mentioned, I had to fill in some gaps where the interplane struts met the middle wing but thankfully that wasn't long nor difficult. I also glued the horizontal tail to the fuselage and thankfully there were no gaps to fill. On the "real thing" there was a gap where the tail meets the upper fuselage so no need to fill in what little gap was there.
Another area I deviated from was the landing gear. I glued the struts with Thin Cement to the axle wing and then placed them on the fuselage to line them up; I did NOT glue the struts to the fuselage. Again, this was for ease of painting as trying to mask that area with the landing gear on would definitely be a little difficult. This worked extremely well.
|
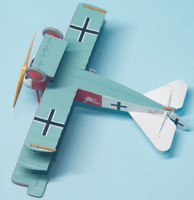
Now I was at a point I could paint. Everything Vallejo's White Primer was primed in white and that was so the red would have an even coat. In fact, once the primer had cured I masked the entire model so none of the underside blue would be sprayed onto the white. This was most fun with the middle wing since the struts were glued in place.
|
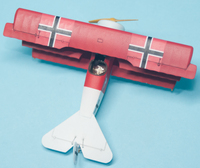
Once the MisterKit turquoise had cured I then masked it as well (keeping the parts that remained white still masked) and now it was time to spray the Vallejo Model Air Red RLM23. I had mixed it with Future to give it some strength and a little bit of gloss. Once that had cured then I used a mix of the red with other colors (sorry, can't remember which) for the areas of the upper wing where the crosses sit. Once that had cured it was time to unmask the entire kit (and clean up a few areas of overspray) and then apply a complete coat of Future prior to adding the decals.
|
The decals snuggled down nicely and I had no issues with them at all.
Finally it was time to glue it all together. First, I used white-glue to add the out-of-the-box guns. I did this because at some point in the future I want to replace them with more accurate versions. Next, I glued the center struts to the fuselage and lightly put the upper wing into place so they would be in the correct position. I didn't glue the upper wing on at this time because I wanted to add the rigging to the center section before the upper wing was on. I did that and found it was so much easier than rigging that section with the wing in place. I will do this in the future for more kits.
|
Now it was finally time to glue on the upper wing. That and the landing gear were added and it started to look a Triplane. I then glued on the rudder, tail skid and wheels/tires. I had to open the holes in the wheels a little more to fit on the the axles but it wasn't a huge deal. As one of the last steps in assembly I added the wing skids. Now it was time to rig using .005 Nitinol wire. Finally, I sprayed the entire model in Vallejo Satin. I didn't weather the model too much as I like the looks of it really clean.
Conclusion
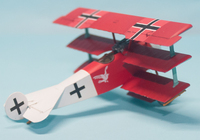
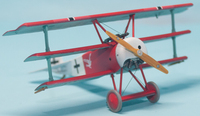
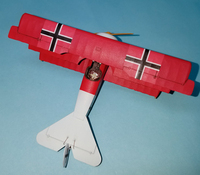
The Eduard 1/72 Fokker Dr.I has been out a number of years and it's starting to show its age. There were some sink marks in a couple of parts that needed work, something I don't remember when I first built it in what seems like eons ago. Even so, this is still a very nice kit and looks great when finished.
|
I definitely plan on replacing the out-of-the-box engine with a Brassin one as well as the guns with ones from Gas Patch. That is why I not only glued the guns in using white-glue, but the cowl and engine as well. It should be easy to pop those off when I decide to perform this task. It will also be at this time I add the tail hand-holds as those aren't supplied in the kit.
Just for the record this is my fifth 1/72 Fokker Dr.I built. And to think it's not a favorite of mine.
Huge thanks to Eduard for supplying the Weekend Kit.
