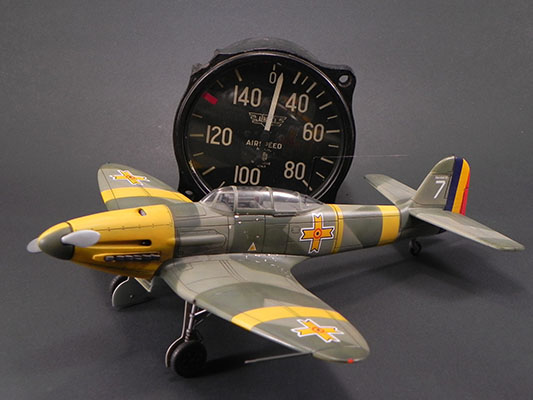
Classic Airframes 1/48 He 112: Airbrushing Tips, Tricks, and Techniques
By John Miller
As promised in the last installment of our airbrushing series: something in 1/48 and Rumanian. This is the Classic Airframes 1/48 Heinkel He-112--a great kit of a lesser-known but attractive aircraft. Designed for Heinkel by the Günter brothers, the He-112 had the firms' distinctive elliptical wing, a slim aerodynamic fuselage, and an almost frame-less, teardrop canopy. This was an elegant design for its day. It was the chief competitor of the Bf-109 but lost to the Messerschmitt design due, to being less agile, slower, and having a complex wing costly to produce. Following the loss to Messerschmitt, Heinkel was permitted to export small numbers of the He-112s to Japan, Spain, Hungary and Rumania.
Rumania received its first complement of Heinkel He-112 B-1s in July of 1939 with a total of 30 aircraft ordered. The type served the Rumanian Air Force with distinction being used for both air-to-air operations and ground attack. By late 1943, the He-112 was replaced in Rumanian service by the superior IAR-80/81 and the newly acquired Me-109G. At this time, the remaining He-112s were relegated to training duties where they soldiered on until 1944 although some reports say the type continued in this role until 1946.
The Build
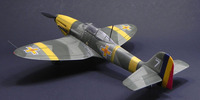
The Classic Airframes 1/48 Heinkel He-112 has to be one of the simplest and easiest kits of the breed I've built. There are only 46 parts to this model, including the photo-etch parts. There is very little flash on the injected parts and the fit of the major components is excellent. Panel lines and other details are cleanly engraved with a scale-appropriate depth. The control yoke, wheels, exhausts, cockpit, and seat are beautifully cast in a cream-colored resin. The vacu-form canopy is nicely molded but alas only one is provided so be careful. Photo-etch seat belts and instrument panel round out the kit.
|
Major components were assembled using Tamiya extra-thin cement. Small and resin pieces were attached with gap-filling CA glue (Bob Smith)
. Inscribed details were refreshed using the small scriber from UMM-USA (#UMM02). The vacu-form canopy fit perfectly with very little fuss, which is always a welcome result. Prior to being attached, the canopy was buffed with Novus #2 polish and a small microfiber swab. It was then polished with a Kimwipe tissue, cleaned with denatured alcohol, dipped in Future floor polish
, and set aside to dry for 24 hours. The canopy was then attached using Super-Gold CA (Bob Smith)
. The combination of attaching clear parts dipped in Future with Super-Gold CA results in no fogging or crazing.
Primer
To prepare the model for primer, the surface was wet sanded with 1000 grit abrasive from Alpha Abrasives using water with a small amount of dishwashing detergent added. Wet sanding using a water-detergent solution decreases scratches to the plastic. The model was then buffed sequentially with 3600 then 6000 micro mesh pads, producing a sufficiently smooth surface. Fine grit was removed from inscribed details with a soft toothbrush and the model was blown clean with a Harder & Steenbeck Small Parts Blower. Just prior to painting, the model was wiped down with a Kimwipe saturated with Denatured Alcohol (Crown).

|
The model was sprayed with Vallejo acrylic-polyurethane primer (White, #74.600) straight from the bottle with 1 drop of Liquitex
added per airbrush paint cup (see Technical Note I below). This was applied using a Harder & Steenbeck Evolution airbrush with a 0.4mm tip at ~15 psi. A dry coat was sprayed first followed by a wet coat producing nice, even coverage (see Technical Note II below). The addition of Liquitex to Vallejo primer increases the drying time compared to straight from the bottle. To ensure the primer is dry prior to buffing, I let it dry for 24hrs. The primer coat was then wet buffed with Micromesh 4000. Vallejo acrylic primer responds well to buffing with a wet micromesh pad but take care as it can be scratched so wash the buffing pad often and use a light pressure while buffing. After buffing, inscribed details were cleaned with a soft toothbrush and the finish inspected for flaws.
Pre-Shading
Panel lines were pre-shaded using Gunze gloss black (#2) diluted to ~10% paint by volume with Mr. Color Leveling Thinner. This dilution results in a paint mixture that is less viscous than milk. For fine-line work I use a Harder & Steenbeck Infinity dual-action airbrush with a 0.15mm tip. Air pressure is reduced to ~5-6 psi using a Harder & Steenbeck Fine Pressure Control (fPc) valve. In addition to the panel lines, random patterns of black were shot within panel areas on the fuselage and wings that will impart a depth to these areas when painted. With the pre-shading completed, I inspected the model one more time for flaws and prepared to shoot some color.
Primary Coat
The model was shot entirely with Vallejo acrylic paints. I find Vallejo to be one of the easier acrylic paints to apply. That said, as with most acrylic paints, Vallejo tends to dry on the needle and care must be taken to not get a dry, pebbly over-spray. The addition of Liquitex will go a long way to making Vallejo paints more friendly. To dilute Vallejo acrylics for spraying, I make a mix of Vallejo Acrylic Thinner (#71.199) to which Liquitex is added to ~5% by volume. I then dilute my paint into this Thinner/Liquitex (Thinner/Lqt) mix. This makes mixing primary paint more accurate, easy and reproducible. If appropriately stored, Thinner/Liquitex solutions have a very long shelf life. In addition, prior to spraying I set up a micro brush in a small volume of thinner and keep this close at hand. This permits me to occasionally (meaning every 30 seconds to-1 minute of spraying time) carefully clean the exposed portions of the needle/nozzle while spraying Vallejo or any acrylic paint.
|
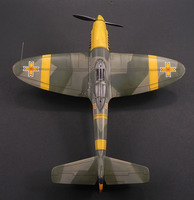
The first color sprayed was Vallejo RLM-65 (#71.255) which was lightened ~20% with Vallejo White (#70.842). I normally lighten my primary colors with less white for 1/48 scale but I found the Vallejo RLM-65 a little dark requiring extra white to compensate. Once mixed, this was diluted to ~30% paint in Thinner/Lqt mix and sprayed with a Harder&Steenbeck Evolution/0.4mm tip using ~12 psi of pressure. Prior to spraying however, I shot some of the Thinner/Lqt through my brush. I find that by doing so, the build up of paint on the needle and the internal components of the brush is less making clean up easier.
As usual, I sprayed an initial dry coat and after working my way across the wings and belly, cycled back to spray a wet coat taking care to deliver enough paint to achieve even coverage but with enough translucency to allow the underlying pre-shading to show through. I was also mindful to not shoot the nose area as this was destined to be RLM-04 Yellow. With the belly shot RLM-65, the model was set aside and allowed to dry for ~12 hours.
To achieve the soft line between the RLM-71/02 on the dorsal fuselage and the RLM-65, a putty worm was run from the trailing edges of each wing back to the tail. Putty worms are made by rolling a piece of Scotch White Adhesive Putty (#860) into a cylinder of ~3mm in diameter. The rest of the belly, cowl, and ventral portions of the wings were then covered with Tamiya tape.
|
Vallejo RLM-02 (#70.886) lightened ~10% with Vallejo White (#70.842) and diluted to ~ 30% paint by volume with Thinner/Lqt, was sprayed at ~12 psi on the appropriate areas of the upper fuselage and wings using a Harder & Steenbeck Evolution/0.2mm tip. I do splinter schemes by painting the first color free hand trying to achieve the hardest line possible. By doing so, the pre-shading on the areas destined for RLM-71 weren't covered by over spray.
Stencils and RLM-71
For the splinter scheme, I opted to use stencils made from printer paper. The stencils were cut out with a razor and held in position on the model by small pieces of putty. The putty also raised the stencil ~1mm above the surface of the model ensuring a consistent soft line when airbrushed. With the stencils in place, the remaining areas of the wing and fuselage were sprayed with Vallejo RLM-71 (#71.015) lightened with ~10% Vallejo White (#70.842) which in turn was diluted to ~ 30% paint by volume with Thinner/Lqt. This was sprayed at ~12 psi using a Harder & Steenbeck Infinity/0.15mm. I used the smaller 0.15mm tip to better control the delivery of paint particularly at the edges of the stencils.
When using stencils, it's best to maintain an angle of 90 degrees between the cone-shaped spray of paint from the brush and the edges of the stencil. If done properly, a soft, steady line will be achieved along the length if the stencil. Vary from 90 degrees and the line will become more soft or blurry. It's a neat effect to play with---but not on this build. When this was dry, the stencils, tape, and putty worms were removed and the model was allowed to dry overnight.
Prior to Operation Barbarossa (the German invasion of Russia) most Rumanian fighters had their cowls painted yellow, as was the convention at the time for Axis aircraft. In preparation for RLM-04 Yellow, the cowl area, wing, and fuselage stripes were taped off with Tamiya tape. To ensure there would be no bleed–thru of the yellow, the edges of the tape were rubbed down with a small round embossing tip. This a step that is worth the extra time it takes especially when you remove the tapes to see near perfect lines requiring little/no touch-up.
Prior to shooting yellow, areas on the cowl that had been painted with 65/71/02 and the wing/fuselage stripes were first painted Vallejo White (#70.842) diluted to ~ 40% paint by volume with Thinner/Lqt and sprayed at ~12 psi with an H&S Infinity/0.15mm. The panel shading in these areas was then touched up with Gunze black as described in the Pre-Shading section above.
|
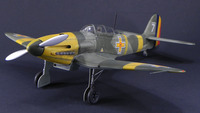
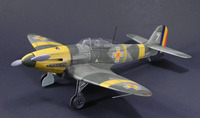
These areas were then shot with Vallejo RLM-04 (#70.953) that had been lightened ~10% with Vallejo White (#70.842) plus a drop/dash/mini-jigger of at least 3-4 other Vallejo colors in a vain attempt to match the yellow of the Rumanian crosses on the Classic Airframes decal sheet: an effort which sadly failed. I came close? Maybe? No. Well, I'll chalk that one up to experience. After removing the tapes, the model was set aside and allowed to dry overnight.
Gloss Coat #1 and Decals
Future floor wax or "Pledge with Future Shine" as it's currently named, was diluted to 50% by volume with Model Master Acrylic thinner and sprayed at ~15 psi. I apply Future using multiple light dry-coats; building the coverage up slowly. The model was then set-aside for 24 hrs. Allowing Future to dry for 48 hours produces a finish that is much less fragile and better able to tolerate decaling solvents. The kit decals were applied using Micro-Set and -Sol and went on with no problems including the rudder decals where alignment was spot on. As an additional touch, paint chipping around the cockpit boarding area of the port fuselage and wing root was simulated with small pieces of decal taken from the "Chips and Scratches" sheet (#FX72-001) by Gekko Graphics.
Gloss Coat #2, Oil Wash, and Weathering
To seal the decals and prepare the finish for weathering, the model was again spayed with Future as described above. Twenty-four hours later, artist's oils (black and burnt umber) were diluted in Mona Lisa Odorless Paint Thinner and with a fine brush were applied to all inscribed details, landing gear, wheel wells, and gear doors. When dry, excess stain was carefully removed with a cotton bud lightly moistened Mona Lisa. Exhaust stains were applied using a small micro brush and a blend of MIG Pigments (Black Smoke, #P023
and Brown, #P058
). This was then set aside to not smudge.
Final Coat
The model was given a final coat of Vallejo Satin Varnish (#70.552) diluted to ~5-8% by volume in Vallejo thinner. For Vallejo Satin, Matt, or Flat coats, it's best to dilute with straight thinner (no Liquitex). I apply Vallejo Satin using light misting sweeps with the brush pulled back from the model as though I were shooting a dry coat. With this done, the canopy tapes were removed and various fiddly tidily-bits were attached with CA.
Conclusion
I really like Classic Airframes kits and this was one is a real pleasure to build. It definitely takes more patience than a Tamigawa but it's worth it. Likewise, Vallejo acrylics shoot beautifully and produce smooth finishes especially if helped along with a little wetting agent like Liquitex. The He-112 is a pretty airplane and this model adequately captures its beautiful wing and svelte airframe. This kit is out of production so if you happen to see one, pick it up. You wont be let down.
Now go paint something!
Technical Notes
I: Spraying Vallejo Primer with Liquitex
I spray Vallejo Acrylic Primer (#74.600) straight out of the bottle with Liquitex added to 1-2%. This reduces build-up on the needle and dry, pebbly overspray. I usually add the Liquitex to the primer in my airbrush paint cup (1 drop per 5ml cup). If the paint cup on your brush is smaller/larger, adjust accordingly. An exact mixture is not critical.
II: Spraying Dry and Wet Coats
A dry coat is applied with the airbrush held far enough from the surface of the model and the paint flow adjusted so as to allow for partial drying of the paint before hitting the surface. If sprayed properly, a dry coat should not result in a large increase in the amount of light reflected from the recently painted surface. For a Wet coat, the brush is maneuvered closer to the surface of the model and the amount of paint flow adjusted so as to achieve a layer of paint that is wet and shiny when applied. There will be a noticeable increase in the amount of light reflected from a properly delivered wet coat. Remember when spraying a wet coat, it's best to cover small areas ~1-2cm2 per pass and keep the brush moving to prevent runs and sags.
