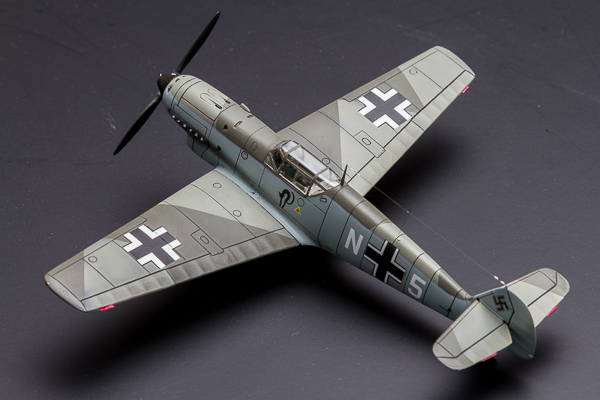
Painting & Finishing the 1/72 Sword Bf 109D
By John D. Miller
Overview
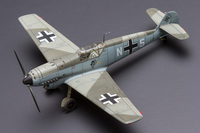
The second model in our airbrushing series is the Sword 1/72 Me-109D wearing an early-war night fighter scheme. The model depicts the aircraft piloted by Lt. Joachim Böhner while serving with 10(N)/ZG26 in Hage, Germany, early January 1940. The decals are from the Kagero book "Messerschmitt Bf109 A-D Models" (#7012). I've long admired and studied the 109: big fan. That said there's a certain gracefulness to the Jumo-powered C and D versions that was lost with the introduction of Daimler-Benz-powered models. In addition, the early night-fighter scheme referred to as the "40er-Anstrich" comprised of mottle-free fuselage and a wing splinter scheme of RLM-02/71 seems to accentuate the grace of the airframe. I'd wanted an early mark 109 "Dora" on the shelf for a long time so I was anxious to get this hummer into paint.
Building The Kit
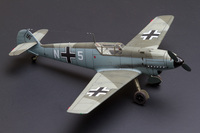
The kit is the old Sword offering (#72005). I purchased it used from the owner of Skyway Model Shop in Seattle. Our mutual friend and modeler Stephen Tontoni had owned it before passing away unexpectedly in 2013. Stephen had removed all the parts from the sprues and cleaned up roughly half before apparently losing interest. Although I may have been the one to finish this model, I consider it a team effort.
|
The kit is passable by current limited-run standards but there are some issues that are best dealt with by reaching for the spares box. In addition, there are accuracy issues that have been described by our editor in a previous review of the kit. The main issue is the tail; it's too small. Deciding I could live with it, I built the kit mostly OOB except for the canopy which is injected but rendered useless by being both thick and cloudy. It was replaced with one from a Falcon Luftwaffe Canopy Set (#5). Other parts (gear legs, and tail wheel) were replaced with parts from the spares box. The overly thick wheel well doors were used as patterns to make appropriately thin doors from brass sheet.
Major components were assembled using Tamiya extra-thin cement while small pieces were attached with gap-filling CA glue (Bob Smith). The main challenge of this kit is the injected parts. They are somewhat crude and require a fair amount of clean up. The cockpit is provided as a resin tub with resin side panels. I cobbled the instrument panel and gun site from the spares box. Although the kit comes together without filler there was a lot of ground plastic on the bench. As usually for my builds, inscribed details were refreshed using the small scriber from UMM-USA (#UMM02). Fitting the Falcon canopy proved to be no small chore as modification to both canopy and model were required to achieve a reasonable fit. After fitting, the canopy was buffed with a Kimwipe and Novus Plastic Polish #2, cleaned with denatured alcohol, dipped in Future floor polish, and set aside to dry for 24 hours. The canopy was then attached using Super-Gold CA (Bob Smith). I find the combination of dipping clear parts in Future and then attaching them with Super-Gold CA produces no fogging or crazing.
Primer Time
The surface finish of the major components was a bit rough so to prepare it for primer, the model was wet sanded with 320 grit sand paper. As a side note, a drop or two of dishwashing detergent added to the water you dip the sand paper into seems to decrease scratches to the plastic. After wet sanding, the model was buffed sequentially with Micromesh 3600 then 6,000 producing a sufficiently smooth surface. Fine grit was removed from inscribed details with a soft toothbrush and the model was blown clean with compressed air. Just prior to painting, the model was wiped down with a Kimwipe saturated with Denatured Alcohol (Crown). Denatured alcohol is a good degreaser, evaporates quickly, and available at your local hardware store.
|
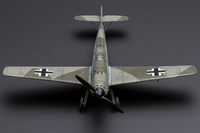
The model was then sprayed with Vallejo white acrylic-polyurethane primer straight from the bottle with 1 drop of Liquitex Professional Flow Aid added per airbrush paint cup (see Technical Notes below). This was sprayed using a Harder & Steenbeck Infinity dual-action airbrush with a 0.4mm tip. The primer was sprayed at ~15 lb/in2 and applied first as a dry coat followed by a wet coat producing solid, even coverage (see Technical Notes below). After 24 hours, the primer coat was wet buffed with Micromesh 4000. Vallejo acrylic primer responds well to a light buffing with a wet micromesh pad but take care as it can be scratched. After buffing, details were again cleaned with a soft toothbrush and the finish was inspected for flaws.
Pre-Shading
Panel lines were pre-shaded using Gunze Mr Color #2 gloss black diluted to ~5% paint by volume with Mr. Color Leveling Thinner. This produces a paint mixture less viscous than milk. For fine-line work I use a Harder & Steenbeck Infinity dual-action airbrush with a 0.15mm tip. The Gunze black was sprayed with the air pressure adjusted for ~5-6 lb/in2. In addition, random patterns were shot within panel areas on the fuselage and wings that will impart a depth to these areas when painted. With the pre-shading completed, I inspected the model one more time for flaws and prepared to shoot some color.
Primary Coat and Diluting Acrylic Paints
The model was shot with LifeColor acrylic paints. I find LifeColor to be one of the nicest acrylics to shoot and one of the most accurate with regards to color and hue. The pigment density is high so if diluted sufficiently, LifeColor can produce thin, reproducible lines yet offer good coverage. Most acrylic paints tend to dry on the needle, however, and LifeColor is no different. The addition of Liquitex will go a long way to making this paint more user friendly. But instead of adding a drop of Liquitex to an airbrush cup filled with paint and thinner, I like to make a master solution of whatever acrylic thinner I'm using to which Liquitex has already been added to ~2% by volume. I then dilute my paint into this thinner/Liquitex solution making handling and mixing much easier and reproducible. For example: eight to nine drops of Liquitex added to 20 ml of thinner yields a ~2% solution. Once prepared and stored in an appropriate bottle, these Thinner/Liquitex solutions have a very long shelf life. Prior to spraying acrylic paint I shoot some of the appropriate thinner/Liquitex mix through my brush. I find that by doing so, the build up of paint on the needle is less and clean up is easier.
|
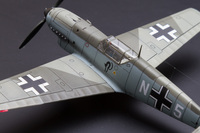
The undersurfaces, and fuselage were sprayed with LifeColor RLM 65 (#UA 503) which had been lightened ~10% with LifeColor White and diluted to approximately 40% paint by volume with LifeColor/Liquitex (LC/LQT). It was sprayed at ~12 psi. In order to achieve a soft line between the RLM 71/02 on the dorsal fuselage and the RLM 65, the demarcation line between the two was masked with a putty worm. Putty worms are easily made by rolling a piece of Scotch White Adhesive Putty (#860) into a cylinder of ~3mm in diameter. The rest of the fuselage was then covered with Tamiya tape.
|
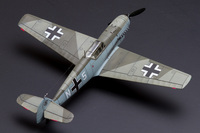
LifeColor RLM 02 (#UA 504) lightened ~10% with LifeColor White and diluted to ~40% paint by volume with LC/LQT, was sprayed at ~12 psi on the appropriate areas of the upper fuselage and wings. I like to do splinter schemes by painting the first color free hand but achieving the hardest line possible. By doing so, pre-shading on the unpainted areas will not be covered by over spray. Once this was dry (around 3hrs), the 02 areas on the wings, stabilizers, and dorsal fuselage were taped off with Tamiya tape and LifeColor RLM 71 (#UA 052) lightened about 10% with LifeColor White and diluted to ~ 40% paint by volume with LC/LQT, was sprayed at roughly 12 psi. When this was dry, the tape and putty worms were removed and the model was allowed to dry overnight.
Gloss Coats, Decals, & Oil Wash
Future floor wax or "Pledge with FutureShine" as it is currently named, was diluted to 50% by volume with Model Master Acrylic thinner and sprayed at ~15 lb/in2. I apply Future using multiple light dry-coats; building the coverage up slowly. This was then allowed to dry for 48 hours. Allowing Future dry for 48 hours produces a finish that is much less fragile and better able to tolerate decaling solvents. The decals were applied using Micro Set and Micro Sol and conventional methods. They responded perfectly to both solvents and, as with other Kagero decals I've used, went down without a problem. I especially enjoyed applying the hunched black cat emblem of 10(N)/ZG26. Cool.
|
To seal the decals onto the model, blend the edges of the decals with the surface, and prepare the model for an oil wash, the model was again spayed with Future as described above. After 24 hours, artist's oils (dark grey and burnt umber) were diluted in rectified turpentine and applied to all inscribed details with a fine brush. After about 4 hours, excess stain was carefully removed with a cotton bud lightly moistened with turpentine and the model was set aside to dry overnight.
Final Coat
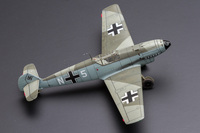
The model was given a final coat of Vallejo Satin Varnish diluted to ~5% by volume in Vallejo thinner. Vallejo Satin Varnish is my go-to final coat as it dries quickly and leaves a nice finish. Moreover, if it is applied using light misting coats you can achieve the exact degree of dulling you're looking for without going too far into flat. With the satin coat sprayed, exhaust stains were applied using pastel chalks and a micro brush. The slightly rough surface of a satin coat (compared to a smooth gloss coat) is an ideal finish on which to apply pastel chalks. These were then sealed with a final coat of Vallejo Satin Varnish. The Tamiya tape was removed from the canopy and various details were attached with CA glue. With that done, I went to my display cabinet and made a space for that svelte Bf109 Dora I'd wanted on my shelf for a long time.
Done!
|
Conclusion
Yea, I enjoyed that. With a little patience and elbow grease older kits like this one old can be nursed into pretty nice models even if the tail is too small. Similarly, with a little extra care, LifeColor acrylics can be made to spray beautifully: producing smooth finishes that are spot-on color-wise. But, that's true for most acrylics as it's just a matter of what twists and tricks you use.
Next up, something in 1/48 scale and Rumanian...
Happy Modeling!
Technical Notes
Spraying Vallejo Primer with Liquitex: To reduce build-up on the needle and overspray, 1 drop of Liquitex can be added to the volume of Vallejo primer contained in the average airbrush paint cup. The average thumb-sized cup holds between 4-6 ml. This volume requires ~50 microliters of Liquitex (~1 drop) to achieve 1-2% by volume. If the paint cup on your brush is smaller/larger, adjust accordingly. An exact mixture is not critical.
Spraying Dry and Wet Coats: A dry coat is applied with the airbrush held far enough from the surface of the model and the paint flow adjusted so as to allow for partial drying of the paint before hitting the surface. If sprayed properly, a dry coat should not result in a large increase in the amount of light reflected from the recently painted surface. For a Wet coat, the brush is maneuvered closer to the surface of the model and the amount of paint flow adjusted so as to achieve a layer of paint that is wet and shiny when applied. There will be a noticeable increase in the amount of light reflected from a properly delivered wet coat. Remember when spraying a wet coat, it's best to cover small areas ~1-2cm2 per pass and keep the brush moving to prevent runs and sags.
