Two Mules: Building Eduard's 1/72 S-199 Mezek Dual Combo
By Chris Banyai-Riepl
Overview
Recently I got the pleasure of checking out Eduard's newest release, the Avia S-199, and it looked like it would be a fairly easy build. Here we are, just a couple of weeks later, and they're done, proving that my initial assessment was absolutely correct. A combination of excellent engineering, great detailing, and simple paint schemes all combined to make these a fun pair of builds.
Building the Mules
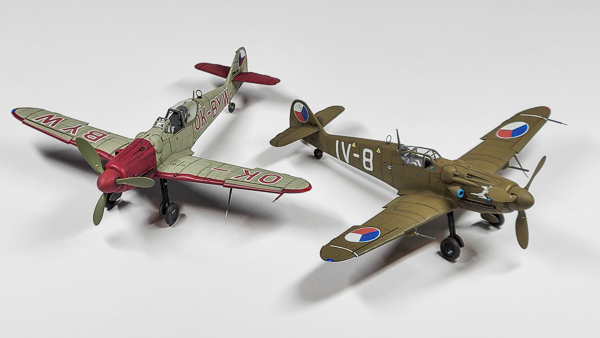
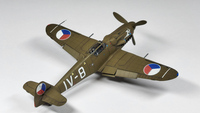
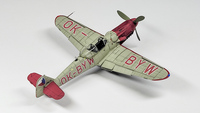
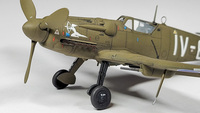
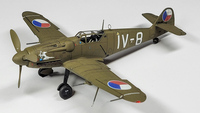
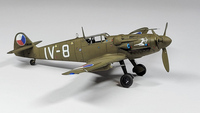
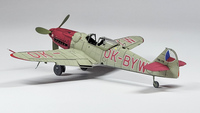
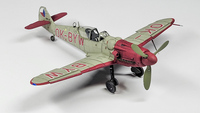
With two kits in the box, each one featuring a different fuselage, decisions needed to be made right from the beginning. So instead of starting with assembly I spent a while going through all of the decal options to figure out which two I was going to build. The main difference between the two fuselages involve the canopy, with one having the traditional Luftwaffe-style canopy, while the other has a larger blown clear hood. For the traditional option I decided the one with nose art of Diana the archer was the choice there. For the blown hood canopy, there was only one option for me: the civil registered Police Air Patrol S-199. That's been an option I've wanted to do for decades, so having it in the box was perfect.
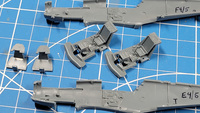
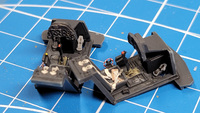
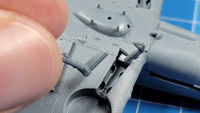
So, with the options sorted out, the next step is still not building anything, but to go through the instructions and mark out what parts & pieces are needed for each option. This ranged from holes (or not) in the cockpit tub to rudder and cowling underside options. By marking these ahead of time, I hoped to avoid missing things and for the most part I was successful with that. So, with the instructions marked up, I could finally start building things up.Of course, that means diving into the interior, and out of the box this cockpit will look really nice. There is a lot of detail across the board that is represented in injection parts, but this kit also includes pre-painted photoetch that adds even more useful bits. The cockpit tub has an interesting overall design that had me a bit confused about, as there's a curved forward section that didn't make sense. Once it was all together, though, and the wing on, it made sense. That curved section formed the troughs for the main gear legs, a case of impressive engineering. More on that later.
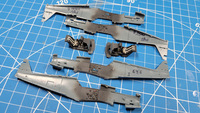 For the cockpit assembly without photoetch (PE), you get separate sidewall inserts for the right side, a separate trim wheel for the cockpit floor, a separate control column and front cover (where the cannon used to go). The instrument panel mounts up to a separate front bulkhead piece, while the seat is built up from a separate pan and separate back. On the PE side, there's seat belts, rudder pedals, instrument panel, trim wheel, and some other small detail bits. For my build, I used some of the photoetch (like the seat belts and trim wheel), but didn't use all of them. One received the PE instrument panel, but the other I was planning on a closed cockpit so I used the raised plastic detail & decal.
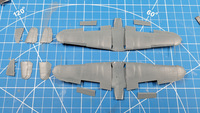 For the wings, you get a single-piece lower wing and separate upper wing halves, and sandwiched in between are the wheel well sidewalls. That makes for a really detailed wheel well that looks great once painted. Before gluing the wing together, though, make sure to drill out the holes in the lower wing for those options that have the under wing cannon gondolas or centerline rack. For Diana, I went with both, while the Police Air Patrol, none of those options were used. There's also an option that has cannons in the wings, so if that's the option you chose, make sure to get that added in. With the wing assembled, the next step is to add it to the fuselage, and here you have to bend the wing apart to fit it around the cockpit tub landing gear leg insert channels. Once done, though, the fit is absolutely perfect. At this point, I haven't used any filler anywhere.
|
|
With the wings on, the remaining pre-painting assembly is pretty straightforward. The wings have separate flaps & ailerons, which were glued in place, along with the separate slats. In hindsight, I should have left those off of the Police Air Patrol option to simplify painting. Likewise, leaving the stabilizers off of the Police Air Patrol options will simplify painting, as those are red while the rest of the fuselage is gray. There are two options for the rudder, but both options use the same rudder so I didn't have to worry about having the wrong one.
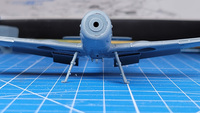
Other bits and pieces to go on include the nose bulges and lower cowling, both of which has some options to them. After following my notes on which version gets what options, I got all those in place, including the underwing radiators (which have options to open up the back side). I also got the landing gear set up for painting, which had the gear doors getting the outside painted first, then glued those to the landing gear legs as the insides of the wheel doors were the same color as the struts. With those, and the propellers together, it was time to throw paint around.
For Diana, this option was super easy to paint as it was all one color, including the spinner and propeller blades. For the Police Air Patrol, this option is a bit more complicated, but still an easy one to do as all the scheme's three colors has hard demarcation lines. I used Vallejo Model Air RLM 81 for Diana, while the Police Air Patrol got two shades of Model Air gray for the main scheme, with the red parts were done with a Model Color red match. The most challenging part of that scheme was masking around the nose, with all its bumps and bulges that needed to work around. The wing leading edge should have been easy, but since I glued the slats on ahead of time, I had to mask those separately as they were in the extended position. Unfortunately, I didn't get that line quite straight, but rather than repaint it, I opted to instead paint some decal paper with the upper surface gray and just clean the line up with a strip of decal.
***image2**After glossing everything up, the next step is the decals. Eduard's current decals are probably the best and worst decals I've used. I know, that doesn't make any sense, but I'll try to explain. First off, I know some have said that the clear film is really large and potentially a problem. Others have suggested that this is because you can carefully peel the film up afterwards and leave just the printed color on the model. I can say that while yes, you could peel that film up, it is completely unnecessary as these are insanely thin decals that absolutely disappear on the model even without any kind of setting solution. With setting solution the clear film just disappears completely, and everything settles into all the nooks and crannies beautifully, so much so that there's no difference between those areas and others when it comes time to do panel line washes.
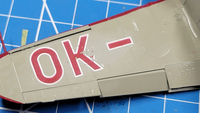
So if these sound that good, what's the problem, you ask? Well, these decals are extremely thin, and tend to be very sticky. The first part shows up in how easy it is for the decals to fold over on themselves. So easy, in fact, that just the process of sliding the decals off the backing paper often resulted in the edges folding over on themselves. This wasn't too big an issue with the larger decals, but for the stencils it was very challenging. For the fuselage codes (IV-8 for Diana, OK-BYW for the Police Air Force), things could have been much easier if those codes had also included the associated stenciling, but they are all separate and require putting decals over other decals, increasing the possibility of the film overlapping itself.
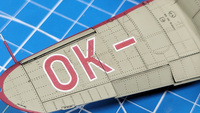
While the folding over was annoying, for the most part it wasn't that big of an issue as the decals are thin enough to handle having a bit of clear film overlap. The stickiness, though, was a big challenge, as the decals tended to stick right where they laid. Repositioning them was challenging at best, and in one case, painfully annoying. The large upper wing registration code stuck in place, and in trying to remove it and slide it into position, the color portion tore and stuck to the model, while the clear film did not. I had no choice but to get the code positioned properly and then come back afterwards and paint over the stuck portions.
|
|
For all of these shortcomings, after some healthy application of setting solutions, the decal film disappeared and the end result was truly amazing, a painted-on look. Thus, the decals are absolutely the best I've used, while also being the worst (okay, perhaps not the worst, but definitely more challenging than most) from all the problems that popped up here and there. For future Eduard kits, I will try to apply the decals with more water to keep things from sticking, and hopefully avoid folding over, as the finished result when they go down right is superb.
|
|
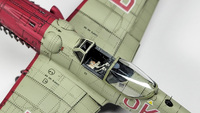
With all the decals on, a clear coat protected them and I turned to the finishing touches. I kept the weathering to a minimum on both of these, just giving them both a panel line wash and that's about it. There's quite a bit of small details that need to get added, from the landing gear to antennas, aileron mass balances, and wingtip lights. For the Police Air Patrol plane, I decided to do this one with an open canopy so it got extra photoetch for the windscreen and hood. Diana got a closed canopy, so it was the easier one to finish up.
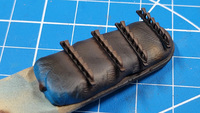 In addition to the open canopy, I decided to use the Eduard Brassin exhaust stacks and wheels on the Police Air Patrol option. These are absolutely stunning replacements for the kit parts, with truly petite detailing. That said, though, I don't think they're necessarily needed. This is not because they're not detailed, they are. It's more a statement about the quality of the injection-molded parts that Eduard is achieving. Once painted, the plastic exhaust stacks looked nearly identical to the Brassin versions, which speaks highly of the injection molded parts.
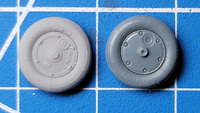 For the wheels, the Brassin ones are definitely much more detailed, but as the hubs are painted black, a lot of that detail disappears. A bit of drybrushing can bring it back, but the kit wheels look pretty darn good out of the box, making this decision a tough one as well. In the end, the Brassin parts do look good on the finished model, but as Eduard gets better and better with their injection molded parts, it's going to be harder and harder to justify these, and that's more a ringing endorsement of Eduard's plastic quality more than anything.
|
|
Conclusion
These two Avia S-199s were an absolute joy to build, making for a pleasant couple weeks' modeling with a couple hours here, a couple hours there. They have me very interested in tackling Eduard's upcoming two-seat CS-199 kit, and potentially doing a couple more straight S-199s (I at least want to do an Israeli one, and probably another Czech example in a different color scheme). If you're looking for a relaxing build, this is a perfect subject as the engineering is superb, resulting in just a fun model to throw together. Visit the Eduard website and order one up before they're gone.
|
|
|
|

