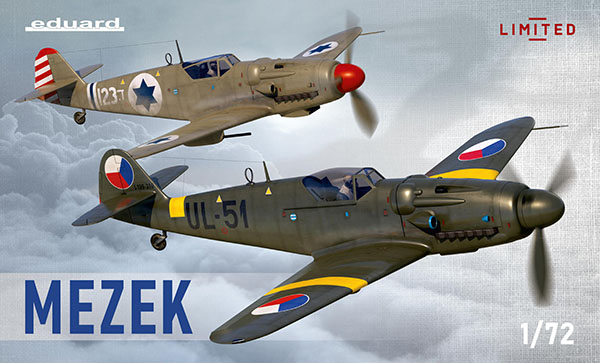
Eduard 1/72 S-199 Mezek Dual Combo
By Chris Banyai-Riepl
Overview
The Messerschmitt Bf 109 line is one of the most interesting in aviation history, both in depth and breadth. It's success in the Second World War was enough to have it firmly established in the annals of aviation history, but its post-war history adds even more interesting flavor, both in Czechoslovakia and Spain. Both nations built Bf 109 variants featuring different engine options, with both having somewhat varied success. While Spain went back to the Bf 109's origins by adding a Rolls Royce engine, The Czechs utilized surplus equipment left on their land after the war and mated Jumo engines originally destined for Heinkel He 111s to the Bf 109G airframe. The result was successful in that a flyable aircraft was created, but it lacked the performance levels of the original Bf 109G. The plane did find itself in combat, though, with the fledgling Israeli air force in 1948, and remained in Czech service well into the 1950s.
The Kit
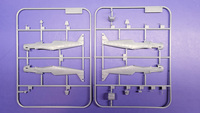 In an interesting twist of fate, there are more S-199 kits in 1/72 than the early Bf 109B/C/D variants, which seems odd given that far more of those early 109s saw service versus the Czech variant. Given that, it is no surprise that pretty much all of the kits out there are from Czech kit companies. Probably the most well known is the original KP kit, which came out in the 1970s or thereabouts, but KP and AZ came out with recent new-tool kits that have whetted the appetite for those interested in building a quality S-199 kit. Eduard has decided to step into the game, though, with a brand new tool of this interesting Avia, and their first release goes even further by being a dual combo kit.
Eduard has definitely done their homework with this kit, as there are lots of subtle detailed captured in the variant options. This means that you will need to decide on a specific scheme ahead of time, and then follow the instructions closely to ensure you get the right parts for the option you want to build. This choice needs to be decided pretty much from the beginning, as there are different fuselage halves provided for the standard or blown canopy options.
 Once you've decided on the options (which forces you a bit, as you only get one of each fuselage types in the box so you will need to build one standard canopy and one blown canopy option), the cockpit is next. This is nicely done and will look great whether you go with just the plastic bits or add in the pre-painted photoetch details. The attention to how details are represented makes a big difference here, with lots of separate parts building up to make the completed cockpit. The result is with just the plastic parts alone, you'll have a great cockpit. The addition of photoetch handles, rudder pedals, control wheels, and seat belts, though, take it to the next level.
The completed cockpit tub is designed to be inserted into the fuselage after the fuselage is assembled, which is a feature I particularly like as it helps make sure everything lines up right. You can also work the fuselage seams before working on the interior, making sure no sanding dust gets into your nicely painted cockpit. The kit comes with two tailwheel options, so again check the marking options you want to do and make sure you're using the right tailwheel.
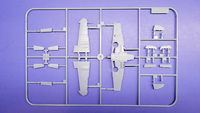
 Speaking of options, next up are the wings and there's lots of callouts in the instructions for marking choice options. There's holes to drill (or not drill) into the wings and wing gun options based on marking choices, and the option of having the centerline rack as well. Common parts include wheel well inserts, separate slats, ailerons, as well as separate radiators & flaps. Photoetch adds radiator grill work, which is a very nice use of photoetch. Still on flying surfaces, there's two rudder options, and the stabilizers have separate elevators.
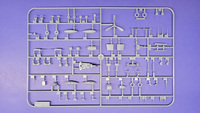
For fuselage details, there are two styles of cannon bulges on the nose (more checking out the marking choices here), as well as a separate insert for the upper cowl that also has separate gun barrels. If you thought you were done with marking option choices, guess again, as there's three different cowling underside pieces. One is vastly different, while the other two are very similar, so you'll want to make sure you have the right part used here. Also optioned details are surrounding the cockpit area, with the original German-style canopy having one layer of extra parts used and the later Czech blown canopy having different parts underneath.
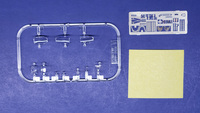 Landing gear is next, and this is pretty straightforward. Well, other than the now-expected variant option differences. Yes, even with the landing gear you have to make choices. There are two different styles of wheels and two different styles of hubs, and two different orientations of the main wheels to the struts. While still on the underside, just because there weren't enough options, the kit comes with two styles of belly fuel tanks. Final steps are the canopies, and there are two versions of blown canopy provided, depending on whether you're building an open or closed canopy (the open canopy is slightly bigger so it fits over the fuselage properly). Some extra bulges, the propeller, and the underwing cannon gondolas (if needed) can be added, and it's painting time.
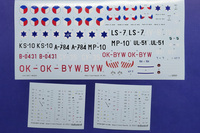
All those various options make sense when you look at the decal options. For the two kits in the box there are a full dozen of options, covering Czech, Israeli, and even civilian choices. There are three main color schemes for all twelve: either an 80/20 blend of RLM 02 & RLM 82; an overall RLM 81, or a light gray upper, dark gray lower. There's a great mix of markings, with black, white, or red numbers on the Czech options, as well as one with a civil registration. The Israeli options range from simple to colorful, with each one having its own uniqueness. Overall, all of the options have something interesting about them, so picking just two will be challenging. Check the Eduard website for side view drawings of all twelve options.
Conclusion
 If you've been wanting to build a 1/72 S-199 but haven't picked up a kit yet, the time is now. This looks to be the best kit of the subject in this scale, and the clear research and attention to detail with all the variations means you won't have to worry about having those bits right. At an MSRP of $54.95 USD as well makes the per-model cost very nice, at under $30 per plane, including photoetch and masks. My thanks to Eduard for the review sample.
