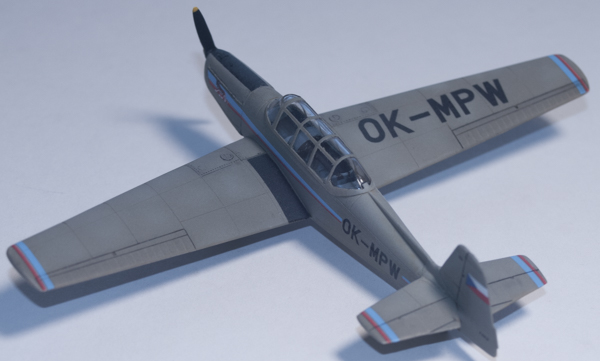
Kovozávody Prostějov 1/72 Zlin Z-226B
By Matt Bittner
Introduction
I gave a short background on the Zlin Treners in my First Look so refer to that article when wanting not only background information on the series but also on the breakdown of parts in these kits.
These kits aren't difficult builds – not at all. There are a couple of areas to watch out for and while my slow-down point was the masking of the canopy, that has recently been rendered moot by the release of masks not only by Kovozávody Prostějov (KP) but also Peewit. Why it took companies so bloody long to release these is a mystery to me, but at least they're finally out there and ready for consumption. And believe me when I tell you you'll want to definitely use these masks as there is a lot of framing on the kit's canopy.
Construction
Naturally construction starts in the cockpit and the Zlin is no exception. What you'll need to pay attention to is the parts call-out in the instructions. The instructions have parts 13 and 17 mixed up so pay attention when you're ready to add these. Plus, when you glue the rear-cockpit instrument panel to the assembled fuselage halves be sure it is centered. If it's off on any side you'll need to remove plastic until the canopy will sit correctly. Trust me on this.
Out of the box the cockpit is decent enough but naturally anything can be enhanced. While for this build I went solely out-of-the-box, my next builds will use more; Marabu has released an excellent photoetch set for the kit that will really enhance the entire model, especially the cockpit.
KP provides decals for the instrument panels (and depending on the aircraft you might not need both – the example I finished didn't have any flying controls in the front cockpit so I didn't use the separate rudder pedals, control stick nor the instrument panel decal) as well as decals for the seat belts, which, considering they're flat, don't look that bad.
The instructions called for a "blue gray" for the cockpit and without looking at photographs (yes, a mistake on my part) I went with Aeromaster US Intermediate Blue and while blue-grey, it appears the cockpit should be closer to an RLM02. Since the aircraft I was building was overall RLM02 anyway, having the cockpit a different color actually makes it look a little better instead of being all monotone. But if you want accuracy as with any modeling, definitely track down images of the aircraft being modeled. While the instructions called for overall RLM02 on this aircraft the pictures of the real thing show it to be a little lighter. That could be due to weather aging, though, since it's been sitting outside for quite some time. So I stuck with RLM02.
Now the cockpit is painted, decaled and finished it was inserted into one fuselage half and those halves glued together. There was only one area that really needed putty attention and that was where the fin of the port fuselage half met the starboard fuselage. It's a single-piece fin so there was a gap that needed filling; thankfully I was able to use Perfect Plastic Putty (PPP) and didn't have to sand this area at all.
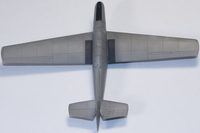
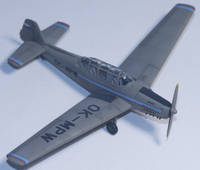
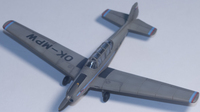
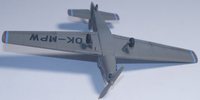
I noticed the trailing edges of the wings, when the top and bottom sections were brought together, were thicker than they should be so I sanded both top and bottom surfaces down to make it closer to accurate. I do like how it turned out. I then glued the wings parts together and offered them to the fuselage to see how everything would look. You can tell from the photos I had an issue with the underside joints. While I was able to eliminate the upper wing-to-fuselage joint with PPP, the joints on the underside were another matter entirely. I ended up adding sheet plastic to these areas. You also need to pay attention to the front of where the wing meets the fuselage at top. There is some scraping to accomplish to get the wing to fit flush with the "root".
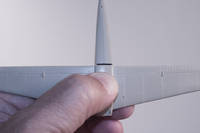
|
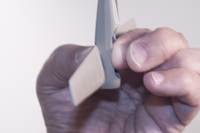
|
When it was time to glue the horizontal tail surfaces to the fuselage these went on without too much hassle. Again, PPP was the only thing needed to eliminate the gaps.
Now it was time to deal with the canopy and now is when construction really stalled. There are a lot of frames on the Zlin's canopy and it was a little daunting knowing I had to mask around all of them. Eventually I was able, using Jammydog tape to outline the frames then filling in using Tamiya tape. Extremely time consuming and it's great seeing that not only KP but now Peewit has finally released masks (but over a year later? and no one else could release masks? sheesh...) so my next Zlin builds should go a little quicker.
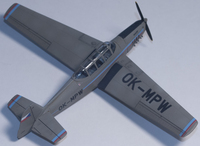
The last thing I glued on prior to painting – since this was an overall single-color scheme – was the landing gear. Keep in mind the starboard gear is longer than the port, on the sprue, so that will need to be dealt with (and thankfully the Pavla resin set handles). Technically the length is in the strut and not the "pant" but trying to get the strut to length is daunting; I ruined one set of landing gear trying to do that. In the end I just settled for shortening it where the landing gear meets the wing.
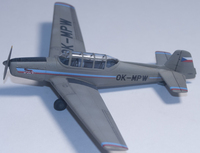
Once the canopy was finally glued on and the slight gaps dealt with (using Loctite Go2 Glue) it was time to paint. Since KP's instructions called for RLM02 as the overall scheme, and since Hataka had sent in their Early Luftwaffe WW2 paint set that included RLM02 I decided to use that paint to cover the entire model. I thinned the Hataka paint with their own thinner and I think it worked perfectly. In fact, there was one area on the model that "something" landed in the paint and I had to remove it which meant either stripping the kit at that point, or trying to feather the paint around the area by sanding. Usually you can't do that with acrylic paint, but with the Hataka I was able to. It wasn't a feather like an enamel-based paint, but it was enough that you couldn't tell this is what I had to do. Nice! Hataka will now be the paint I'll try to use more in the future (once I run out of all the other paints or have the Hataka in my hands already). My only complaint with Hataka is you have to buy an entire set of paints to get the color you want as they don't sell bottles individually. Plus, they don't sell direct so you'll need to track down a vendor that carries the Hataka line.
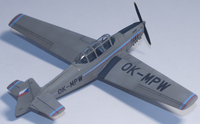
After letting the paint cure for two days I used a Raw Umber oil wash and applied a filter. This not only had the effect of darkening the finish just a little, but evened everything out and settled into the panel lines. Once this dried for two days I applied a coat of Future prior to applying the decals.
I had no issues at all with the decals and they went down well using MicroScale Micro Sol. After letting those sit for a day another coat of Future was applied. Once that had cured then a dark gray oil wash was applied into the control surfaces' "panel lines".
In keeping with this being an out-of-the-box build, I used the kit-supplied exhaust stacks (which was not easy, having to cut them from the sprue and clean them up) and after they were glued on and dried I went in with a drill to open the ends. Quite tedious but it worked well enough. I hand-painted those using the Model Master airbrush-ready Exhaust followed by black paint into the open ends. I then painted the main tires, glued them on and painted the tail-wheel tire. After everything was painted and glued on (don't forget the under-wing pitot tube) I gave it a coat of Vallejo matte.
Conclusion
The Kovozávody Prostějov Zlins are not difficult kits, just some areas need a little more attention than others. Aside from what I mention above, I do have a list of things I will do differently on my other Zlin builds. Those are:
Even though it took me a while to finish this, I did enjoy the process (okay, maybe not masking the canopy) and am looking forward to working on another. That one, though, will have the full treatment of using the Pavla resin and Marabu photoetch sets. At the very least the Zlin builds from here-on-out will definitely have the Pavla set, saving time when correcting the mismatched landing gear.
I definitely say "Thank You" to Kovozávody Prostějov for sending the Zlin Z-226B to review.

