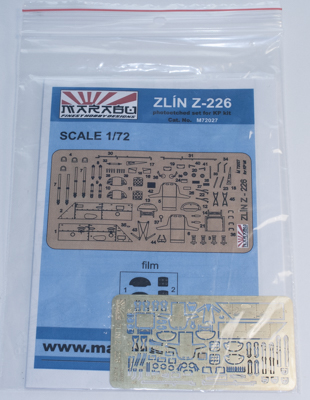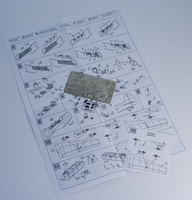
Marabu 1/72 KP Zlin Z-226 Photoetch
By Matt Bittner
While Marabu has been around a while it is only recently one of their photoetch sets has come in for review. Since I was given a few Zlin Z-226 kits from KP to review, I decided to build one out-of-the-box (and it's almost finished) and the other I wanted to build with more detail added. When I heard about Marabu's release for the KP kit I knew I had to acquire it for the future all-out build.
The photoetch set is really nice; there is a lot of detail packed into the photoetch fret. Before you proceed with adding the brass details you'll have to perform some work on the kit. First you need to remove all molded-in sidewall detail on both fuselage halves. Plus, you'll need to add some "supports" or "lifts" (or maybe even "shelves"?) to the cockpit floor for the replacement, brass seats to reside on. Once that work is finished then you can proceed with using the Marabu set.
Now that you have the molded-in sidewall detail removed you need to add the photoetch replacement sidewalls. Once both of those are in place then there are lots of "bits and bobs" to add to each sidewall. Follow the instructions carefully and you'll have a lot of excellent detail added.
 The next step is additions to the cockpit floor. Once your additional "supports" are in place for the seats then you can add rudder pedals, two side-controls for each seat and a piece to add to the bulkhead behind the rear seat. After the seats are folded and the photoetch belts are included you can add the seats to the floor as well (although you may want to paint the seats and belts before you glue them on).
If you're building a Zlin that has a front instrument panel (not all of them did) then build up its instrument panel with the pieces provided, followed by the rear-seat instrument panel. Since Marabu photoetch is all unpainted and unfinished definitely paint these pieces before you create the instrument panel(s). There is a piece that is added to the back of the piece for the rear-instrument panel to provide detail for the front seat.
Those last steps were all interior pieces; now you move to add brass to the outside of the aircraft. Marabu provides a replacement grill for the nose, what appears to be a smoke discharger for behind the tail wheel, oleo scissors for the landing gear struts, control arms for the ailerons (and note there is a separate piece of paper with new instructions for that area, so follow those instead of the main instruction sheet) and pieces for the canopy.
As I have worked on the KP Zlin I have noticed you'll need to correct the main landing gear (one side is longer than the other) and the canopy is a bit thick. Thankfully Pavla has released an upgrade set for the Z-226 that includes replacement pieces for both.
This is an excellent set of photoetch for the KP Zlin. I'm looking forward to using this and for acquiring more Marabu sets in the future.
Huge, huge thanks to Brengun for sending this set in for review.
