Brengun 1/144 Kokusai Ta-Go
By Matt Bittner
Introduction
I made some comments about the Kokusai Ta-Go in my First Look of the Brengun kit, so refer to that article for specifics of the aircraft. If you're a relatively quick builder, then this truly could be a weekend build. There isn't much to the kit.
Construction
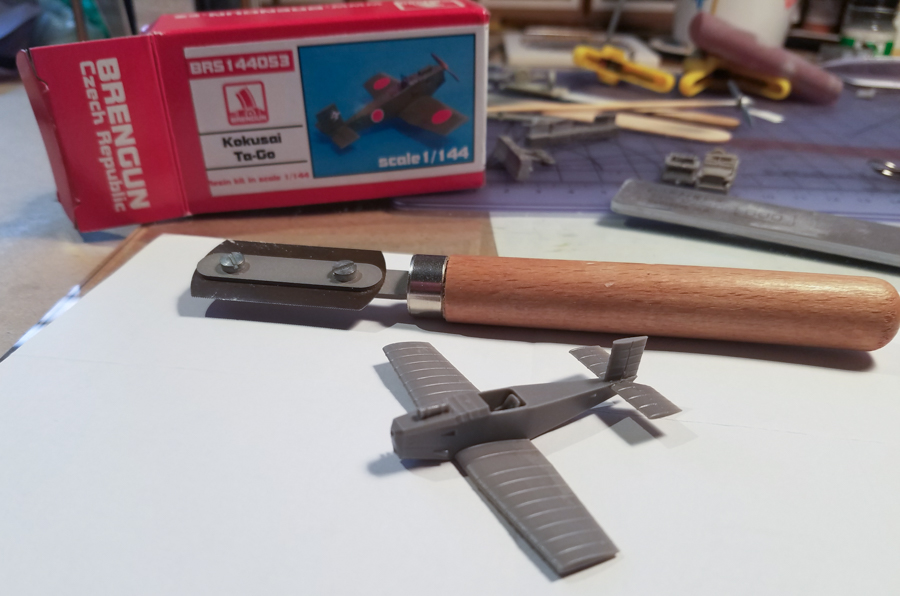
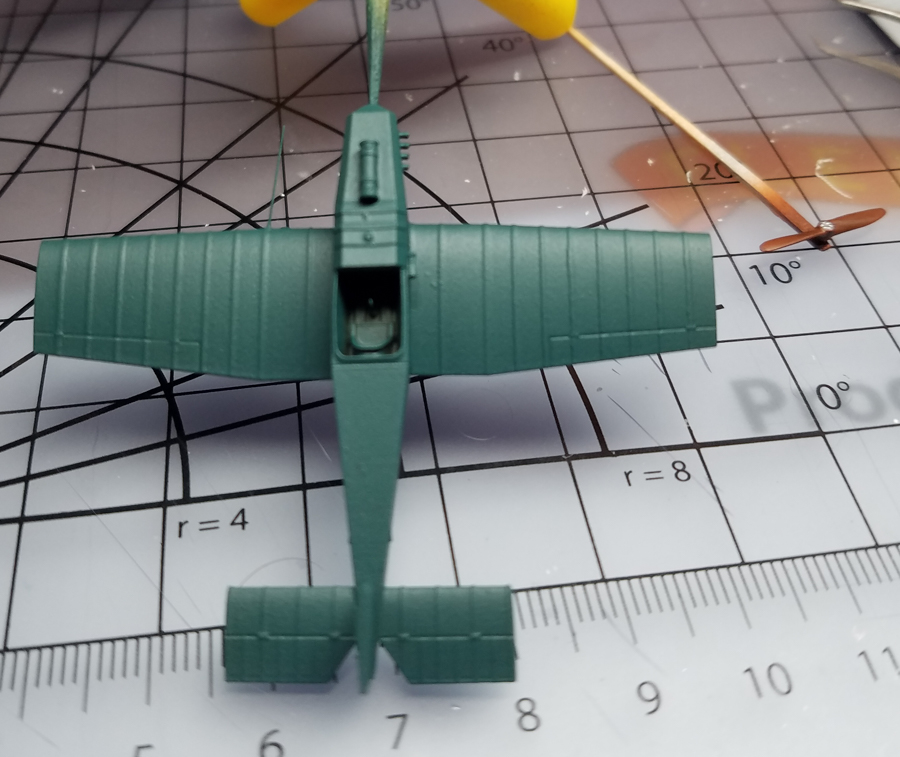
Naturally with resin kits construction starts with removing parts from their pour blocks. With a few cuts and some sanding, first the fuselage was separated than the wings. For some unfortunate reason Brengun decided to mold the wings to the pour block via their mounting surface to the fuselage. They did not do that with the tail surfaces so why the wings I have no idea. It would have been nice to have had to clean up the wing tips after removal instead of trying to ensure the mating surfaces were cut to try and have a good seam. Naturally in my clean-up it didn't go so well so I did have to apply putty after the wings were glued on.
|
Because I was working on a 1/72 Dewoitine D.500 at the same time, and had to spray its prop, I decided to separate the Ta-Go's prop next, clean it up and get it ready to paint. Unfortunately each blade in my example had an air hole which meant I needed to add plastic rod through the hole to close it up. After glueing and with a few swipes of a sanding stick, it was ready for primer and paint. The prop boss was painted after airbrushing the rest of the prop, naturally.
|
Now it was time to move to the tail surfaces. Thankfully Brengun molded those to their pour block on the tips of each part and not the mounting surface to the fuselage. There was only a little bit of clean up after removal, but because of that - and the fact Brengun molded mounting tabs on those parts - there was no seam work needed on the stabs nor rudder/fin. The only thing I had to do was open up the slots in the fuselage just a little bit to accept those tabs.
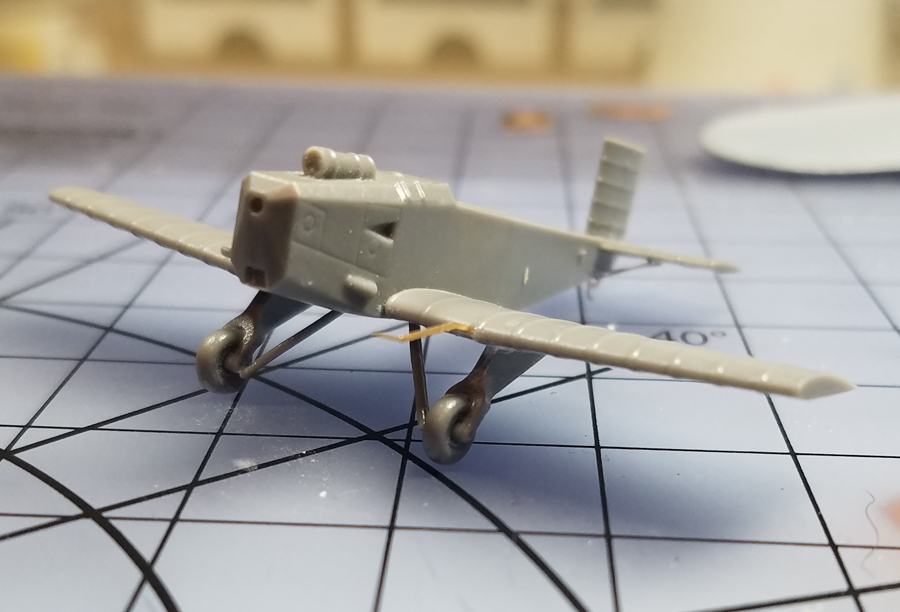
Next were the landing gear legs, with the tires molded in-situ. Again it was unfortunate these were molded to the pour blocks again on their mating surfaces but in Brengun's defense, I can't see any other way to do that. Unfortunately for me I cut one a bit too short so had to pack it out with plastic sheet to get it to the right size. Once those were glued on and seams eliminated I added the separate struts that went from the fuselage the the gear legs right at the wheels.
|
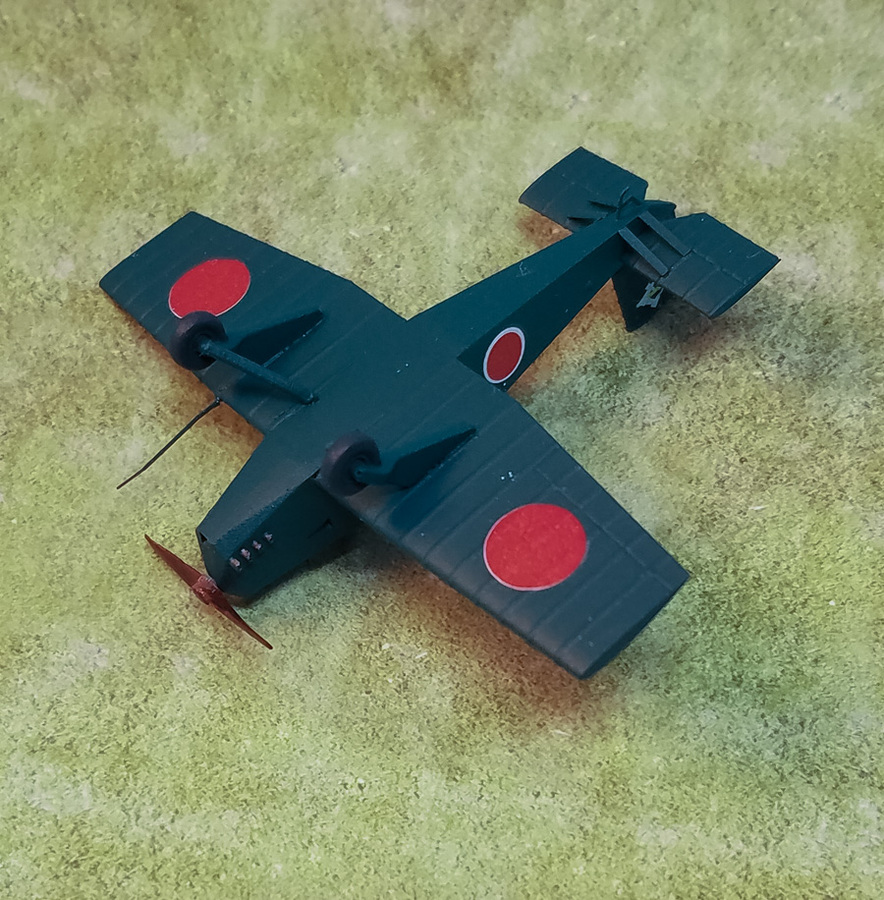
Even though it's usually not recommended I now glued on the photoetch control stick along with the photoetch tail struts, photoetch pitot tube and photoetch tail skid. Since the aircraft was a single color I thought it best to glue everything on prior to priming and painting. Note that I did not add the bomb that Brengun provides. That was because I wanted to model the aircraft as it appeared in period photographs, and it showed it without the bomb attached.
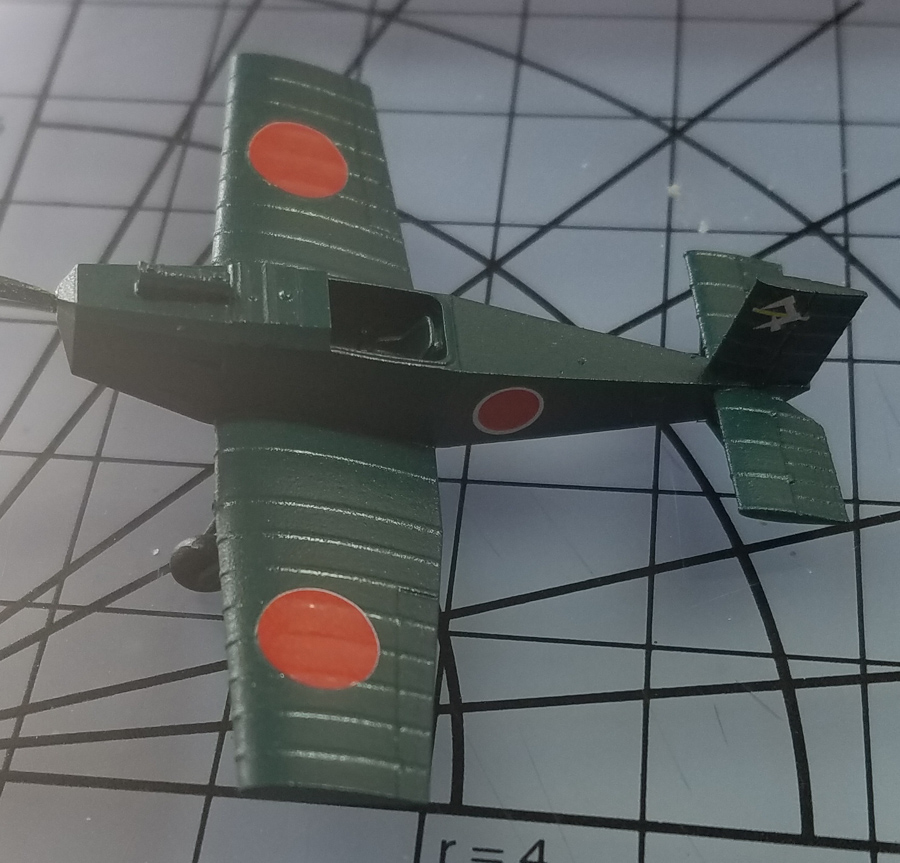
Finally it was time to prime - using a Vallejo gray primer - followed by spraying the Vallejo Model Air IJN Deep Dk. Green. Because there was only the one example built and flown, I decided not to do any sort of weathering or "enhancement", other than drilling out the exhausts and painting them a separate color. In addition, because this was a one-off - and a kamikaze-aircraft - I decided not to worry about seat belts.
|
Unfortunately I had some issue with the Brengun decals. First, my decals had a slight registration issue. Finally, I couldn't get them to snuggle over the ribs no matter what I did. I tried every decal solution I have: MicroSet, MicroSol, Solvaset, Agama's Tensol and Hypersol, and I also tried Future under the decal, rolling a Q-Tip-like device over it, squeezing the Future from under the decal which normally means the decal is down, tight. Not so. I did spray Future over the entire model first, so had a good, glossy overcoat, but still had issues. Thankfully the upper Hinomarus settled better than the underside, but there are still small areas that could still be better adhered. Not exactly sure what happened, because when I built Brengun's 1/144 Ho 229, those decals went down like a dream. Ah well. After the decals were as good as I was going to get them, I sprayed a coat of Vallejo Premium Satin over the entire model.
|
Final assembly consisted of gluing the already painted and folded windscreen on, followed by putting Microscale Kristal Kleer into its window frames. I also glued in the photoetch instrument panel but had a personal issue with that. Brengun provides a decal for that instrument panel that would have worked, if I didn't have large fingers. I ended up really messing up the decal while trying to put it on the photoetch instrument panel. So I just ended up painting it by hand. This was truly my own issue. Finally I glued on the prop.

|
Conclusion
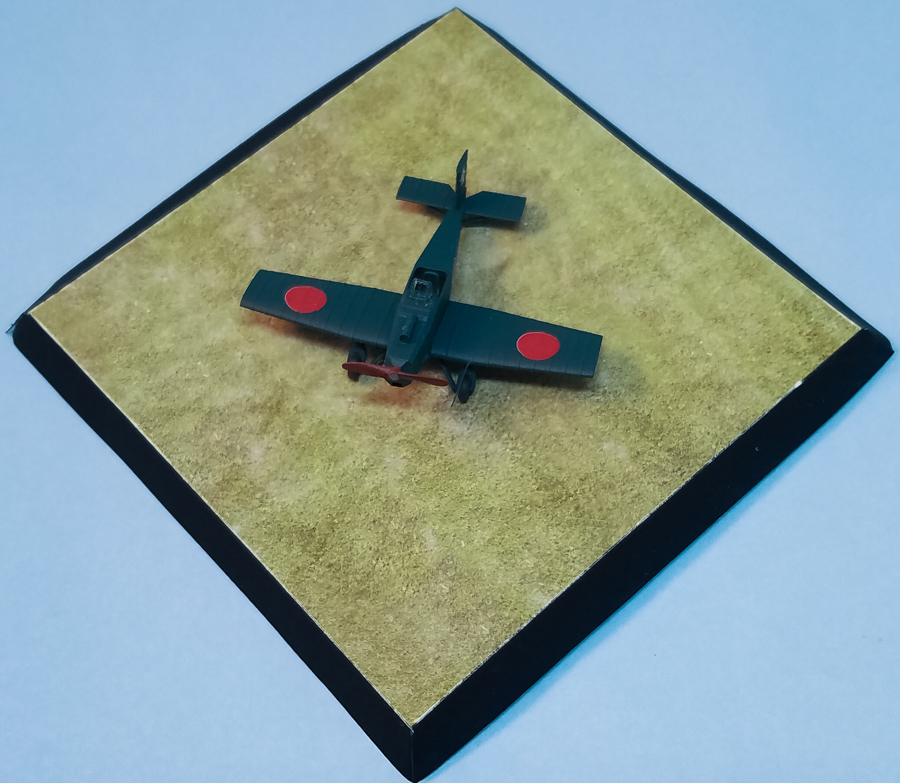
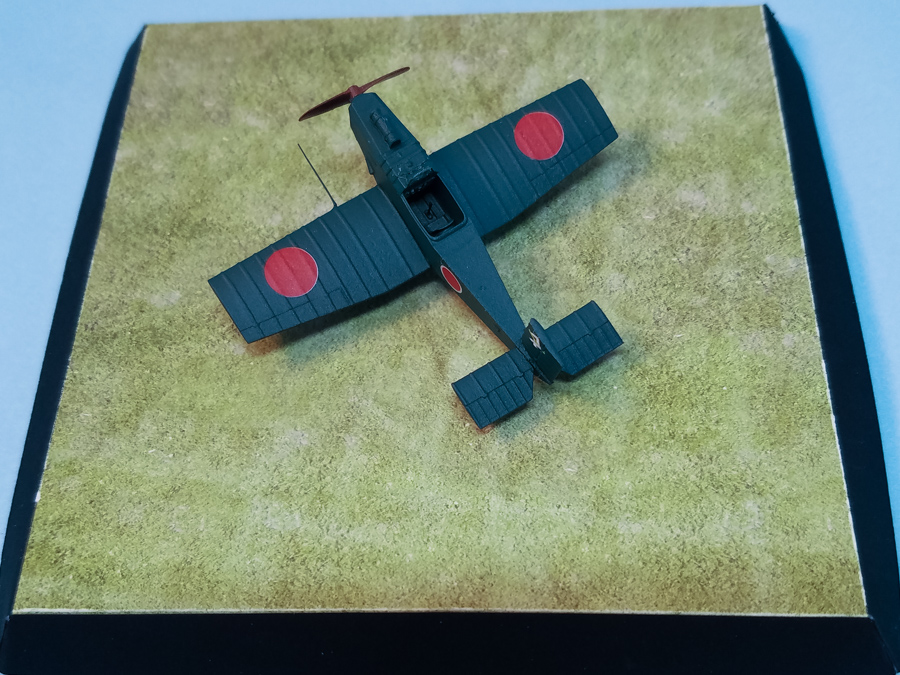
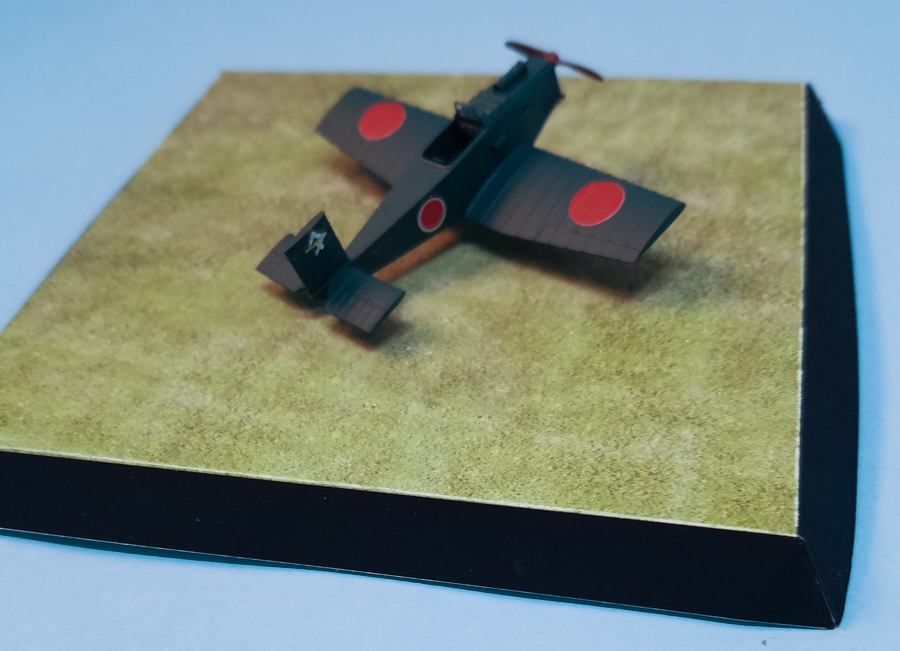
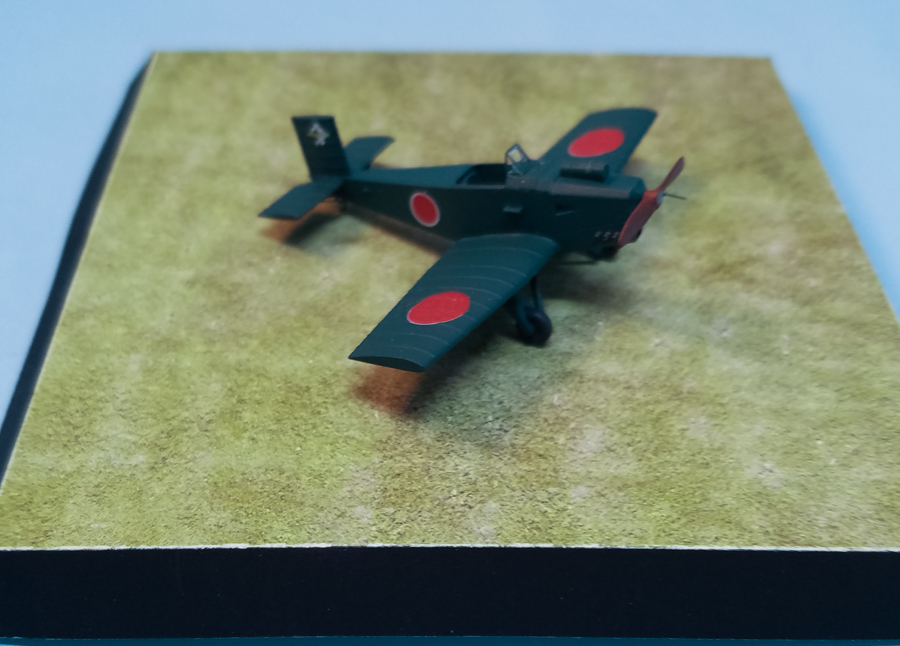
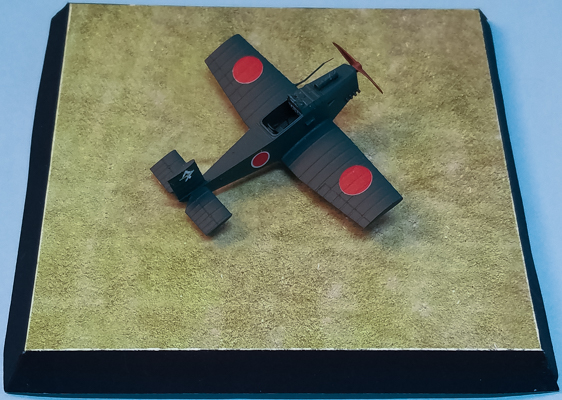
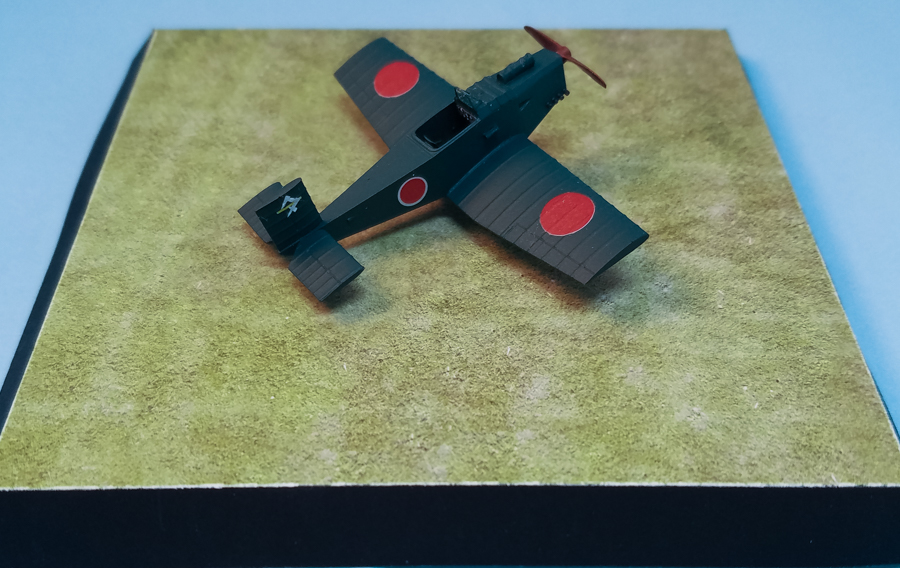
Aside from my decal issue and that I didn't like how the wings were molded to their pour block, the Brengun 1/144 Kokusai Ta-Gos is still a great kit, worthy of a weekend build. It looks great once finished but does need a base to be attached to. With the long pitot tube sticking off the port wing, it's prime to be knocked off if the model is handled directly. My temporary-maybe-permanent solution is using one of Peewit's Paper Display Bases, as shown in the photos.
I definitely send my thanks to Brengun for allowing me to review this wonderful model.