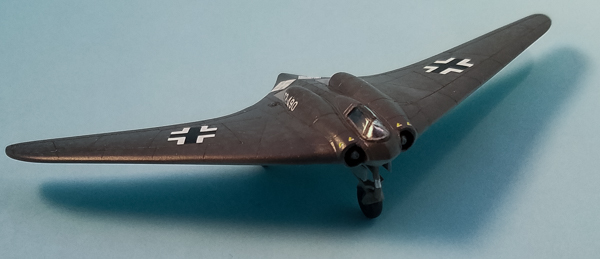
Brengun 1/144 Horten Ho 229
By Matt Bittner
Introduction
It has happened to me in the past. A model lingers on "the shelf" until something new comes along and sparks interest. This time it was the release of Valiant Wings Publishing book The Horten Ho IX/Ho 229. I'm not a big fan of "What If" schemes and that's what the Ho 229 would be finished as, since there was only one example that was around before the war ended, and that in a piece-meal state. So when I reviewed the mentioned book I saw that people had cobbled together the single, original Ho 229 and displayed it at the Chicago World's Fair after the war. Those people had also given it a spurious paint job and markings, but since it "existed" I knew how I wanted to finish the model. So I brought it off "the shelf" and started working on it again.
To be honest, I didn't write a First Look on the kit when it was sent because I honestly thought I would be able to finish it quickly and in time. Well, life events (like moving across the country) kept that from happening and for that I do apologize to Brengun. But here it is, finally finished.
The Kit
The Brengun 1/144 Horten Ho 229 consists of 27 parts of injected, gray plastic and one clear, injected canopy. My example came with decals for four Ho 229s:
- Horten Ho 229 V3 when the Americans arrived in Friedrichroda in 1945
- Horten Ho 229 V3 at NASM in Washington
- "What If" Ho 229 A3 of JG 3, Captain Aldo von Perik, Prenzlau April 1946
- "What If" Ho 229 A4 of the staff. II / JG 1, Colonel Heinrich Bär, Eindhoven May 1946
Decals appear nice and in register. I decided on the second scheme because that was how it was displayed at the Chicago World's Fair, but according to the Valiant Wings book (published after the kit came out, to be fair) Brengun has a number of things wrong with that scheme.
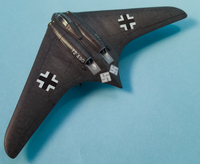
|
The kit does not come with any photoetch but Brengun does have a separate photoetch set, definitely recommended as it makes some things "more to scale", especially the landing gear doors.
The Build
One item right up front. Before working on anything - painting, gluing, what have you - take some time to get the fuselage and wings to line up. Tape the fuselage halves together and see if the top and bottom of the wings meet up with the fuselage halves. You might want to sand some from the fuselage halves in order to get things to line up correctly. I did, but ended up taking it a little too far and had a step I had to deal with on the underside. Thankfully it was small, but still. I had no gap to truly fill on the top which was a blessing; only a small application of Perfect Plastic Putty (PPP) and a quick wipe-off with a wet finger and the top was good to go. Not so the underside.
Now that's out of the way, construction starts with adding items to the lower fuselage half. This includes the intake and exhaust "cones", seat and "instrument panel" into the cockpit. The instrument panel is just plastic with nothing to show instruments, not even a decal. I sprayed everything I could prior to adding parts: RLM 66 inside the interiors of the cockpit and engine-areas and Vallejo Silver for the intake and exhaust "cones". Now these parts can be added to the lower fuselage half. I also added tape seat belts and a piece of round sprue to represent the control stick (all not easily seen through the closed, thick canopy).
|
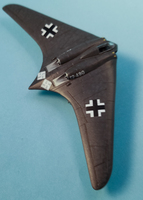
The fuselage halves were now glued together. Note that Brengun does not mention nose weight so I didn't add any. With the design of the aircraft I thought it would sit on its gear correctly and I was right. Now the fuselage is together I noticed you could see through the cockpit to the intakes so I dabbed a little PPP into the area and wiped it away. Afterwards I brushed RLM 66 back onto those areas. I cut away the guns because I could work on the seams better that way and was thinking I would re-add them later. Well, the pictures of the NASM aircraft doesn't show gun barrels so I left them off.
Now you add the wings. There's a slight mold depression on the top of the wings but I thought it wouldn't be seen with the paint applied and I was correct. So I glued the wings on and dealt with the seam on the underside - see my first paragraph in this section above.
So you have a 1/144 Ho 229 ready to paint. I first sprayed Vallejo gray primer on the model, gave it some time to cure, then lightly sanded it with 2500 grit sandpaper. Then the first color went on, which was the underside blue. According to the Valiant Wings book the thinking was the people that painted the Ho 229 for Chicago probably used US paints, but tried to get them at least close to the original colors. And the thinking was the underside looks like RLM 76 while the top looks like RLM74/RLM75. I used Hataka "Red Line" paints for these colors so their RLM 76 was sprayed, thinned with their thinner and Future. Once it was cured (at least two days) then the bottom was masked while the top was sprayed with Hataka RLM 74. It was here I wasn't sure what to do when I stumbled upon something that would help.
|
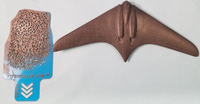
I looked on LP Models site (as a company they mostly make 3D printed, modern aircraft ladders, but they also used to carry 77propeller's ware as well) and they had a stencil that looked like a good fit for the mottling that was applied in Richard J. Caruana's color profile in the Valiant Wings book. So LP Models sent 77propeller's "PRP015: Airbrush Stencils for spraying fine details" for review and I was extremely pleased how it worked. The only thing I could have done different was sprayed a little more of the RLM 75 through the stencils to make them a little darker. Still, I like how it turned out and the effect is great. Again, both the RLM 74 and RLM 75 Hataka paints were thinned with their thinner as well as Future.
The landing gear and landing gear wells were sprayed RLM 02 and once the wheels were masked (the nose wheel and gear being the most difficult) the tires were sprayed with the same color I used for RLM 66, Vallejo's Black Grey. I had to touch-up the intakes and I masked the exhaust area and sprayed it with Vallejo Metal Color Aluminum.
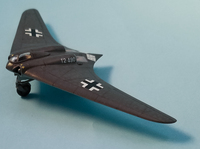
Once this had all cured, then a coat of Future went on prior to decaling. There aren't many decals to add but some of them are very tiny. I added everything I could at this phase, but when looking at not only the color profile in the Valiant Wings book but also the photo provided of the aircraft, the numbers and letters on the sides of the engine housing Brengun provide were way too large. I didn't have anything in my stash that came close but remembered Warbird Decals produced Axis decals in 1/144 that had numbers that were "close enough" so I ordered some. Sure, the numbers and letters were probably in US-style but at this scale - and wanting to finish the model for 2020 - I thought the Warbird Axis decals would be "good enough". They didn't have a 'T' in the correct size, so I cobbled them together from two '7's. The dot between sections was hand painted.
|
After everything had settled and dried, then I glued on the landing gear and gear doors, and started with putting washes into the panel lines. For the underside I used Vallejo Model Wash Blue Grey and the top was a mixture of their Grey and Dark Grey; I thought the Dark Grey was too dark. I kept other weathering to a minimum since this aircraft never flew. I then finished the model with a coat of Vallejo Premium Satin Varnish.
Conclusion
This was actually a fun build, albeit stretched out across a few years. If I didn't have plenty of life events I'm sure I would have finished this close to the time it was originally released. Even so, if you want a quick 1/144 Ho 229 in your stash then by all means pick this up.

|
I definitely send a huge "thank you" to Brengun for the review model.
