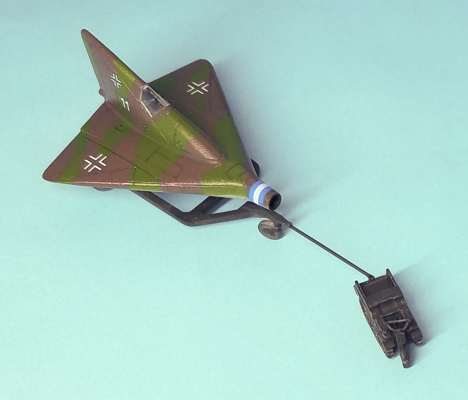
Armory 1/144 Lippisch P.13a
By Matt Bittner
Introduction
What do you do with a subject that truly didn't exist, except in one test glider form? Do you go ahead with what the model producer provides, or come up with something entirely different? In my case, I decided to do both.
To be honest "Luft '46" subjects are not something I tend to build, but the looks of the Lippisch P.13a was intriguing and could lend itself to a number of "what ifs". Since there were two kits in the box, my imagination just exploded.
Construction
First, about the kits themselves. In my First Look you can see what's in the box, in terms of the two Lippisch P.13a aircraft as well as the supplied Kettenkraftrad.

|
Actual construction isn't difficult. I sprayed the interior of all fuselage halves, along with the supplied seat with an RLM 66 equivalent from Vallejo. I then applied Warbird Decals seat belt decals knowing those would probably be the only thing seen through the canopy, and I was correct.
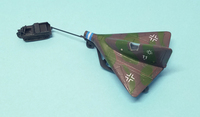
Now, do as I say, and not as I do. I then glued the fuselage halves together and after dealing with the seams (and there are some that need puttying) proceeded to try to get the fuselages to fit to the one piece wing. The opening in the wing needed to be widened to fit the fuselage, but after adding the canopy I realized what I should have done was sanded each fuselage half mating surfaces before gluing them together. That would have eliminited two problem areas: the opening in the wing wasn't large enough for the fuselage, and the width of the canopy was narrower than the fuselage.
|
I can't reiterate this enough: sand each fuselage half mating surface before you glue the fuselage halves together. Otherwise you will have to widen the opening in the wings as well as sand the fuselage to match the canopy.
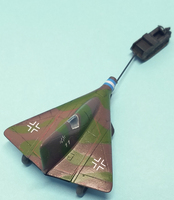
So, back to my builds. There were a few sink marks and short-shot areas on different parts of each model that needed to be addressed. That required some sanding and some putty, typical of modeling so I wasn't too put out. There were also seams that needed to be addressed once the fuselages were glued to the single-piece wings.
|
Once all surface work was taken care of, I then glued the canopies to the fuselages. And that's when I realized I should have sanded each fuselage half mating surface because the canopy was narrower than the assembled fuselage halves. Which means I needed to sand each fuselage around the canopy to get it to blend better. But, as to not lose the surface detail, I tended to just stick to the area around the canopy. Which meant the model now looked a little odd and wasn't "symetrical", if that makes sense. Actually one of the two Lippisch was worse than the other so that's when I started thinking of what to do with the worst one. More on this in a bit.
Now the fuselages are blended better with the canopies, then it was time to mask the canopies and paint. Both were primed with Vallejo USN Light Ghost Grey Surface Primer then once I had an idea what I wanted to do with each separate Lippisch, they were sprayed with their collective colors.
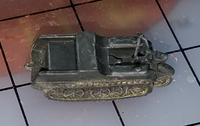
The kit-supplied carts also weren't difficult builds. There was some sanding of a couple of dimples but overall it was just glue the parts together and paint using Vallejo's Panzer Gray.
The Kettenkraftrad model is all resin and very nicely cast. Construction is super simple once the parts are removed from their pour blocks. After priming, this was sprayed entirely in Vallejo Panzer Grey and then given a wash and dry brushed to bring out highlights.
|
Luft '46
I knew I wanted to actually finish one of the Lippisch with the markings supplied in the box, so I chose what I thought was the easiest - the first scheme - and went from there. The rest of the paints used with this model were all Hataka. Even though Hataka says their Red Line paints are meant to be sprayed out-of-the-bottle, I still thin them even more. First mainly with Future, but also with a few drops of their thinner. The underside was sprayed with Hataka's RLM 76 while the uppers were sprayed with their RLM 81 and RLM 82, masked with some tape but mostly BlueTack. Once the painting was finished then it was overcoated with Future, even though all the paints had Future in their mix.

|
One minor complaint with Armory's instructions. While the marking locations/profiles were in color, it was extremely difficult to tell where the demarcations were for each color. In fact, the colors on the color profiles are close enough to be nearly indistinguishable. While I tried to be true to the instructions, in the end I just made the rest up. And why not? This is Luft '46, afterall.
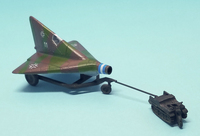
|
Another complaint with Armory's decal instructions is they show panel lines that don't exist on the model. So if you're trying to line up Armory's decals to specific panel lines, in most cases it won't work so you'll need to rely on location, location, location. The decals themselves went down very well, mostly just usling Micro Sol. In a couple of places I needed to use Solvaset but it wasn't many. Once the decals were down then I added a wash to the panel lines and that was all to the weathering. I wanted to show an aircraft that hadn't flown yet (both in reality and fantasy). The final finish was Vallejo's Satin.
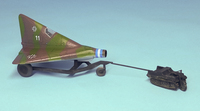
|
I decided not to glue the Kettenkraftrad to the Lippisch cart because I want to use the Kettenkraftrad in other displays.
The Discovery
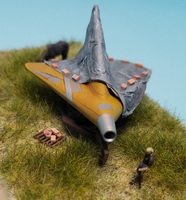
As I mentioned above when I sanded the fuselages to meet the canopies, one came out worst than the other. The one "not so bad" was the basis of the Luft '46 bird but the one not as good I needed to come up with something. That's when I thought about covering the model in a tarp, and a friend mentioned how about being "discovered" in a field. Perfect! The thinking was the Lippisch would have been left "au natural" so I sprayed this one mainly in a wood color, adding some "grain" via various means of drybrushing and washes. Once the wood areas were taken care of then some parts were masked off and Vallejo Aluminum was sprayed. I also wanted to show other metal areas differently so those were hand-brushed using Vallejo RLM 02. Now how to create the tarp.
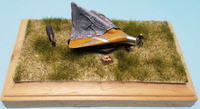
|
Vantage Modeling Solutions (VMS) has a product called Paper Shaper that will make paper pliable to be used on models and model parts. They also used to sell their own, special paper which I used as well, but that appears to be missing from their catalog. In any event, I soaked the paper in VMS' Paper Shaper then worked it on the model, creating a section that was "folded over" onto itself. Once it was almost dried I removed it from the Lippish so it wouldn't be permanent yet, so I could spray it. First spraying on a light gray, I then used a darker gray for a wash, and other grays for dry brushing, ended up with an even lighter gray for the highlights. I do like how it turned out. Unfortunately while drying one end turned up a little bit so it needed to be glued to the model. Not a huge thing.
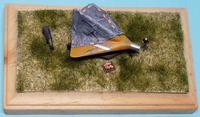
|
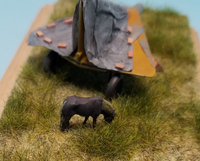
I found some model railroad N Gauge bricks that could be used to appear to be holding down the canvas, and since those were pre-painted I just glued them to the model - and to the N Gauge pallet - using white glue. Both the horse and "old dude" are also N Gauge items, suitably dressed up. In fact the "old dude" needed a lot of mold release seams removed so most of him has been re-painted.
|
The base is one that comes from one of the local craft stores while the grass is actually a Heki mat, cut and glued to the base. Everything else but the bricks were glued to the base using CA.
|
Conclusion
Coming up with ideas for modeling is sometimes more fun than working on the model itself. Once I had the idea for the diorama it was just finding all the things needed to make it come to fruition. I do really like how the diorama ended up.
But I can't stress enough that if you build the Armory 1/144 Lippisch P.13a to sand each fuselage half as I mentioned above. It will make building these kits a bit easier.
I definitely thank Armory for allowing me to review these models.
