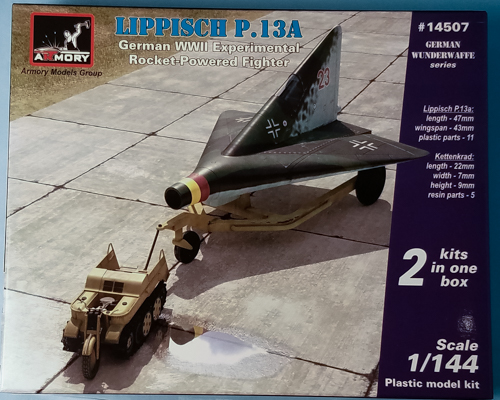
Armory 1/144 Lippisch P.13a
By Matt Bittner
Introduction
Because I found it so fascinating, I include most of the text from Wikipedia. Coal powered; intriguing!
"As conventional fuels were in extremely short supply by late 1944, Lippisch proposed that the P.13a be powered by coal. Initially, it was proposed that a wire-mesh basket holding coal be mounted behind a nose air intake, protruding slightly into the airflow and ignited by a gas burner. Following wind-tunnel testing of the ramjet and the coal basket, modifications were incorporated to provide more efficient combustion.
"The coal was to take the form of small granules instead of irregular lumps, to produce a controlled and even burn, and the basket was altered to a mesh drum revolving on a vertical axis at 60 rpm. A jet of flame from tanks of bottled gas would fire into the basket once the P.13a had reached operating speed (above 320 km/h), whether by using a rocket to assist takeoff or by being towed.
"The air passing through the ramjet would take the fumes from the burning coal towards the rear where they would mix under high pressure with clean air taken from a separate intake. The resulting mixture of gas would then be directed out through a rear nozzle to provide thrust. A burner and drum were built and tested successfully in Vienna by the design team before the end of the war.
"It is not known what armament would have been carried by the P.13a; the MK 103 cannon would have been too heavy and large for such a small aircraft and it is possible that one or two large-calibre machineguns would have been used.
"At the end of the war even the prototype DM-1 test glider had not been finished when it was captured by American forces. The Americans ordered Lippisch's team to complete the glider, and it was then shipped to the United States where it was test-flown. According to the National Advisory Committee for Aeronautics the results were positive and lessons learned were incorporated into NASA's research aircraft of the 1950s and on.
"Film footage exists which shows a gliding test of a scaled-down model of the P.13a. These tests began in May 1944 at Spitzerberg, near Vienna."
The Kit
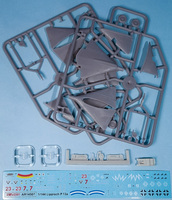
The Armory 1/144 Lippisch P.13a boxing actually consists of two P.13as with towing carts and one of their resin Kettenkrad. One Lippisch P.13a consists of just six pieces of gray, injected plastic along with an injected clear canopy, while the towing cart consists of four pieces. The Kettenkrad consists of five pieces of light colored resin. There are decals for four hypothetical P.13a aircraft:
- "White 11", in just an RLM 81/82 splinter scheme, with a white stripe on the nose, and RLM 76 under surfaces
- "Red 23", that also has the 81/82 but a larger patch of RLM 76 on the tail and mottling also on the tail, and yellow and red stripes on the nose
- "Red 7", that also has the 81/82 but a larger patch of RLM 76 on the tail and mottling also on the tail, and red stripes on the nose
- "Squadron unknown", that also has the 81/82 but a larger patch of RLM 76 on the tail and mottling also on the tail, with a larger scalloped-design encompassing all of the nose (which will need to be painted)
Decals appear to be in register and are nicely printed. While the profiles for the aircraft are in color, unfortunately it's extremely difficult - if not impossible - to differentiate between the RLM 81 and RLM 82. But then again, since this is all hypothetical, does it truly matter?

|
Construction is super-simple. After painting the one-piece cockpit and seat (probably RLM 66 although the instructions have no interior color call-outs) then glue them together and add them to one fuselage half. The kit doesn't provide seat belts and to be honest that would be the only items needed as the cockpit is quite small, and viewing it through the injected canopy will be a little difficult.
Now that the cockpit and seat are in one fuselage half, glue the fuselage halves together and add the canopy. You'll need to provide your own masks for the canopy but it shouldn't be difficult as the frames are mostly straight lines.
Glue the wing halves together and once dry add the fuselage. And there you have it, a finished Lippisch P.13a in 1/144. The next step has you glue the wheels to the towing cart to complete it. The above steps will need to be done twice, since there are two P.13as to a box.
Instruction Step 5 is where you glue the Kettenkrad together and step six shows how you add everything together. Unfortunately since there is only one Kettenkrad to a box you can only "attach" one Lippisch to the Kettenkrad; the other will need to stay off in the background.
Conclusion
This is truly an AMS-busting kit. Since it's all hypothetical you can do whatever you want with these kits: finish it in one of the schemes provide or come up with something of your own. One thought I had was to take the one "not attached" to the Kettenkrad and display it in a field, in a worn-out state. But then again, I have all these ideas floating around my head for a lot of displays that never make it into the physical world...
I definitely thank Armory for sending the Lippisch to review.
