Mirage 1/72 C7P Artillery Tractor
By Loren Pike
|
 |
History
The C7P tractor was designed by the tractor department chief of BS
PZInz, Witold Jakusz in 1933/34. The tractor was designated as C6. The
hull, suspension and engine of the 7TP tank, which was about to enter
production, were used. Work on the tractor moved faster than on the tank
and in 1933, the first two prototypes were made. One had the front sprocket
and was designated as C6P, while second one had the rear sprocket and
was designated as C6T. In early 1934 both prototypes were tested on a
1000km tour. After the tests, it was decided to move C6T's sprocket to
the front creating C6P/II.
 At
the same time, the C6P's engine was moved to the rear, and the hull was
changed with the resulting vehicle being designated C7P/I. It is important
to mention that in comparison with other tractors developed from Vickers
Mk.E tank (eg. British Dragon, Soviet T-26T), the Polish C7P tractor was
technically advanced and universal in use. The most important feature
was that it had an enclosed cabin and winch powered by the tractor's engine.
The winch cable could be used at the front or in the rear of the vehicle. At
the same time, the C6P's engine was moved to the rear, and the hull was
changed with the resulting vehicle being designated C7P/I. It is important
to mention that in comparison with other tractors developed from Vickers
Mk.E tank (eg. British Dragon, Soviet T-26T), the Polish C7P tractor was
technically advanced and universal in use. The most important feature
was that it had an enclosed cabin and winch powered by the tractor's engine.
The winch cable could be used at the front or in the rear of the vehicle.
 On
June 12th of 1934, the C7P tractor was approved as the army's main vehicle
of this type. It was planned to use the C7P as an artillery tractor for
heavy artillery in artillery units, as a specialized vehicle for various
purposes (including towing of light trains and destruction of tracks with
the use of a special hook) and as a recovery and tank transport vehicle
in armored units. In 1934, production of C7P tractor started in Factory
F1 PZInz. in Ursus. Either 151 or 173 C7Ps were produced. On
June 12th of 1934, the C7P tractor was approved as the army's main vehicle
of this type. It was planned to use the C7P as an artillery tractor for
heavy artillery in artillery units, as a specialized vehicle for various
purposes (including towing of light trains and destruction of tracks with
the use of a special hook) and as a recovery and tank transport vehicle
in armored units. In 1934, production of C7P tractor started in Factory
F1 PZInz. in Ursus. Either 151 or 173 C7Ps were produced.
The main users of C7P tractors were artillery units. In September of
1939, 11th, 12th and 13th Heavy Artillery Squadron was mobilized, each
equipped with 33 C7P tractors. Before the war, armored units had 18 or
22 C7P tractors, while specialist units probably had two tractors. The
Germans utilized captured C7P tractors to recover both Polish and German
armored equipment from the battlefields and as plows in the General Government.
Further fates of those vehicles in unknown.
Crew - 6-7
Weight - 8.5t
Dimensions - length 4.6m, width 2.4m, height 2.4m
Speed - 25 km/h
Range - 150 km
Engine - Diesel-Saurer CBLDb (PZIn.235), 115 hp, fluid cooled.
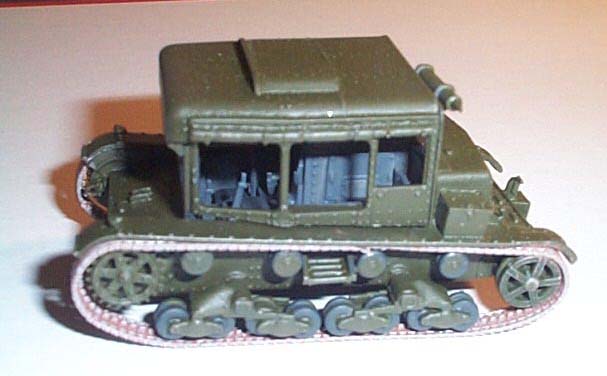
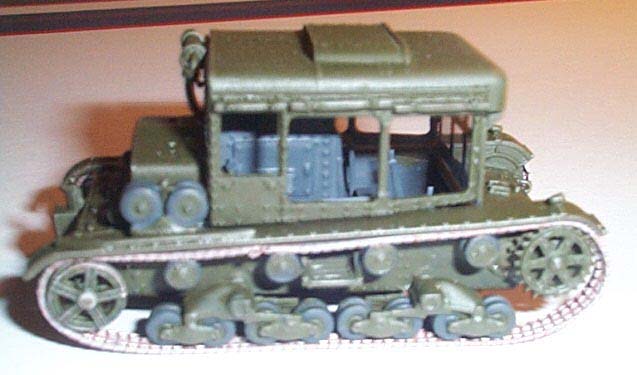
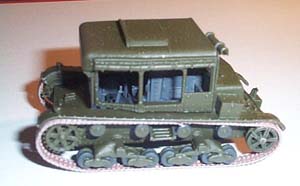
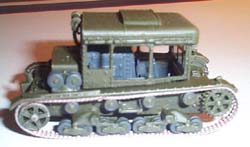
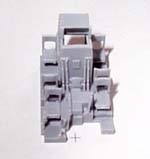
The Kit:
 There
are 227 crisp, clean injection molded parts (including 12 in clear plastic,
for the windows), with excellent raised detail...plus two vinyl tracks,
a vinyl tow rope, decals (with markings for four vehicles), photo etched
details (including engine grills) and a detailed 10 page instruction booklet!
All road wheels are separate moldings and the cabin interior is fully
fitted out. Accessories include storage boxes, shovel, crow bar, hand
winch, etc. There
are 227 crisp, clean injection molded parts (including 12 in clear plastic,
for the windows), with excellent raised detail...plus two vinyl tracks,
a vinyl tow rope, decals (with markings for four vehicles), photo etched
details (including engine grills) and a detailed 10 page instruction booklet!
All road wheels are separate moldings and the cabin interior is fully
fitted out. Accessories include storage boxes, shovel, crow bar, hand
winch, etc.
Assembly:
As stated earlier, this kit has a 10 page instruction booklet. There
are 29 assembly steps with several 'sub-assembly'' steps within those
29 steps. I found the directions to be extremely useful and well written
for both the novice and the 'old timer'. Since this kit had a large number
of parts (227 by "someone's" count - not mine!!), you have a lot of work
in a very small vehicle. The assembled vehicle is not 2 inches long! (Less
than 1/2 the size of a Tiger or even a Sherman in 72nd scale!!)
 I
won't bore you with each and every assembly step. Let it to suffice that
by following the directions, you will proceed with little trouble. The
alternate versions were clearly detailed and all parts clearly called
out at the appropriate step. It would be at these points that the 'end
result'' should be decided on so as to move on with the completion. I
won't bore you with each and every assembly step. Let it to suffice that
by following the directions, you will proceed with little trouble. The
alternate versions were clearly detailed and all parts clearly called
out at the appropriate step. It would be at these points that the 'end
result'' should be decided on so as to move on with the completion.
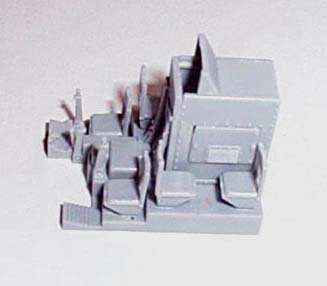
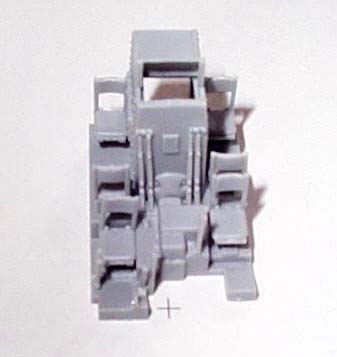
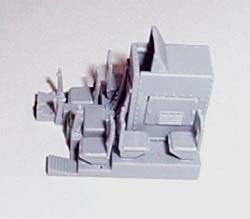
I built my kit up in sub-assemblies (ie: chassis, interior, roof/sides
and running wheel assemblies) to be assembled after some preliminary painting
was complete.
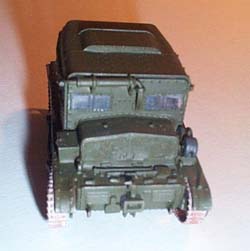
Some of the parts (and not just the PE parts) were exceptionally small.
You must exercise extreme caution when cutting them off the sprue and
when attaching them to the vehicle or the infamous 'carpet monster' will
consume them!!!
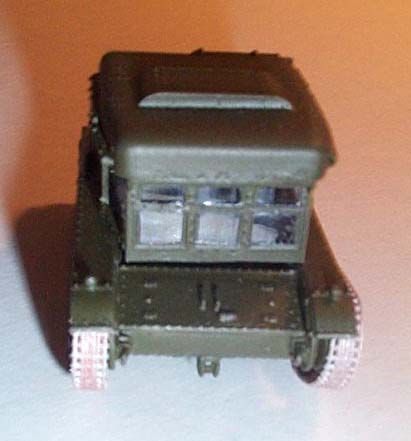
 I
used just a touch of putty around the front of the vehicle to blend in
the parts, but other than that, the kit went together very easily and
accurately. I
used just a touch of putty around the front of the vehicle to blend in
the parts, but other than that, the kit went together very easily and
accurately.
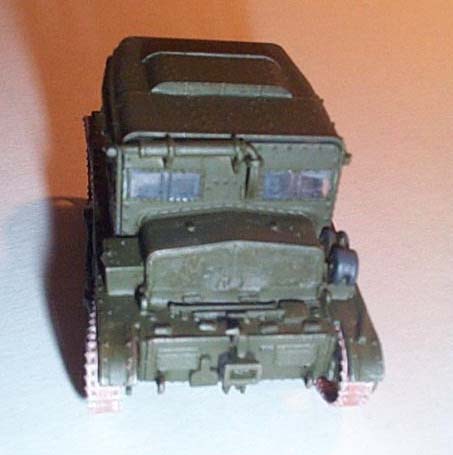
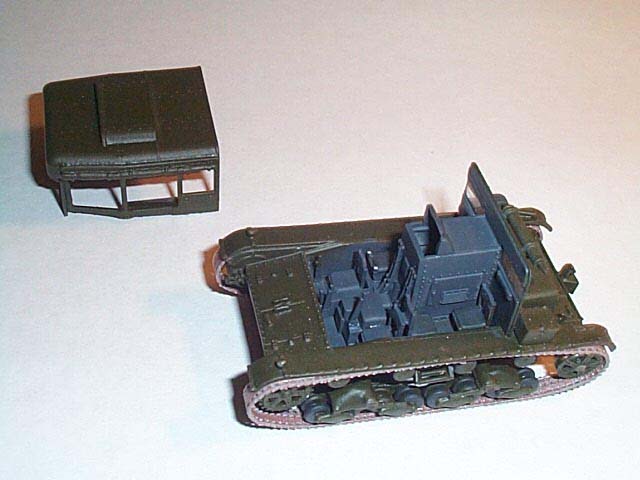
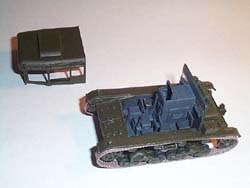
Tracks:
You would think that a 1:72nd scale kit with 227 parts would have 'link
& length' track. But this kit comes with the 'rubber-band' track. I can
never get this to hold very well and certainly cannot detail paint the
track as I would 'link & length' track. To me, this is the only downfall
of the kit. But for those of you that LOVE the rubber-band type - go for
it! As you can see, I got it done, but not sure of the accuracy of the
completed parts.
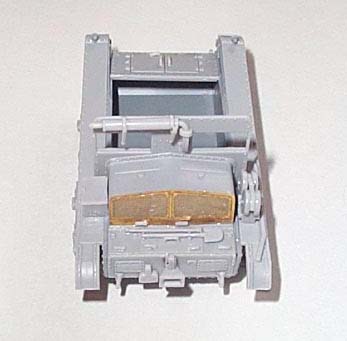
Photo Etch Parts:
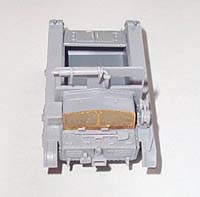 I
only used a few of the PART photo etch parts. I used the grill and grill
surround (parts PE 1 & 2) which were the most prominent parts. There was
an injection molded part for those 'feint of heart' which was nicely rendered
as well and could have been used without reservation. The other PE parts
were a couple of flat license plate holders (I think??) and the instrument
panel (part PE13). I
only used a few of the PART photo etch parts. I used the grill and grill
surround (parts PE 1 & 2) which were the most prominent parts. There was
an injection molded part for those 'feint of heart' which was nicely rendered
as well and could have been used without reservation. The other PE parts
were a couple of flat license plate holders (I think??) and the instrument
panel (part PE13).
Painting:
Well, here is where things came to a screeching halt. Since I mainly
used Testors Model Master enamels for my painting sessions, the directions
did not have one of the color callout for that brand. The main colors
were all listed as Humbrol enamels and I could not find one of the proper
cross references to match up - so I 'punted' (American football slang)
and tried to match as close as possible the main colors with Model Master.
I'm pleased with the results but the purist is probably going to scream
at me - oh well, I model for myself and not the purist!! The scheme I
painted was used in 1932 but still on some vehicles when the Germans captured
them in 1939. The color used was 'Polish Khaki' [Humbrol #159 = Model
Master (no match found)].
All other colors were used as per the instructions with the appropriate
Model Master paints (rust, silver, steel, etc.). Since I seldom weather
my models, little was done in the area of dry brushing on washes.
Decals:
There were only a couple of decals. The instrument panel and a couple
of licenses were pretty much it and went on without too much trouble.
(I use the 'dab of future' to float the decal in, then a light coat of
future on top. When dry, I use whatever flat I have available to overcoat.)
Conclusions and Recommendations:
 I
absolutely loved the kit! On a scale of 1 to 10 (10 being the best) I'd
give it a 9 ONLY because of the let-down in NOT having link and length
track. [Editors Note: Part makes photoetch track for the Vickers/C7P/T-26
series of tanks. See Bruce Simard's T-26-1
review for further information.This is a 'way cool' little kit and you
should add this to your collection. It was fun to build, fun to paint
and detail, and is a very nice addition to my 1:72nd armor collection
of build-ups. Can't wait for some of Mirage's other announced kits! I
absolutely loved the kit! On a scale of 1 to 10 (10 being the best) I'd
give it a 9 ONLY because of the let-down in NOT having link and length
track. [Editors Note: Part makes photoetch track for the Vickers/C7P/T-26
series of tanks. See Bruce Simard's T-26-1
review for further information.This is a 'way cool' little kit and you
should add this to your collection. It was fun to build, fun to paint
and detail, and is a very nice addition to my 1:72nd armor collection
of build-ups. Can't wait for some of Mirage's other announced kits!
Thanks to Squadron Mail Order
for the review sample, and Ray Mehlberger for asking me to build .. also
to PART for the Photoetch.
On-line References:
| 


|