Upgrading a Modeling Workbench
By Matt Bittner
Introduction
Back in 2018 I needed to move back to the place I grew up – Ohio – for multiple reasons. I took almost that entire year to find a job, something I needed before moving, and it wasn't until December that I was able to move away from Nebraska. Because of that, most of my modeling had stalled and I haven't completed a model since December of 2017.
Now that I have moved I decided I wanted a better workbench set up than the one I used to have. The one I had was good, but I wanted better. I started to perform research on various items that could help with rearranging my workbench and try to make it a bit more efficient and of those that I found, the modules from HobbyZone intrigued me most. It was mainly because most of the modules were to the same size and could interlock with each other. That way you're not accidentally moving a workbench item due to use: it takes some force to move large items on your workbench when they're "stuck" together.
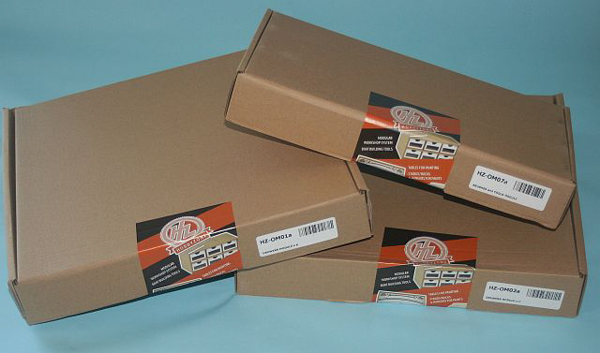
I contacted the owner of HobbyZone USA and told him of my wants. He offered to give me a discount on three modules so I would provide a review of them. So, here is that review.
I decided on three modules: OM01a Six-Drawer Module; Om02a Three-Drawer Module; and OM07 Brushes and Tools Module. I thought these three would be the best for the start of my re-designed workbench. There were aspects of my older workbench I liked, mainly having a "turntable" to hold the liquid items I used frequently (like all glues, some paints and the decal solutions) along with all my drills and drill bits, etc. Those are in such awkward containers that all of them won't fit into any of the drawers and I had them on the turntable before, so left them where they were.
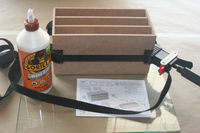
All HobbyZone modules need to be assembled by the user. Not a problem for modelers, but it helps having the right tools for the job. I needed wood glue (I used Gorilla Wood Glue), some sort of clamping system and a hammer to tap in the magnets. Oh yeah, forgot to mention the magnets. In order for the modules to "lock" together, HobbyZone uses rare-earth magnets to keep the modules together. Ingenious, I thought.
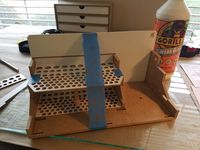
I used two types of clamping systems: an actual, flexible clamp that could hold square and rectangular items; and painter's tape. The tape definitely helped with gluing together the Brushes and Tools Module.
OM02a Three-Drawer Module
|
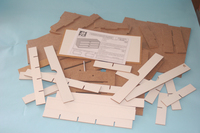
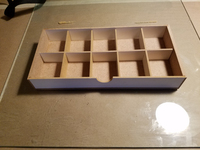
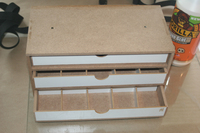
I first decided to assemble the three-drawer module. It was this one I used the flexible clamping system on and that worked really well except for one aspect: I over-tightened it, resulting in a slight bow to the top of the module. It's not a lot so doesn't affect the magnets' holding ability, but it is obvious when another module is placed on top. So if you have a flexible clamping system, don't over-tighten it, just enough to keep the wood together.
|
|
When gluing the wood together definitely use enough glue which means it will squeeze out from the adjoining surfaces. Just use some type of damp rag to wipe the extra away.
|
|
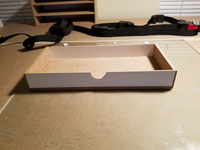
Overall the unit went together really well and I had no issues. The drawers didn't need to be "clamped" and it would have been difficult to do so, anyway. The nice thing about the drawers is HobbyZone include extra pieces so the insides of the drawers can be partitioned to your heart's content. Just be aware they're not a very tight fit so items like paper or sandpaper could slip under, unless you glue the partitions down. But doing that would take away the dynamics of adding or removing these partitions.
OM07 Brushes and Tools Module
|
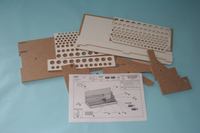
The next module I worked on was the tool module. This one takes a little bit more planning to assemble but is still not difficult to put together. Definitely follow the instructions because pieces of the module go together in a specific order. As you can see it was here that I used the blue painter's tape to help keep things together while they dried.
|
It was with this module that I also learned a valuable lesson: test your magnet's polarity before you put the magnets into the wood. I thought I had but it's easy to flip the magnets around while you put them in so there were a few I had to push out to flip around correctly. It was also here that I knew it was good that I put the magnets in correctly in the three-drawer module, and used that to test the other modules.
OM01a Six-Drawer Module
|
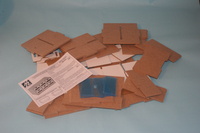
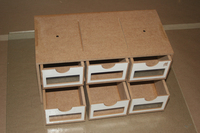
The last module I assembled was the six-drawer module, and this one actually took the longest time. That's because not only are you assembling the main unit but you also have to assemble all six drawers. Here's a very important note if you're going to build this one: the clear parts that are added to the front of the drawers (so you can see their content) have protective film on both sides of the clear. Both sides. Remember that. And you must remove the film before you glue the drawers together, capturing the clear parts. Very important, trust me.
|
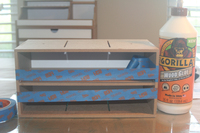
As I mentioned this one took me the longest and I also ended up using large books to keep the main unit together while it was drying. I ended up gluing the horizontal middle piece first to the ends, using the top and bottom - unglued - to keep everything in place. Then I glued the bottom vertical, center pieces to the horizontal center piece again, using the top and bottom piece - unglued - for stability. I then followed suit for the upper, vertical center pieces. It was only after those were dried did I glue the top and bottom to the whole unit, using heavy books to keep everything in place.
|
Now it was time to assemble the drawers and since there are six, it's just a matter of taking the time to assemble them. I used painters tape to keep these together while drying. Unfortunately I prematurely deleted all the photos I took during this procedure so you can't see how I did this.
|
Conclusion
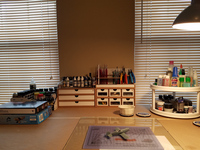
Now that I had all the HobbyZone module assembled I could start thinking about how to populate them, and how to continue to populate my new workbench layout. Inside the Three-Drawer Module I have sanding sticks/pads and paper in the bottom drawer (having removed the partion piece), and files in the second drawer (again, removing the partition piece). The top drawer has yet to be fully populated but my plan is to put toothpicks, water/soda bottle lids (for when I mix expoxies, etc.) and other smaller items like that, inside the partitions.
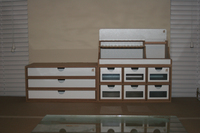
I also need to finish populating the Six-Drawer Module but so far one drawer has clamps, another has all the new knife blades, one drawer holds Tamiya tape and tape dispensers, and one holds small parts for the Eduard 1/72 Avia B.534 Series IV you see in the final picture. You can see how I populated the Brushes and Tools Module.
|
As you can also see in the final picture, I picked up two non-HobbyZone units as well. Since I'm not tied into one specific system I could "mix-and-match" to my heart's content. The unit you see on top of the HobbyZone Three-Drawer Module is from Coherent Design in their Dr Paint Rack series and is the Wall Mountable 32 Bottle Holder. The other unit to the left (looking at the picture) is the Vallejo Corner Module. Even though I have a whole bunch of paint, my plan right now is to use those two paint holders to hold paints I use frequently and ones for the current project(s), along with onsies and twosies of non-Vallejo paints. For example, I'm going to try True-Earth paints at some point and have picked up their paints I wish to try. Those are in the Dr Paint Rack for future use.
I think I have my workbench to a functioning level, now. Sure, I can always add more modules/units as time goes by, but right now it's functional and I'm happy with it. I have drawers in my workbench/desk where I contain items I use all the time (knifes, tweezers, Hobby Elements files, stepSanders, etc.) so I think I'm good to go.
My thanks to HobbyZone USA for the discount on their modules.
