 There are some things that you just expect in this world: The sun comes up in the East. You must pay taxes. And as an absolute – Batman always has a myriad of toys and vehicles at his immediate disposal. Joel Schumacher's 1995 Batman Forever is no exception. In addition to the Batbelt accessories and of course the awesome Batmobile we get to see (albeit briefly) the latest incarnation of the Batboat. Being a Batman collector as well as a modeler I purchased the Revell 1/25 scale Batboat (kit #6722) as soon as I could and promptly shelved it for a rainy day. I finally got to it this summer (go figure).
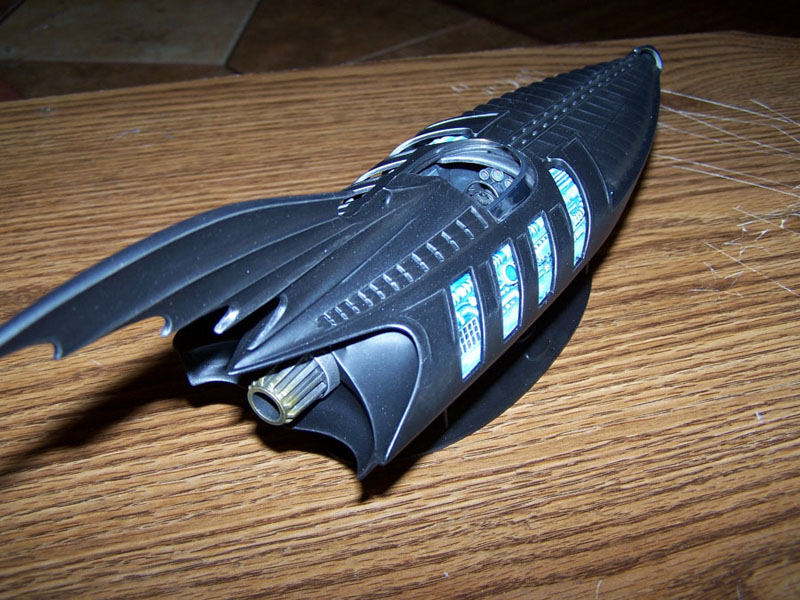
The Revell offering comes in a box roughly shaped like that of an auto kit. It is adorned with painting of the Batboat on the top and a few photos of a basic built kit on the sides for reference. Three black, one chrome and one clear sprue along with decals and instructions complete the package. I could immediately tell this kit was going to be more about painting than building. Time to get to work!
Assembly
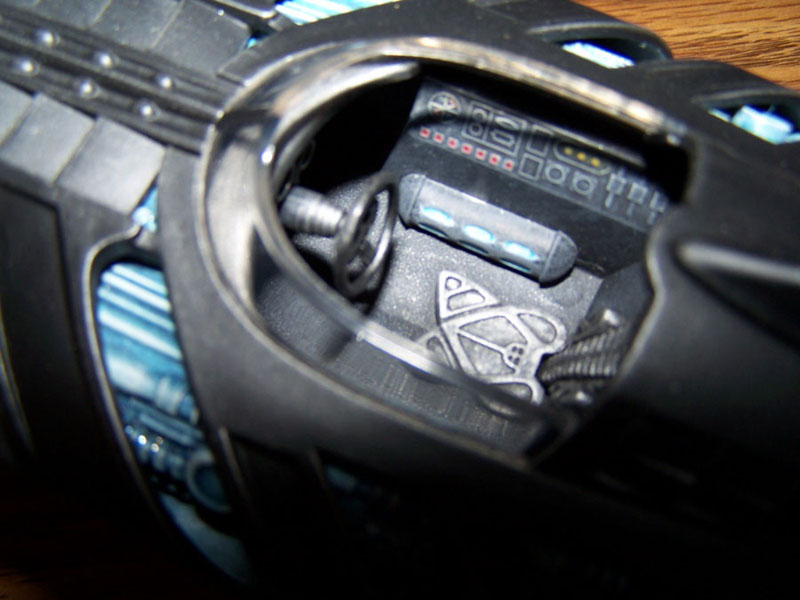 As with many types of kits I started with the cockpit. The instructions offer little in detail and even less in reference to what was used in the movie. The few on-screen seconds and a little imagination was the best I could do. The cockpit parts were painted semi-flat black, even the chrome canisters on either side of the seat (the chrome stood out too much in a very small, dark space). After the tub and steering column subassemblies were together I dry-brushed all surfaces with medium gray to break up the monotone look. The instrument panels were then dry-brushed white and then the details were painted red, blue, yellow, etc. Decal gauge faces were added to the steering column and then the whole assembly was dry-brushed with graphite to tie everything together.
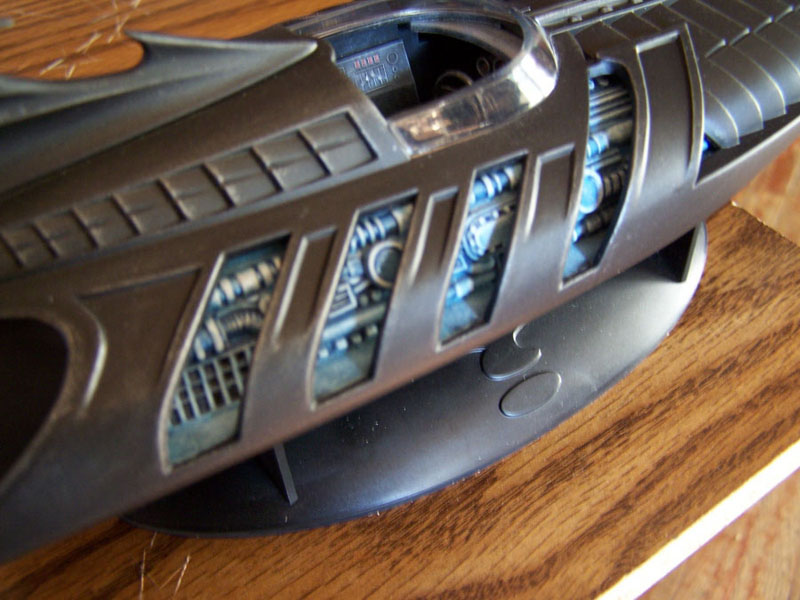
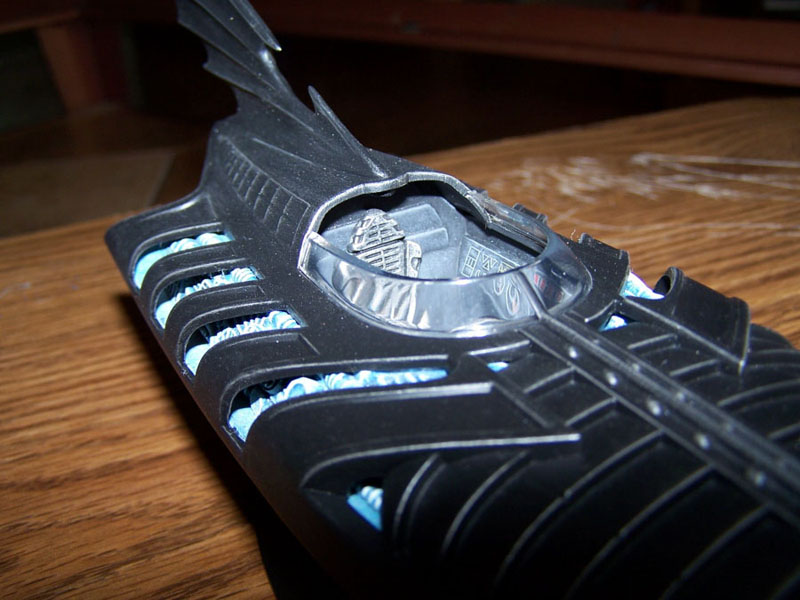
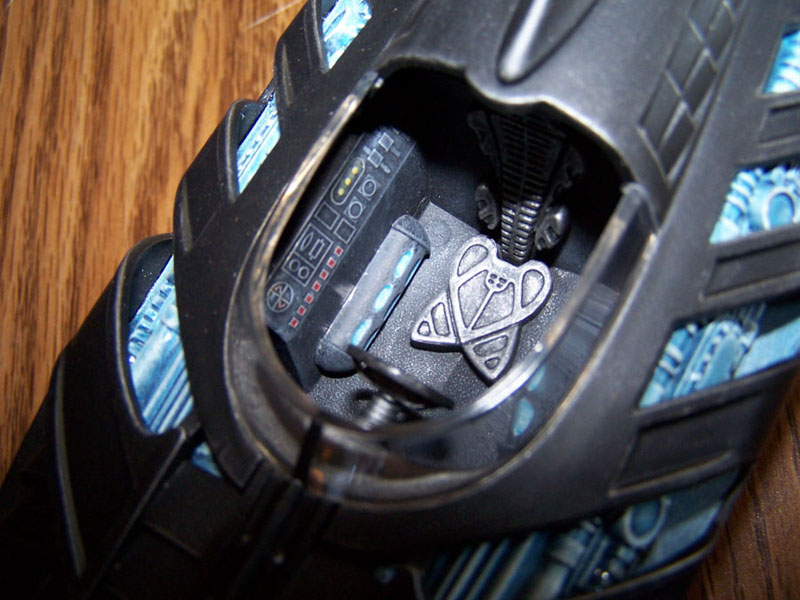 Next to be painted was the luminous underdeck panels that lie on either side of the cockpit, running longwise along the top of the hull. In the movie they were most definitely “lit” and I wanted to reproduce this effect without using actual lights. I painted a basecoat of dark blue right over the chrome parts. This will be the darker color deep in the shadows of the detail. After drying for a day I dry-brushed a couple of layers of powder blue over the dark, hitting only the raised details. Then a wash of thinned down black was applied to assorted details and allowed to dry completely. A third layer of powder blue was then dry-brushed. After that was completely dry two layers of bright white were dry-brushed to bring out the highlights of the raised detail. I used this technique for the openings on the canisters inside the cockpit as well.
 After all was dry I started on hull assembly. The cockpit and two upperdeck panels were attached to the upper hull. Then the four hull pieces were joined to make it whole. The bow cap and upper fin pieces were added. Filling and sanding were minor and went well. Using a small pick I set about filling the openings for the upperdeck panels with pieces of damp paper towel. Then the cockpit was masked off. The whole assembly was given 3 coats of semi-flat black Ace hardware spray paint. I find the semi-flat black (as opposed to semi-gloss paint) works best for Batman related projects. After a day or two of drying I removed the masking and reminded myself: You're almost done… Don't mess up now!
 I really wanted to bring out more of the molded-in detail on the hull. After rolling it around in my head for a night I decided to do a test on the upper hull. Very lightly I dry-brushed a patch of graphite on the detail at the center. It looked pretty good so I did a little more… then a little more. Before I knew it I was almost done. I went over it a second time to even the color out a little and to darken the color a little more.
Final assembly went really fast. I painted the tailpipe graphite and gave it a quick wash of thinned black. When that dried I dry-brushed it with bright silver and a little jet exhaust then attached it to the transom. The brace in the center of the windscreen was painted black and was fit onto the top of the cockpit (the fit was so good it needed no adhesive). My final act for the Batboat was to take the parts for the stand included with the kit and promptly throw them away… I'll have to come up with something better sometime.
Conclusion
 All told I spent about 3 hours actually building this kit. I spent closer to 8 hours painting it, give or take. The kit is a great representation of the really cool but short-lived Batboat and thus, continuing on the tradition of Batman making a better one for next time. Because of the black paint scheme and “lit” panels this subject presented an interesting challenge. Having been a modeler for nearly 30 years I have had my share of dry-brushing for the purpose of weathering or shadowing. This is my first attempt at using this technique to represent actual “lighting” and I really enjoyed the challenge. Now, where did I put that Batmobile kit?