From Internet Modeler
Fine Mold's 1/72 Type A Japanese WWII Mini-Submarine
By Richard Eaton
Jul 1, 2002 - 4:32:23 PM
Introduction
I am a nut for WWII submarines. When I toured the Nimitz Museum in Fredericksburg, Texas, I saw the IJN Type A mini-submarine in an incredible display. After that I just had to model one. Barring a vac kit put out some time ago I knew of no other kit. Then when I was perusing HobbyKit Japan's web store I came across a great surprise! They sell Fine Mold's 1/72 injected Type A! I purchased it and was delighted when my order arrived only a few weeks later. If you are into mini submarines of WWII, read on.
History
 From 1934 to 1944, the Japanese Navy built several dozen midget submarines for combat use. They were originally intended to be carried by larger Japanese ships and deployed in the path of an enemy fleet, where they would disrupt its operations with torpedo attacks. However, during the Second World War, the midgets were used for special operations against ships in enemy harbors, among them the 7 December 1941 Pearl Harbor attack and May 1942 raids on Sydney, Australia, and Diego Suarez in the Indian Ocean. The boats also were employed off Guadalcanal in 1942-43, where they achieved modest success against U.S. shipping, and as shore-based defensive units in the Aleutians and elsewhere in the Pacific war zone.
 The Japanese Navy included five Type A midget submarines in the Pearl Harbor raid of 7 December 1941. Transported on board large I type submarines, the midgets were launched near the entrance to Pearl Harbor the night before the attack was to begin. One, spotted trying to enter the harbor before dawn, was attacked by USS Ward (DD-139) and presumably sunk in the first combat action of the as yet unopened Pacific War. At least one of the midgets was able to enter the harbor and was sunk there by USS Monaghan (DD-354). A non-functioning gyrocompass prevented Ha-19 from entering Pearl Harbor. After many adventures, she went aground at Waimanalo, on the east coast of Oahu. The submarine and her pilot, Ensign Kazuo Sakamaki, were captured on 8 December. Ensign Sakamaki was the first Japanese prisoner of war taken by the United States during the Pacific War. Ha-19 was salvaged and later sent to the United States' mainland, where she was featured at War Bond drives throughout the country. After the end of World War II she was exhibited for many years at Key West, Florida. In 1991, Ha-19 was moved to Fredericksburg, Texas, where she remains on display at the Admiral Nimitz museum.
The Class
 Type A midgets displaced 46 tons, were 78 feet long and carried two 45cm (17.7") diameter torpedoes. Powered by electric motors, they were capable of very high speeds (about 20 knots), but had very limited range. To increase endurance, the prototype Type B and production Type C boats were fitted with a diesel engine to recharge their electric batteries. They had an additional crewmember, were slightly longer and heavier, but otherwise resembled the Type A.
Approximately sixty production Type A midget submarines were built between 1934 and 1942, and given alphanumeric names in the "Ha" series (Ha-1 through Ha-52 and Ha-54 through possibly Ha-61). The single Type B (Ha-53) and fifteen Type Cs (Ha-62 through Ha-76) were built in 1943-44. The submarine was propelled by a single-shaft electric motor of 600 h.p. Powered by acid-cell batteries, the submarine carried no generator and required recharging by a mother submarine or tender. At top speed (an unbelievable 23 knots surfaced and 19 knots submerged) the submarine's battery charge would last only 55 minutes. However, at a submerged speed of 2 knots, the submarine had an effective range of 100 miles. The shaft connected to two tandem-mounted, counter-rotating propellers, the forward propeller turning right and the after propeller turning left.
In the Box
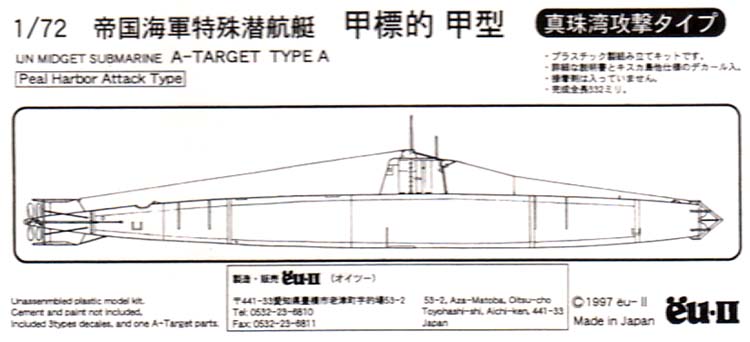
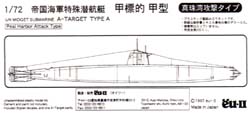 The sturdy cardboard box features a very nice line drawing of the boat. Inside were two sprues of kit parts. One had the hull split in the middle sides. The other contained the conning tower, aft fins and rudders and the various kit parts. The parts are molded in hard black styrene and feature engraved panel lines and excellent fine detail. There is little to no flash. The hull detail is very tastefully done. Kit instructions are in Japanese but feature seven excellent assembly drawings that leave nothing to the imagination. The last page of the instructions includes drawings of two possible configurations and markings. Painting suggestions were in English and Japanese. Anti-fouling rigging was represented.
Kit decals include markings for four different boats. The decals were sharp and in register.
Building the Type A
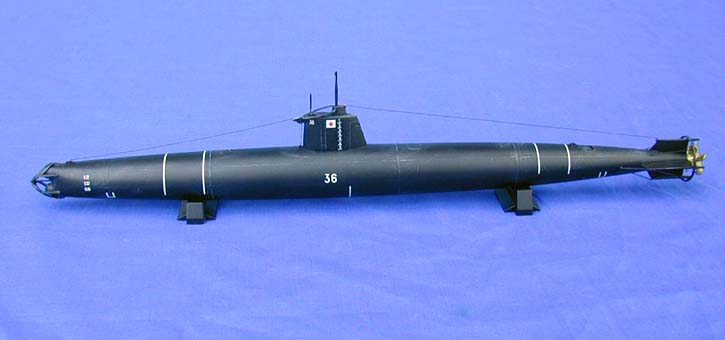
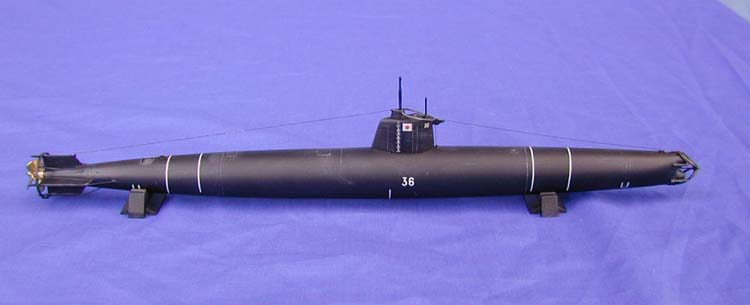
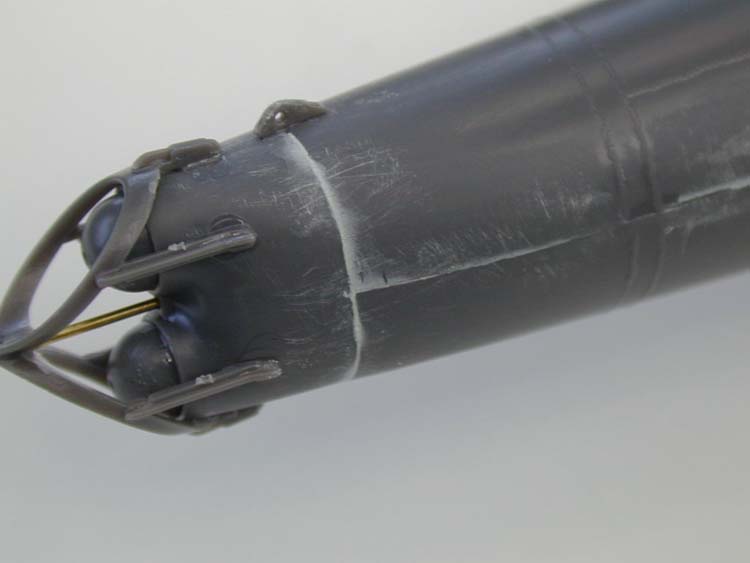
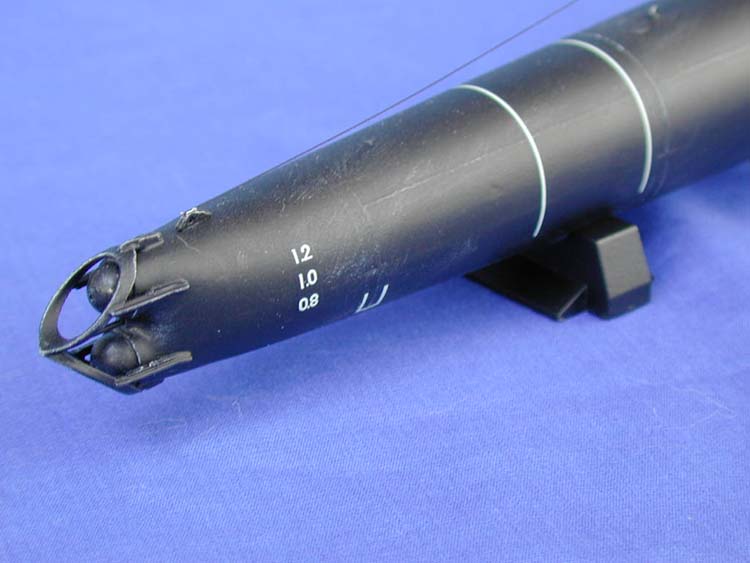
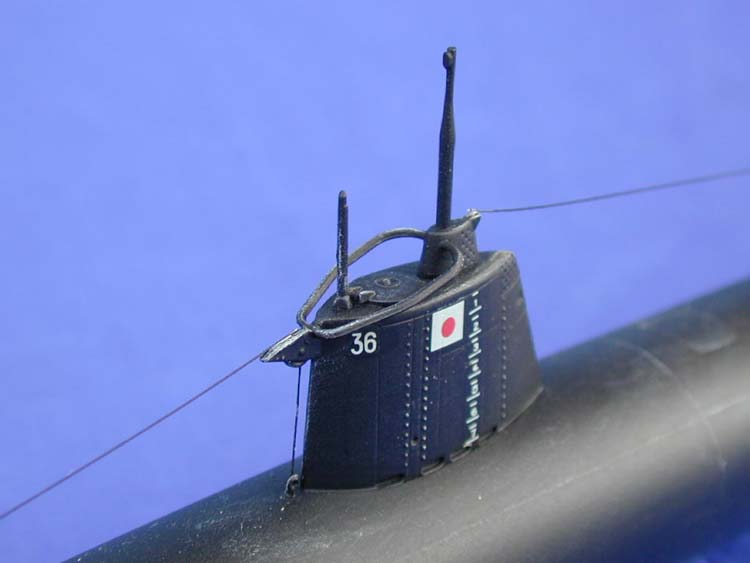
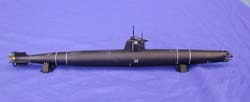
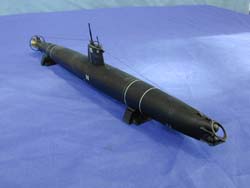
Diving right in I cut off the hull parts and dry fit them to check fit. Fit was great though I knew already some minor seam filling would be required. I began with step one where the hull, conning tower, rudders, and bow parts are assembled. I glued the hull parts together aligning them carefully to minimize the seams. I added the separate bow piece. The bow of the type A has the distinctive twin torpedo tubes. The torpedo tips are visible protruding from the bow. Each tip was a separate piece and had detonators depicted.
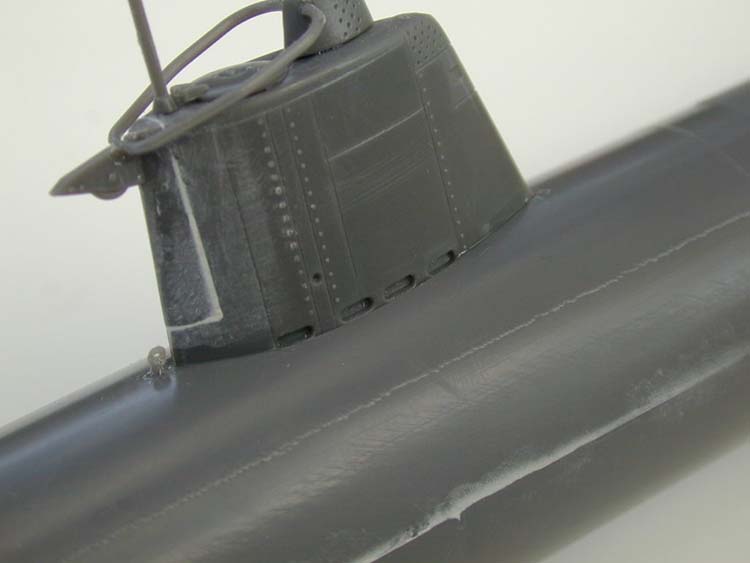
I then assembled the conning tower halves. The leading edge of the tower is a separate piece that could be configured in two ways. A pulley for the anti-fouling wire is molded on but can be cut away for those boats not having this component. The leading edge piece fit was not good. The con fit the hull snugly but I used clear plastic cement to seal up a minor gap. I finished up step one by adding the horizontal and vertical fins/rudders. Having most of the main assembly done I then applied putty to the hull and conning tower seams and let it dry. I then began sanding away using a medium stick until the seams were smooth. Use care here (I masked with tape) to preserve the fine model surface details. I then went over all the seams with a fine stick to buff away any sanding marks. That done I was very pleased with the look of the boat.
In step two I added the periscope and radio antenna to the conning tower. The periscope is very nicely done with a streamlined base. I then added the hatch, which was nicely molded with an access handle. I decided to add what looks like a handrail part to the assembly because I thought it looked cool. Some versions did not have this.
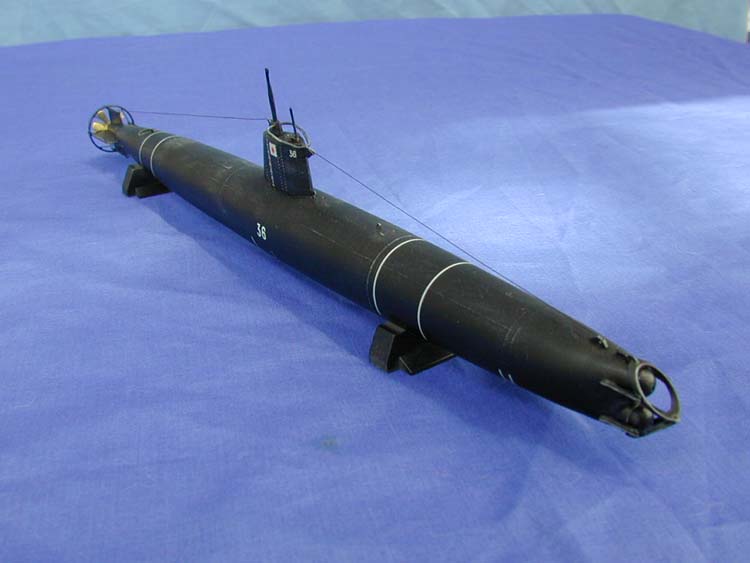
Following step three I added the interesting twin hooped submarine net cutter to the bow of the boat. This was comprised of two circular blades and their mountings. The blades are constructed so the torpedoes fire through them. The center support pole met the hull between the tubes. Six small supports secure the blade sides, top and bottom.
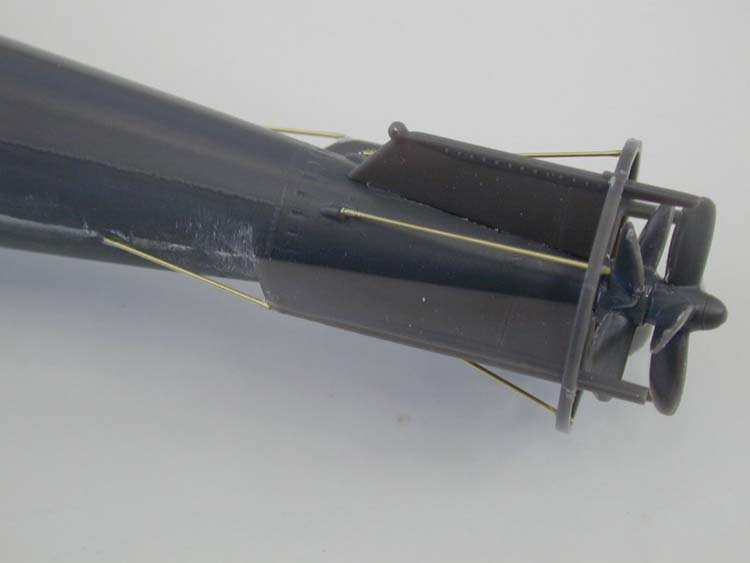
The next step takes us to the stern of the boat. I cut out the twin counter rotating propellers and dry fit them. You will need to go over the props lightly with the sanding stick, as there is minor flash. Once happy I put them on the stern. A finely molded circular prop guard was then added.
A nice diagram details how the rudder anti-fouling rods are made and applied. Following the suggested lengths, I cut .10" brass wire and CA'ed them into place. I used .06" brass rod for the anti-fouling wire along the top of the boat. I then added the mooring point to the bow and stern of the boat. That done all the major assembly was complete.
Painting and Decals
All references I could find had these boats with a very dark gray or black finish. I shot the model with gloss black enamel, believe it or not. After drying for a couple of days I followed the drawings and applied the numerous decals, carefully aligning the various hull stripes, as there are no hull indicators for placement. I chose markings for HA-34 because they looked cool. The decals are thin and look very sharp against that black hull. I sealed the decals with Future to prevent silvering.
Once every thing was dry I shot the entire model with Dullcoat. Once that dried, I dry brushed lightly over the hull with light gray to pop those details out. I then used white pastels to add a hint of sea salt at various points and added a touch of rust here and there. I then sealed everything up with another coat of Dullcoat.
Conclusion
What a fun little build! I just love the sleek look of this fast little sub. I would certainly recommend this kit to the submarine enthusiast. Assembly is nothing an average modeler couldn't handle and kit decals really make the model shine. As I mentioned earlier I got this kit from the friendly folks at HobbyLink Japan.
© Copyright 2023 by Internet Modeler