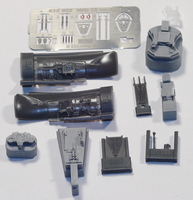
Eduard 1/72 MiG-15 Brassin Cockpit
By Matt Bittner
In today's age, it's not long before you start seeing aftermarket released for a new kit. When the aftermarket comes from the company producing the kit, then the release is usually even sooner. This is definitely the case with Eduard.
Their initial MiG-15 release back in 2012 was a short one - only a handful of kits made before the mold failed. Then came E-Day 2013 and another new MiG-15 release, this time the entire mold was steel. Unfortunately they found a small flaw within the kit so decided to re-do the molds again. Now, thankfully, everything is much better so they can crank out more MiG-15s. What this means, though is the "straight" MiG-15, right now, isn't easy to find since that's the mold they've re-done. If you're lucky enough to have one or more (don't worry, it's being re-released in a couple of months) then you definitely want to think about using this cockpit set.
Out-of-the-box the kit is very good. If you want to close the canopy the cockpit is "good enough". But if you enjoy lots of detail then their separate Brassin Cockpit (#672 022) is definitely the way to go. There are ten pieces of opaque resin, one clear piece of resin (for the gun sight) and one fret of photoetch consisting of 20 pieces.
 Assembly starts with building the seat. While there are only two resin pieces for the seat, there are a lot more photoetch. Seat belts, a headrest "stop", handles, plenty that will make the seat look really awesome. Once assembled the seat is added to the floor, more smaller parts (including the control stick) added, the front bulkhead glued on and once it's painted then the cockpit sides (also painted) are glued to the floor. The instrument panel is also added at this time, along with the rear bulkhead.
After performing a small bit of plastic surgery to the area under the windscreen the cockpit is added to a fuselage side and the fuselage sides are glued together. There is one option to this set, and that's if you decide to make your MiG-15 a MiG-15SB (bomber, I believe). If that's the case then you'll need to add another part to the gun sight after painting both. Once that is accomplished then you finish construction by adding the gun sight, adding the pieces of resin and photoetch to the area behind the seat, and a couple of small photoetch pieces to the cockpit side.
Using this cockpit in place of the kit's cockpit will really add a lot to the level of detail to your MiG-15.
My thanks to Eduard for sending this cockpit set to review.
