Revell 1/48 Mercury & Gemini Capsule Set
By Jay Chladek
Introduction
Continuing a trend of space kit reissues that started with the Apollo anniversaries and which has progressed with the retirement of the Space Shuttle fleet this year, Revell has been continuing to pop out kits of old spacecraft models that have been out of production for awhile. The newest re-issue is the 1/48 double model kit containing both the Mercury and Gemini spacecraft which was first offered by Revell in the mid-1960s. Compared to the 1/48 Apollo kit reissue from a few months ago which only ever comes out very rarely, this kit has been offered quite a few times over the years. In the mid 1980s, Monogram issued the model as part of their "Young Astronauts" kit series. Revell issued it as part of their Selected Subjects Program (SSP) in the late 1990s and then as a Gus Grissom two kit in honor of his flights aboard Liberty Bell 7 and Molly Brown. And now we see it again in Revell's SSP packaging. So just how good is this kit and has it survived the test of time?What You Get In the Box
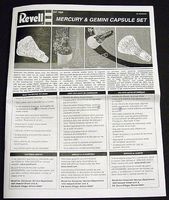
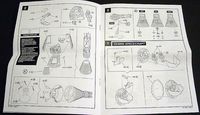
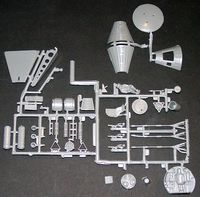
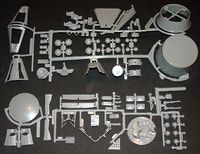
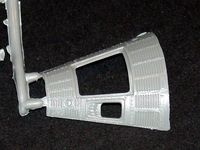
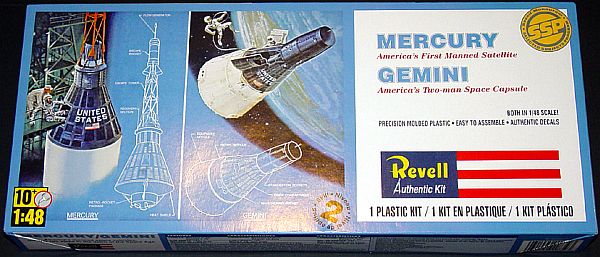
The newest issue of the Revell Mercury and Gemini set comes packaged in a box that is reminiscent of the original box art from the 1960s. But unlike the previous SSP offering, this one includes some updated graphics in spots to make it easy to distinguish this newer boxing from the earlier offerings. The box contains over 140 parts molded in medium gray styrene, a decal sheet and a sheet of clear acetate plastic to make the windows on the spacecraft. At a glance, the mold looks like it has held up reasonably well over the years, although some of the parts do have noticeable flash in spots and some of the details seem a bit soft. But it looks like everything that should be present is.This kit documents an interesting transition point in the space program, as it was originally designed about a year after the Mercury program had concluded with Gordon Cooper's flight aboard Faith 7 and came out just before the first Gemini flight in 1965. One model represents a well understood spacecraft while the other one represents a vehicle that hadn't yet flown. So there are some accuracy issues to overcome, depending on which versions of each spacecraft you plan to build.
The Mercury
The Mercury kit represents the vehicle configuration that had been used during the majority of the flights except for Al Shepard's Freedom 7 craft. It features a main window for the astronaut to look out. Shepard's craft (and ones used in early unmanned and Chimpanzee test flights) featured two small round portholes offset on angles from either side of the pilot and a thick smooth side hatch. Some modelers have been successful in converting this kit into a Shepard version by using the exterior bits from two model kits, but it isn't something I would recommend to beginners as it involves a lot of careful cutting.The kit has a nicely rendered retro-rocket pack and escape tower. For 1960s molding technology, both assemblies are very well done with wiring and conduit bits, which might be ever so slightly over-scale in spots. But they don't detract from the looks. One drawback with the kit though is as designed, the Mercury can only be modeled with the escape tower in place. In reality, a Mercury capsule would only look like this if it were undergoing a launch abort with the tower pulling the capsule away from the booster. During a normal flight, the escape tower would be jettisoned just prior to the capsule separating from a booster using three posi-grade rockets on the rocket pack bolted to the heat shield. It will take some cutting and scratchbuilding to fix the front end if you wish to represent a Mercury in orbit. But at the same time, the escape tower does practically double the length to the completed model as the Mercury spacecraft is rather tiny otherwise.
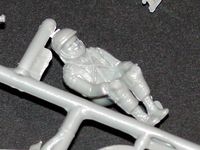
The interior is nicely rendered with a control panel, seat and an astronaut figure, albeit with some simplifications and compromises. A super-detailer could really go to town in the interior as Mercury craft had a lot of relative clutter compared to aircraft cockpits. But a modeler likely won't see much in there unless they shine a flashlight inside. Each Mercury spacecraft was a little different in its equipment fit, so consult references depending on which mission you plan to build. Spacecraft in Miniature SIM book #5 on the Mercury Spacecraft is an excellent resource. RealSpace Models also makes a modestly priced resin correction set for the kit which allows modelers to correct several of the flaws and display the capsule in either launch or on orbit configuration. One version of the correction set also includes a replacement outer shell for early style porthole capsule.
The Gemini
The Gemini kit looks almost as good as the Mercury as it also features a nicely detailed interior with two astronaut figures. The model also includes a rather heavily detailed service module with elements of the craft's propulsion system and consumable tanks rendered. All these little bits made the 1/48 Gemini and its 1/24 cousin favorite detail parts donors for science fiction movie models built from the late 1960s until the early 1980s. On the real vehicles though, a lot of that detailing was never seen as the back of the Gemini service module was obscured by a gold foiled bulkhead cover.Like many other Revell space kits, the Gemini suffers a bit from "prototype syndrome". This means in their rush to get the first kit of a spacecraft (or aircraft) to market, they tend to give the model features only found on either the earliest spacecraft, or non-flying mockups. Since the Gemini kit was designed about a year before it flew its first manned mission, the Revell Gemini is no exception. The biggest error involves the cresent shaped cutouts on the capsule just in front of the hatch doors and viewports. On this kit (as on the non-flying mockups and trainers that NASA used) the cutouts go about three quarters of the way up the capsule in front of the hatches and curve back in a gentle crescent. On the flight articles, these cutouts went all the way up to the cylindrical snout that housed the forward thrusters and the parachutes. The interior is also a little simplified as the interior seats aren't very good matches for the actual Gemini ejection seats. The instrument panels are nicely rendered though for their size. Given how Revell offered a nice set of decals for the interior of the 1/48 Apollo CSM, I was hoping they might have given the Mercury and Gemini interiors the same treatment. But unfortunately, they did not do that in this case.
Even if the front cutouts are corrected, the boxy reaction control thruster housings on the kit are a little different from those used on the majority of the Gemini flights. In addition to the first two unmanned flights, the only manned Gemini that these original thrusters were used on was Gemini 3 (a.k.a. "Molly Brown"). Apparently, the original thruster design was prone to leaks. Since Gemini 3 was a short duration mission only lasting a few hours, it was decided to use the original thrusters and not fly the redesigned ones until later. All subsequent missions from Gemini 4 onwards used beefier thruster housings. Thankfully, RealSpace Models comes to the rescue again with a resin correction set for the 1/48 Revell Gemini. It contains resin pieces to correct both the front cutouts and the thruster housings, in addition to providing a vacu-formed cover for the rear of the service module. It also provides different instrumented front ends for the capsule and a set of pitch/horizon scanners for the nose. The Revell kit provides only a set of covers for both these areas. The covers are jettisoned when the craft reaches orbit. RealSpace also makes a 1/24 set to correct similar errors found on the larger Revell Gemini kit as well. Both correction sets only fix the exterior bits though, not the interior. But other conversion sets from various firms have been (and continue to be) offered to correct the internal issues. One unique feature which the Gemini kit has though is a set of landing gear struts and covers. Early in the Gemini program, NASA was trying to develop an inflatable cross between a parachute and a wing known as the "Regallo" Flex wing (named for its designer). If used, this would have allowed the Gemini to safely glide to a landing on land rather than splashing down in the ocean to be hauled out by the US Navy. The wing would deploy instead of a parachute and inflate into a semi-rigid shape. On final approach, the three gear struts would pop out to cushion the touchdown. Prototypes of the wing were developed and tested on both a motorized para-plane and a boilerplate Gemini capsule. But the concept was behind schedule and over-budget. So it was scrapped in favor of a traditional parachute. Even with this setback though, the Regallo flex wing did help to spawn the popular hang glider and ultra-light aircraft movements of the 1970s and 80s and a similar concept may find its way into a future spacecraft recovery system.The gear struts offered in the original kit were deleted from reissues offered in the 1970s and 80s. They were reintroduced with the previous SSP offering of the kit and are also present in this one. They allow the modeler the chance to build a Gemini as it was originally conceived for an interesting "what if". The separate door covers mean that a little more assembly is required for a clean Gemini, but it is nothing a typical modeler can't overcome.
Other Features
Both the Mercury and Gemini kits features some nicely done display stands with a ball and socket (i.e. the infamous "Revelling" stand feature) to allow the models to be posed in different positions. The fit of these kits requires a bit more modeling skill than a typical modern day "shake and bake" kit. So expect to use filler in spots. Liquid Solvent glue would probably be best for assembly, since it would allow a builder to coax and massage potentially troublesome parts into place.
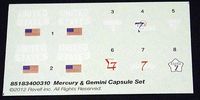
The decal sheet is a rather simple affair, only featuring two pairs of panels with "United States" and US flags. All the manned Mercury spacecraft insignias are nicely rendered from Al Shepard's Freedom 7, all the way to Gordon Cooper's Faith 7. Both Mercury and Gemini craft have carried more markings than that though and these sheets fall a bit short of some of the offerings found in the Revell of Germany 1/24 Gemini reissue and the Dragon Gemini kit. But there are quite a number of aftermarket decal sheets that have been issued over the years, containing more extensive markings for both craft if a modeler desires them. Some of the companies that have done markings include New Ware, Space Modeling Systems (SMS) and Indycals.net. New Ware and SMS stuff can be found at CultTVman.com, as well as other vendors.There are also conversion kits out there to allow the Mercury to be paired up with the Glencoe/Hawk 1/48 Jupiter C rocket kit in order to turn it into a Mercury Redstone. A couple of resin kits for both the Mercury Atlas and the Gemini Titan of varying quality have also been done. These could be combined with the capsule models for a nice display as well.
Conclusions
It is very nice to see this blast from the past around again. While it has its flaws, the Revell Mercury and Gemini Capsule set is a nice offering from the era when spaceflight commanded the world's attention. It can be done out of the box for a bit of a nostalgia flare, yet there are plenty of resources already out there for those who desire turning these models into a set of contest quality display pieces. There are also plenty of detail parts that could be scrounged for other space projects (either hypothetical or science fiction) as well. Price-wise, the kit retails for about $20.00 US, so it won't break the bank. Given the age of the molds, I would say intermediate model building experience is required. But anyone who has built a few vintage Revell or Monogram kits should find no trouble building these, as long as they know that some coaxing and filler might be needed in spots.
Our thanks to Revell for supplying the review kit.

