Revell 1/48 Apollo Lunar Spacecraft
By Jay Chladek
Introduction
Throughout the past three years with the 40th anniversary of the Apollo 11 mission and the retirement of the space shuttle, we’ve been seeing a plethora of space kit reissues from most of the major manufacturers. If they did a kit long ago, it was coming back out. During the 1960s, long before its merger with Monogram, Revell USA was the king of space models. Mercury, Gemini and Apollo, Revell had a kit, usually before anyone else. One of the most desired kits during that time of the Apollo 11 mission was a 1/48 scale model gift set featuring the complete lunar spacecraft of the Apollo Command Service Module, the Lunar Module and a portion of the “LM garage” as it were, the top of the S-IVB rocket stage which contained the flower like petals that housed the lunar module. As a final piece, the set also included the launch escape tower, the tractor rocket designed to yank the command module to safety should the mission experience disaster shortly after launch.
Over the years, this kit became something of a “holy grail” kit since after its first release, it has not been reissued very often. It came back for an all too brief appearance in the early 1980s in the Revell “History Makers Series”. In 1994, Revell of Germany reissued it, but with international kit distribution being what it was at the time, the kit was not readily available in the US and it got snatched up quickly from the few places that carried it. The LM itself was reissued by Revell of Germany two years ago, but due to distribution rights, it was not available in the states. So this summer, there was eager anticipation when Revell USA announced the kit was scheduled for re-release.
What You Get In the Box
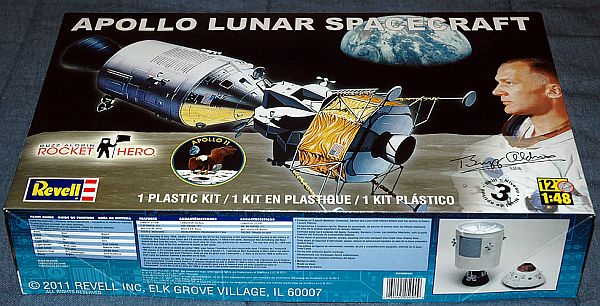
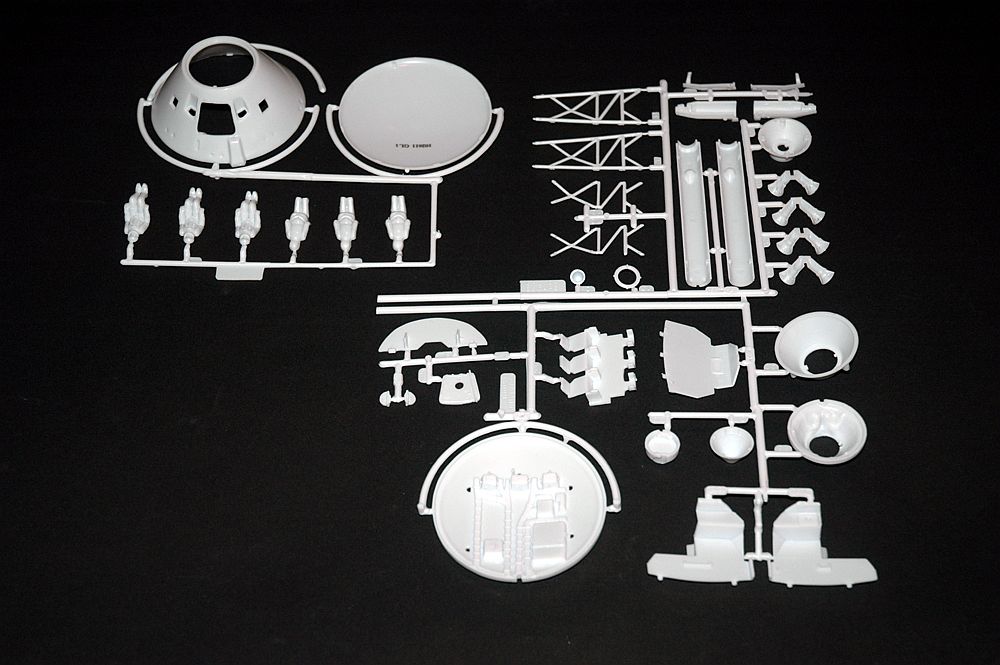 The box for this kit uses art from Revell of Germany’s 1/96 Apollo CSM and LM kit in combination with Buzz Aldrin’s mug as Revell is offering this under the banner of the “Buzz Aldrin: Rocket Hero” Apollo kits first issued two years ago. Inside the box are 171 parts molded in opaque white plastic and packaged in three bags along with the instructions and a decal sheet. One nice touch on the instruction sheet is every part number has a description name for it, so modelers can learn a little bit of Apollo terminology at the same time. I do sometimes wish that Revell would have just reprinted the old instructions for a bit more of a nostalgia feel though.
 I have one of the 1994 kit issues and based on what I can see, the molds seem to have held up well over the years. Surprisingly there is not much flash at all on the plastic and the parts detailing for the most part still looks pretty crisp. Detailing on the rest of the parts looks nice and petite with raised panel lines and rivets. I had some concerns as to if this kit might see the light of day again as part 95, the lower support ring section for the LM garage was showing signs of mold damage as some of the details were wearing off the mold. It looks like the same part in the current issue has the same problem as there is a section of a saw-tooth shaped band which runs around the ring has some crescent shaped marks in it. It could be patched with a little filler putty though. It doesn’t look like the damage has migrated to any where else, so the parts should build just fine.
If you remember the Revell Gemini kit, the Apollo is very similar as operational features were a hallmark of Revell space kits (and many model kits) of the 1960s where play after the build was supposed to be just as much fun as the build itself. So with the model, an entire Apollo mission could be simulated. So, launch has the LM in its garage and after the escape tower is jettisoned, you rotate the CSM around to twist lock onto the LM and extract it. Fold the legs out on the LM and prepare for landing while a folding door on the service module allows you to see the craft’s oxygen and propellant tanks (perfect if you want to simulate Apollo 13). After landing on the surface, detach the LM ascent module from the descent stage and dock it with the CSM, then fly the CSM back to Earth where you can “reenter” it and blow the top cover off to expose the stowed parachutes. Then stack the whole thing back together and do it again. The hatch on the CM could also be opened, revealing its interior and three 1/48 scale astronauts all in their couches.
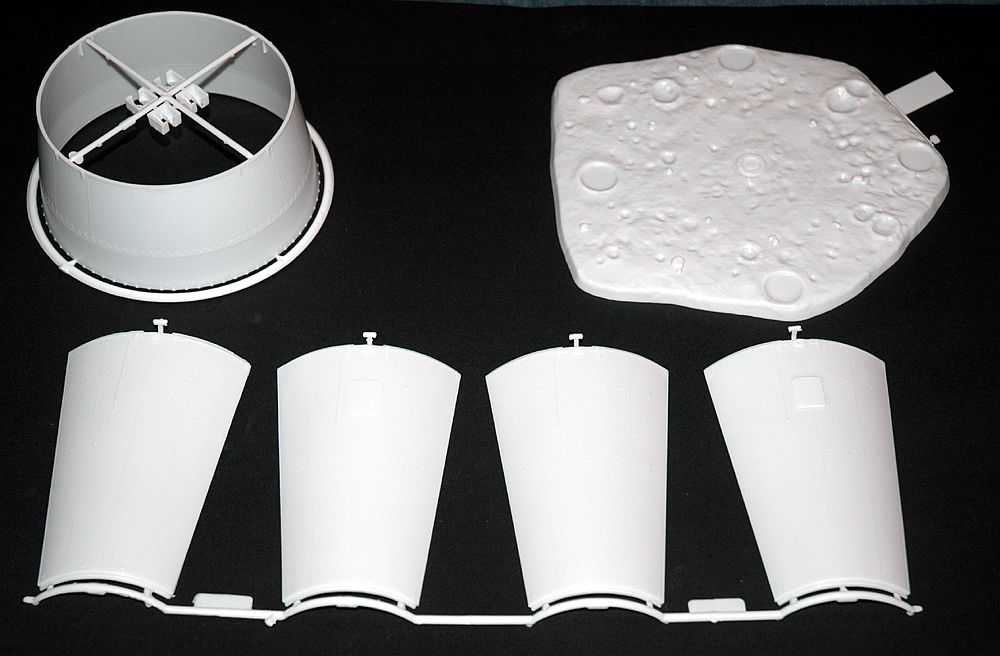 From what I can remember from my 1994 issue, fit is typical 1960s Revell, which is good, but not great and expect to use filler in spots. Due to its play features, there are twist locks and hinges throughout the kit. Care must be exercised if you plan to build this model with operational features as the parts can be quite delicate. A small sheet of clear styrene is provided and from it you will need to cut out the clear windows for both the CSM and the LM. Care must be used to ensure that you don’t put a glue blob on a window where it can be seen. A cratered lunar display base is provided for the LM. This is the display base that Revell offered with the LM by itself and not the one used in previous issues of the gift set. The original Apollo CSM and LM gift set (and the 1994 reissue) had two display bases. One was a square display base for the LM and second base with blue sky and clouds was provided for the top of the S-IVB stage (Saturn Vs are tall, but not THAT tall). It is a pity they couldn’t use the original display base molds.
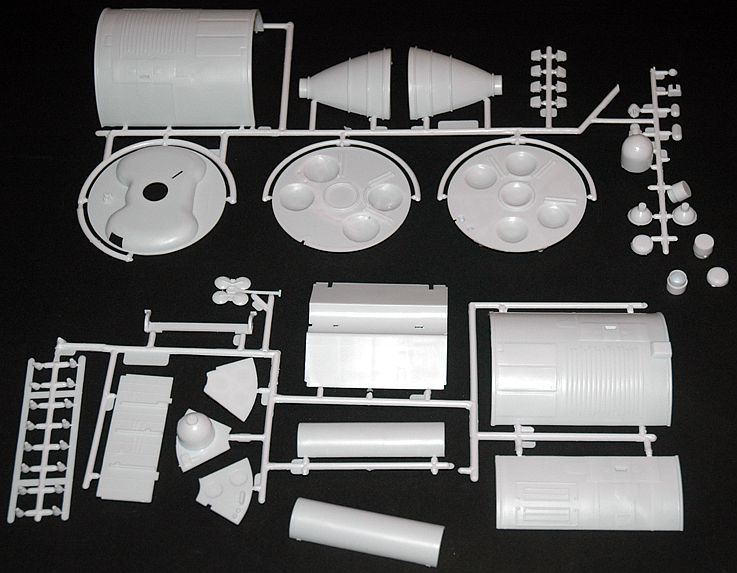 I have some bad news though for modelers who are hoping to build an accurate representation of an Apollo spacecraft as it actually flew to the moon though, this kit is not accurate if built out of the box. The CSM represents a Block 1 command service module and the LM is based on a mid-1960s mockup built before the LM flight articles were even made. The reasons for this are two fold. Block 1 command service modules were built for the early testing of the spacecraft. It took about three to five years from concept to hardware and with all the rapid changes occurring during the Apollo program, North American Aviation (the prime contractor for the Apollo CSM) decided to freeze the Block 1 design so they could get hardware built for the first test launches of the spacecraft while continuing to refine the design on the Block 2 ships. The Block 1 spacecraft were only intended for Earth orbit testing and the test flights were unmanned. If the Apollo 1 fire which killed astronauts Grissom, White and Chaffee in 1967 had not occurred, that mission would have been a manned Earth orbit flight of a Block 1 CSM. Revell designed and issued their kit in 1968 using the Block 1 drawings, rather than waiting for the Block 2 spacecraft to fly. So as a result, accuracy suffered a bit.
The biggest differences between the Block 1 and Block 2 Apollo CSMs were on the Service Module as the external details and radiator patterns changed quite a bit. If you want to accurize it, your best bet is to just sand off all the details completely and use sheet styrene and scribing to add back the correct Block 2 details. The service module engine mount and engine bell will also need modifications as well. The Command Module is pretty good and only had minor detail changes with the main change being the relocation of the cable attachment tunnel being relocated from below and to the right of the entry hatch to 180 degrees opposite of the hatch on the Block 2 ships. The interior of the command module looks good with the three flight couches and the telescope mount on the back wall. The odd bit is a reel to reel tape machine, like what a mainframe computer of the 1960s would use (something Apollo never had). Three crew figures are provided for the couches, but they are wearing Gemini and Apollo 1 style suits instead of what actually were used on the flights to the moon.
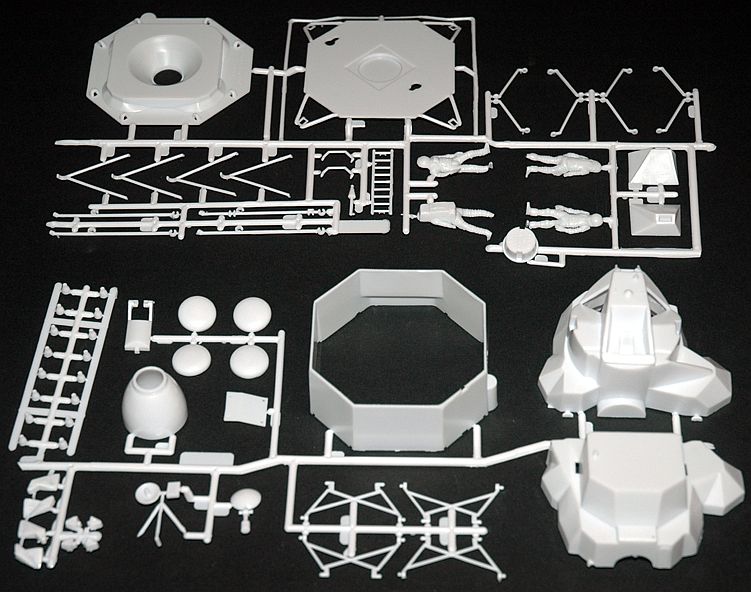
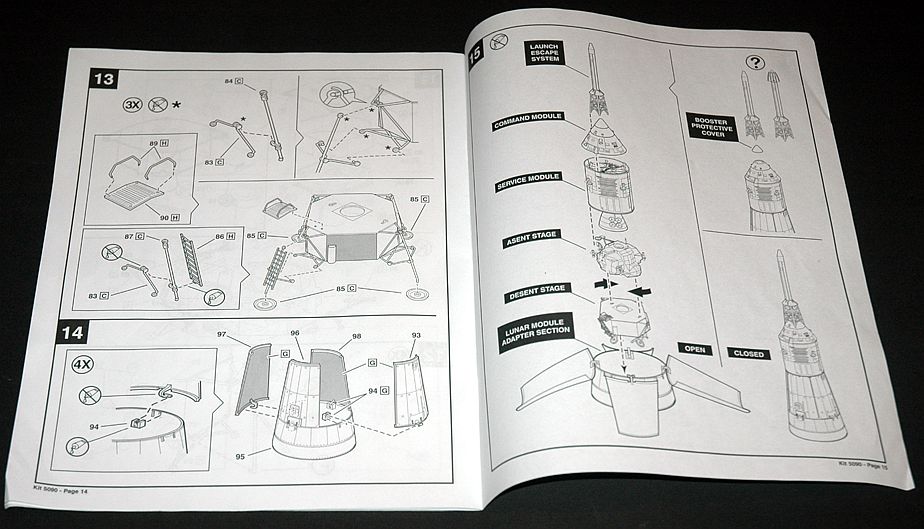 At the time this kit was developed, Grumman hadn’t even flown a production spec Lunar Module yet and the LMs that did fly all constantly evolved over the course of the Apollo program, so no two LMs were exactly the same. The basic layout of the LM is there, yet several of the shapes on the sub-assemblies are not quite right. By comparison, the 1/48 Monogram LM designed for the First Lunar Landing kit is much more accurate to the early LMs, mainly because it came out about a year after the Apollo 11 landing. The Revell LM has no interior and you are supposed to glue in a standing astronaut in one of the windows to block the view. The astronaut’s suit is totally fictional though and the same goes for a second astronaut that is supposed to be glued to the lunar display base.
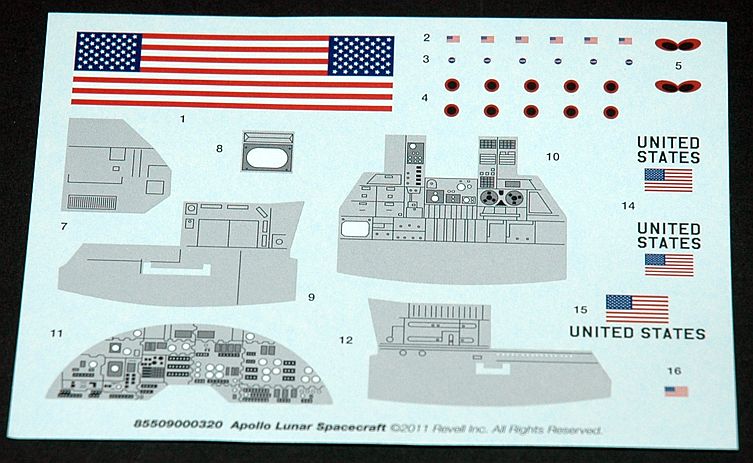
A small decal sheet is provided in the kit. It includes United States and flag logos for the CSM and LM, a large flag decal for the landed LM display and some reaction control system (RCS) thruster port decals for the command module. As an added bonus, this sheet also includes gray instrument panels for the cockpit interior. The displays are pretty rudimentary though as the round gauges are just white and only match what is embossed on the panels in the kit (including the reel to reel magnetic tape bank).
 The escape tower is molded rather well. It even includes two folding canards which were used to flip the command module over at the top of its arc so the parachutes could be deployed. One inaccuracy here though is the escape tower should be paired with a large boost protective cover. The BPC was a covering that completely enveloped the Command Module on the launch pad and it was designed to protect the CM from the motors on the tower, should an abort take place. The BPC was jettisoned with the tower after a few minutes of flight. To build the BPC will require some sheet styrene and a bit of skill (or a spare capsule and a vaccu-forming machine).
Conclusions
With the Block 1 based features and the fact that this model can’t be built as an accurate lunar mission spacecraft as it is, it sounds like I am knocking it pretty badly. Indeed, my recommendation is if you wish to build an accurate model of an Apollo CSM docked with an LM, your best bet is to probably get one of the 1/72 Dragon kits, or pair a 1/48 Dragon CSM with the Monogram Lunar Module instead. There is A LOT of work required to make this kit an accurate Block 2 spacecraft and I have seen plenty of good models built with it, but the path is not an easy one if you wish to do that.
But that doesn’t mean there is no hope for the old Revell kit. The best use for this kit in my humble opinion is to just build this model close to out of the box and have fun with it. The offices of NASA representatives in the 1960s had plenty of similar desktop models on display. Indeed if you watch the movie “Apollo 13” or the HBO mini-series “From the Earth to the Moon” they made use of several of these Revell kits in both offices and mission control. Tom Hanks as Jim Lovell can be seen using one of these models in “Apollo 13” to simulate the mission for his youngest son in the film. So the model makes an excellent visual aid if used in that fashion. I don’t recommend it for a kid though as this is not the easiest of models to put together.
As for serious projects, This model does provide an excellent starting point for someone who might be crazy enough to want to scratchbuild either a Saturn 1B or Saturn V rocket in 1/48 scale. Parts from it can also be used for any number of science fiction model kitbashes. If you want to glue the interior hatch shut, the Gemini suited astronaut figures can be scrounged for use in 1/48 SR-71 and U-2R models since the pressure suits used by the USAF directly evolved from the suits used in the Gemini program. One Apollo kit gets you three pressure-suited figures, perfect for one SR-71 and a U-2R.
I say just build it and enjoy it for what it is. For the vast majority of us, this is what the hobby is about afterall. So thanks to Revell for reissuing this nice bit of nostalgia and sending it in to review.
