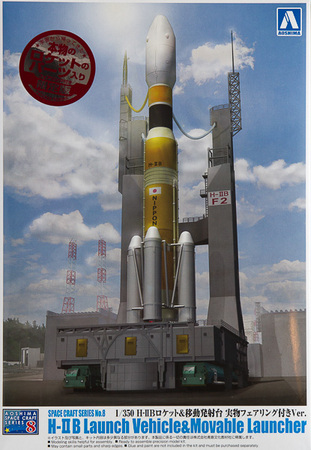
Aoshima 1/350 H-II B Launch Vehicle & Movable Launcher
By Chris Banyai-Riepl
Overview
The H-II B launch vehicle was developed from the earlier H-II A, seeking to build on the knowledge of that earlier design to both improve performance and make the design and manufacturing both faster and more cost effective. The H-II B is capable of carrying up to 8000kg of payload to geostationary transfer orbit, compared to the 4000-6000 of its predecessor. Its first flight took place in September 2009 and since then there have been three total launches. The next launch with HTV4 is scheduled to take place on August 4, 2013.
The Kit
 This is an interesting kit, not only because it provides a detailed model of the H-II B rocket, but also because it includes payloads, the movable launch platform, and even more impressive, a certified piece of the H-II B that went into space on January 22, 2011. That feature gives some fascinating historical weight to the model, and provides more impetus to finishing the kit.
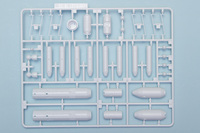
Building this kit will be pretty straightforward, for the most part. Molded in several colors, the kit comes with lots of options, most centered around how to display the finished rocket and how to display the available payload options. Starting with the simple, though, the first step is to assemble the four Solid Rocket Boosters. These are split into right and left halves, and feature a separate exhaust cone. The main rocket body is also split into halves, and has a separate engine section with two separate exhaust cones. Once that is together, the four SRBs can be attached, and the support structure added.
With the base rocket complete, attention can then turn to the payload section. The kit provides two choices for the payload section: solid plastic or clear plastic. If you go the solid plastic route, your assembly is much easier. Just glue the four upper stage pieces together and you're done.
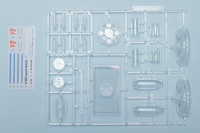 If you go the clear route, there's more to do. First there is the HTV module that fits inside the upper section. This is split in half, so assembling will be simple. Painting is another story, as the HTV has many sections that are varied in color. The finished HTV then gets trapped between the two clear nose pieces, revealing the payload. The section just below that can also be displayed in clear, and this gets a three-piece engine and fuel tank assembly. In both cases the interior bits are simple and could really use some additional detailing to highlight the complexity of these parts.
Whichever way you go, with those two upper sections completed, the H-II B is finished and ready for painting. The painting instructions are given throughout the instructions, so pay attention to each step in order to learn what gets colored what. Looking up some reference photos wouldn't hurt, either. The decals are minimal, and should pose no problem in application.
 With your rocket finished, attention can now turn to displaying the completed model. The easiest solution is to use the included stand and set the H-II B vertically on it. If that's too simple, but you still want to have it vertical, this kit includes rocket exhaust, molded in clear. This is actually made up from no less than thirteen parts, and it fits onto the same base. Finally, the last of the base options is an arm that will display the finished rocket at an angle, as if in flight.
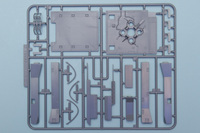
That covers the simple display options. Really, though, you're buying this kit for the movable launch platform, and who can blame you, that's a really neat way to display this rocket. This is made up from two main columns that are braced between, and which fit onto a large base. This base is made up from four separate sides, a separate bottom, and a separate top. There's quite a bit of molded on detail here, although there is room for some additional detailing should you so wish.
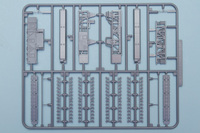 That takes care of the platform, the next step is to focus on the movable part. This comes in the form of two very large and many-wheeled vehicles that are on either side of the platform. These are built up from a top piece and a bottom piece, with separate wheels. Those wheels are built up from two strips glued together, with each truck getting two sets of those completed wheel assemblies. A bumper and an outside railing complete these assemblies, and they can then be attached to the platform. In checking some of the photos online, this launch platform has a fair bit of color to it, so this is a great way to add some extra zing to a fairly bland white rocket.
Conclusion
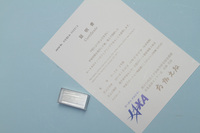 It is great to see other nations taking to space, and even greater to see model kits come out of these vessels. This one, with its added display options and certified space-flown rocket piece is even more impressive, and if you're looking for something unique for your model shelf, this might be just what you need. My thanks to Dragon Models USA for the review sample.
