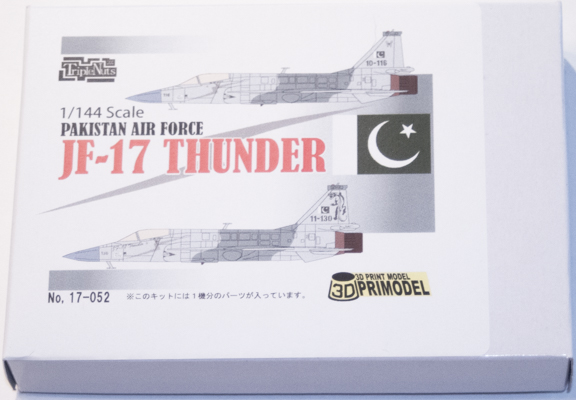
Triple Nuts 1/144 Pakistan Air Force JF-17 Thunder
By Matt Bittner
Introduction
Taken from Wikipedia:
The PAC JF-17 Thunder, or CAC FC-1 Xiaolong (pinyin: Xiāo Lóng; literally: 'Fierce Dragon'), is a lightweight, single-engine, multi-role combat aircraft developed jointly by the Pakistan Aeronautical Complex (PAC) and the Chengdu Aircraft Corporation (CAC) of China. The JF-17 can be used for aerial reconnaissance, ground attack and aircraft interception. Its designation "JF-17" by Pakistan is short for "Joint Fighter-17", while the designation and name "FC-1 Xiaolong" by China means "Fighter China-1 Fierce Dragon".
The Kit
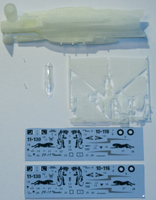
The Triple Nuts 1/144 JF-17 consists of 29 pieces of light-tan, 3-D printed resin and one clear resin canopy. There are decals for two different Pakistani JF-17s and the decals look nice, but I’m unsure if they’re on a contiguous piece of decal so you might need to cut as close to the design as possible, something I do anyway.
I do have to admit that seeing how the Triple Nuts 1/144 Yak-28P Firebar was printed, this one from what I think is Shapeways isn’t as nice as the one Triple Nuts printed as what they term “3D Primodel”. While the detail is nice enough on the JF-17 there’s plenty of “residual” that needs to be cleaned from most of the parts; unfortunately, some of it in hard-to-reach places, like the landing gear wells. But, if you have the right tools (as demonstrated in my review of the latest tools from Hobby Elements) clean up won’t be difficult.
Even though the printing on this “Shapeways” release isn’t as clean as the Yak-28P it’s still a kit worth tracking down, if you like the JF-17. Construction shouldn’t be too difficult as long as you take your time with clean-up. I’ve actually started the clean-up process and will be able to get tight enough fits on the wings and horizontal tail I won’t need to use putty. Always a great thing when building models. There are only two steps on the minimalist instructions: first, attach all the main parts to the fuselage (wings, vertical and horizontal tail pieces, nose cone and exhaust (which can be left off until the end, facilitating easy painting)) along with the ejection seat (sans belts) and you’ll have the main assembly done in no time. Since the canopy is only one-piece you can mask it and attach it now as well to help facilitate painting its frames.

|
The next construction step has you add all the pieces to the underside, most I would leave off until after painting. The one piece I will add prior to painting is the underside fins, towards the tail. I have also started cleaning up the external fuel tanks and unfortunately those might require a swipe or two of putty, even though I have been careful with both removal from from the “print sprue” as well as clean up. That’s because each tank is composed of two pieces, and at least one of my external tank-halves is a bit “sunken” at the mating surface to the other half. So, it will need to be built up a little so one half matches the other. Because the external wing fuel tanks are molded separate from the pylons you can attach the pylons and not necessarily the tanks. However, the fuselage-underside fuel tank has its pylon molded in situ with the tank so either add the entire thing, or nothing.
One aspect to be careful of when removing the wings from the “print sprue” is to watch carefully for the wingtip missile rails; I thought the place to cut was closer to the wing that it really was so when I assemble the model I will have to re-add the piece I inadvertently cut off.
Conclusion
If you want a Pakistani JF-17 in your 1/144 collection I believe this is the only option. Sure, there’s some work involved in assembly, mainly cleaning up the “chaff” from the 3-D printing process, but it shouldn’t take long to get the model ready for assembly and painting. It will definitely look great on the shelf when finished.
My thanks to MAKO Models International for the review model. These models are available on their eBay store.
