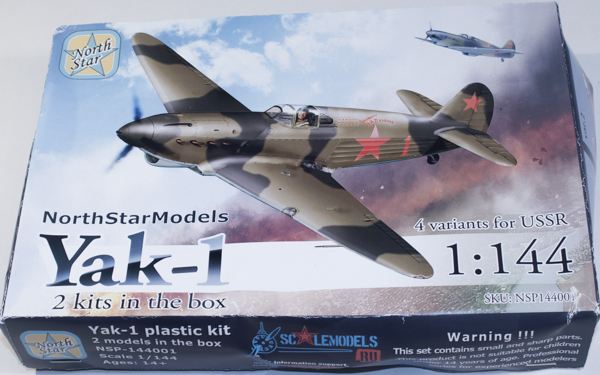
North Star Models 1/144 Yak-1
By Matt Bittner
Introduction
The world of 1/144 modeling has grown a lot these past few years. When all you had were not-very-accurate Minicraft kits and some decent – and some not so decent – Revell kits, amongst others, the world of 1/144 injected plastic kits was small. Then it started growing. Gashapon (collectible all-ready-assembled and painted kits from Japan) became a "thing" and then the likes of Jach (then Attack and now Mark I) released injected plastic kits, along with OzMods moving their kits from resin to plastic came along as well. Revell started making really nice kits (it could be their Hunter was the first in this new line) and Dragon/DML started to release decent 1/144 kits as well. Platz came along from Japan (most were just their F-Toys Gashapon released in kit form) with some extremely nice kits and Sweet also has some excellent releases as well. So as the years went by we finally had some really great injected plastic kits, especially when Eduard decided to move into the scale. Now we have North Star.
The Kit
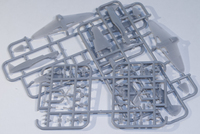
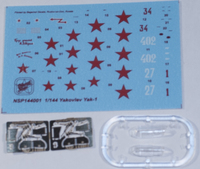
Wow. In the box this is truly an exceptional kit. In the box of the North Star 1/144 Yak-1 there are two complete kits. Each kit consists of 34 pieces of gray injected plastic, 10 pieces of clear injected plastic and a photoetch fret with seven parts. There are decals for four Yak-1s:
- Red 1 - АМТ-4/АМТ-6/АМТ-7 (Dark green/black/light blue)
- White 27 - АМТ-4/АМТ-6/АМТ-7 (Dark green/black/light blue)
- 402 - АIIЗ/АIIГ - Green/light blue - is is pre-war painting scheme, the green color is some brighter that wartime АМТ-4
- White Yak - Winter White/АМТ-7
The decals are nicely done and printed by Begemot.
|
I'll start off with saying I have one complaint with the kit. Each Yak-1 has a photoetch fret to help finish it and that fret contains seven parts: main landing gear doors, "linkages" for the landing gear, a "handle" for the cockpit, and the support for the gun sight. However, it doesn't contain any seat belts. If you're going to supply a photoetch fret, why not include seat belts? It doesn't make sense.
But that's my only complaint with this release. Construction starts with building the landing gear followed by putting the prop and spinner together. Naturally you'll want to paint these items before you put them together especially the landing gear doors (and remember, these are photoetch so they're nice and thin). Next you add the tail wheel, instrument panel and radiator intake to one fuselage half before gluing the halves together. Again, painting everything before gluing pieces together. Another small nuisance with the instructions are no color call-outs for anything; nothing to state what the color of the cockpit should be nor anything else so you're on your own to research these colors.
|
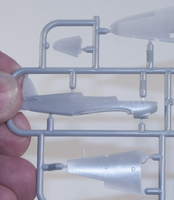
Step Four on the instructions finally has you assemble the cockpit which consists of the "floor", front bulkhead (and the photoetch "handle"), control stick, seat pan, seat back with partial framing and finally, an extra piece of framing that attaches to the seat back as a support. Once everything is together and painted, then the cockpit is attached to the wing (after the wing pieces are assembled together) prior to the wing being attached to the fuselage.
|
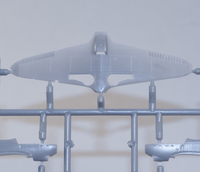
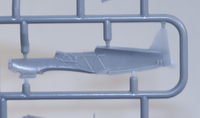
A little bit more about the wing. While it does consist of multiple pieces (the top of the wing, with the wing root, is a single piece while two separate pieces are for the underside of the wing, and there is a separate piece for the wing radiator exhaust) the trailing edges are super-thin, the thinnest I've ever seen on a plastic injected wing. The only time I've seen a thinner wing trailing edge is on any vacuum-formed model. Nice! Another extremely nice thing no other 1/144 model has (as far as I know) is this kit comes with not only a separate, clear piece for the leading edge landing light, but also includes clear wing tips which will show the wing tip lights to excellent advantage. I might glue these to the wing prior to painting and then mask appropriately. I'll make that determination once I start building the kit.
|
Now that the wing pieces are together and the cockpit is attached to the top of the wing, this entire assembly is then glued to the assembled fuselage. Step 7 you'll need to make a decision: build the kit as an "early" or "late" Yak-1. The biggest difference is the canopy since there is a different one depending on your decision. The canopy is only one-piece so if you want to show the canopy open you'll need to cut the windscreen and the rear part from the canopy. Either way you'll need to attach the gun sight attachment piece to the inside of the windscreen, along with the clear gun sight that's added to that piece. Remember to paint these pieces prior to inserting them into the windscreen.
|
Step 8 is where you attach the wing, canopy and separate upper nose (along with the "prop shaft", which if added correctly could make the prop spin) to the assembled fuselage. While Step 9 is just a reference drawing to show all of Step 8, Step 10 has you glue the prop, landing gear, horizontal tail surfaces, eight separate (!) exhaust stacks and clear, rear light (again, based on if you're building an "early" or a "late" Yak-1) to the rudder. Personally I'm just going to attach the horizontal tail surfaces only before painting. I'll even leave off the separate exhaust stacks until after painting and decaling (yes, you read that correctly, in a 1/144 kit each exhaust stack – four per side – is a separate piece so paintence and magnification is a must).
Conclusion
There are a lot of things in this kit that makes it the best injected kit in 1/144 yet released. Extremely thin trailing edges; separate wing-tip, landing and rear light clear, injected pieces; landing gear doors already photoetch (meaning they too are nice and thin) are all items that make this the best injected kit, yet. If North Star would have included seat belts on the photoetch fret this would have been a complete kit with nothing else needed. Come to think of it, it may come down to economics: someone (North Star?) may come out with their own, separate photoetch set that includes seat belts, which requires one to spend more money. (Brengun did this with their 1/72 Yak-1: included photoetch for various things but left off seat belts, and later released a separate photoetch set with seat belts.) However you feel about that, I still whole-heartedly recommend the North Star Yak-1. It's an excellent kit and we need to prove to North Star to continue releasing 1/144 injected, plastic kits so definitely pick one up.
I definitely thank North Star Models for sending the review model.
