Mark I 1/144 F-104A/C/G Starfighter At War
By Matt Bittner
Introduction
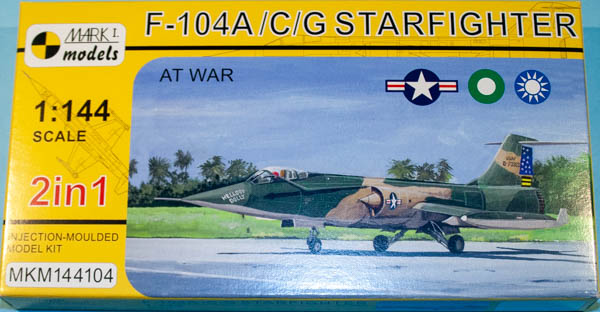
Most should know about the F-104 Starfighter. In 1/144 there have been a few kits released, with the releases by Revell and F-Toys/Platz being the best. However, all of them - before now - have neen for the later marks of the Starfighter. Now, we finally have the earlier versions of the F-104 in 1/144, thanks to Mark I.
The Kit
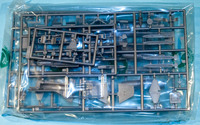
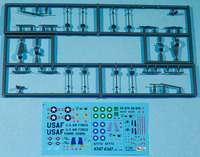
Up front, it needs to be noted that the basic kit inside the Mark I F-104A/C boxings is from the Revell molds. However, Mark I includes a separate, injected plastic sprue that not only includes the different, shorter tail, but also includes sidewinders, launchers for the wing-tip based missiles as well as the forward, underside fuselage missiles, a different ejection seat and the bent nose air refueling probe. There are decals, made by Mark I, for four F-104s:
- F-104C-5-LO Starfighter, S/n 56-0886 (c/n 1174), Black 60886, 'Fannie', 436th TFS, 479th TFW, US Air Force, Da Nang Air Base, Vietnam, 1965
- F-104C-10-LO s/n 57-0923 (c/n 1240), Black 0-70923, 'Hellooo Dolly', 435th TFS, 479th and 8th TFWs, US Air Force, Udorn Royal Thai Air Force Base, Thailand 1967
- F-104A-25-LO, s/n 56-0874 (c/n 1162), Black 56-874, No. 9 'Griffins' Sq., Pakistani Air Force, PAF Base Sargodha, credited with an IAD Canberra B(I) Mk.58 night kill, Indo-Pakistani War, September 1965
- Canadair-built F-104G, s/n 64-17773 (c/n 6118), Black 47773/4347, 3rd TFW, Republic of China Air Force, Ching Chuan Kang Air Force Base, scoring a Chinese (PLAAF) J-6 victory, Taiwan, January 1967
The first USAF and Pakistani aircraft are mainly aluminum, the second USAF aircraft is finished in SEA camo, and the Taiwanese bird is overall light gray. Decals look good and in register.

Revell Kit
|
Construction naturally starts with the cockpit. You'll make your first decision on which aircraft to model now: if you stick with the one F-104G on the decal sheet, then use the seat that comes with the stock Revell kit; if you want to build any of the F-104Cs or the F-104AA, then use the seat Mark I provides. Once that decision is made, and the cockpit pieces painted, decaled and put together then add it to the forward fuselage halves, along with the nose cone and nose landing gear. In Step 3 you'll also glue parts together based on the aircraft being modeled: the F-104A and F-104C requires the short tail Mark I provides and the single F-104G you'll still use the larger tail from the Revell kit. Now you glue the rear fuselage halves together along with the rear-most tail built in Step 3.
The instructions would have you glue the main landing gear to the gear well prior to gluing the well into the rear fuselage assembly, but I suspect you should be able to hold off gluing the landing gear until after painting and decaling. Once the gear well is glued into the rear fuselage assembly, the forward and rear fuselage assemblies are glued together. From there you glue the intakes on the fuselage, along with the wings and both horizontal and vertical tail surfaces. The instructons also show the side-mounted, Mark I provided, fuel probe being glued on as well. I'm not sure if this can be left off until after painting, though.

Mark I Additions
|
If you are adding the wingtip missiles, then you'll need to sand away the mounting tabs for the wing-tip fuel tanks and glue on the missile pylons.. The final steps of assembly include adding all underside stores and pylons.
Conclusion
Mark I provides an excellent way to build an early F-104. The Revell kit is truly superb so why not provide the parts to create just the F-104A and F-104C to add to the superlative Revell kit. Hopefully everything will mate up well and you'll have an excellent example of an early Starfighter on your model shelves.
While I would like to thank Kits-Shop for the review kit, unfortunately they went out of business.
