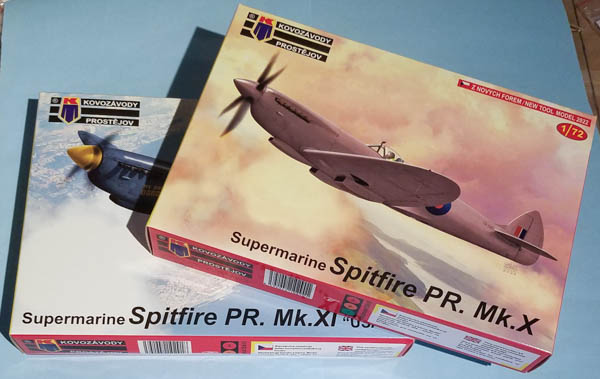
Kovozávody Prostějov 1/72 Spitfire PR Mk.X/XI
By Matt Bittner
Introduction
The history of the Spitfire is vast. So vast most know about it and its history so I won't repeat that here. Know that Spitfires also flew as Photo Reconnaisance (PR) aircraft as well, and here is Kovozávody Prostějov's take on the PR Mk.X and PR Mk.XI.
The Kit
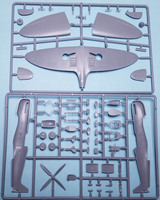
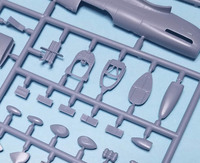
Each Kovozávody Prostějov (KP) 1/72 Spitfire PR Mk.X or PR Mk.XI kit contains the same two sprue of gray, injected plastic which contains 64 pieces total. Each kit also comes with a clear injected one-piece canopy, and this is the only part that differs between the two PR versions.
|
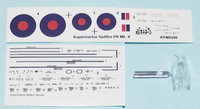
Here are marking options for the Spitfire PR Mk.X:
- SR396, 541 Squadron, Benson, 1944 (PRU Pink overall)
- Unidentified, 542 Squadron (medium sea grey uppers; undersides are PRU Blue)
- Unidentified, 541 Squadron, 1944 (overall PRU Blue)
|
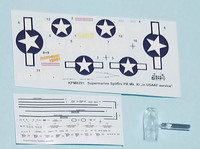
These are the markings for the Spitfire PR Mk.XI "USAAF":
- PA892 My Darling Dorothy, 14th Photographic Squadron, Mount Farm, May 1944 (overall PRU Blue with a yellow spinner)
- MB950, 14th Photographic Squadron, Mount Farm, December 1944 (overall PRU Blue with red around the exhausts and an olive rudder)
- PA843 Photogenic Virgin, 14th Photographic Squadron, Mount Farm, March 1945 (overall PRU Blue)
|
Decals look nice but the truth will be in applying them. I had no luck with the decals from their Dewoitine D.500 so hopefully these will perform better. Also included in each kit is a small set of stencil decals.
Naturally construction starts with the cockpit, and out-of-the-box it truly is spectacular. The instrument panel has raised detail as well as a decal to put over it. Decals also provide the seat belts. I'm definitely looking forward to building one of these as the cockpit is really nicely detailed. It's only a shame that the canopy is supplied as a single part, so you're on your own to cut it in two to open the canopy. Maybe one of the aftermarket vac replacements will work (such as from Barracudacast).
Once the cockpit is built up then blanking plates for the exhausts are glued into place followed by the cockpit subassembly and other parts, then the fuselage halves can be glued together. While the instructions show to add the exhausts now, I definitely will wait until the end of the build to make it easier to paint them.
|
Now you add pieces for the landing gear wells into the lower wing part followed by gluing on the upper wing halves. This is followed by turning the wing assembly over and gluing on the radiators with all their parts. Finally there are fuel pump blisters to add in front of the landing gear wells.
There are two different types of nose intakes, one for the "U.S." version, one for the other versions. The instructions also have you glue the landing gear parts together, which include separate oleo scissors. It's here you also glue the doors to the landing gear but of course after painting everything separately.
Next you glue the wing to the fuselage, along with the stabs and your choice of rudder, tall or standard. Also added at this time is the canopy, the antenna mast, tail wheel and the prop is assembled to its baking plate and spinner. Again, after painting all separtely of course.
Finally you add the landing gear, thn under-chin intake, prop and starboard Coffman starter bulge and pressurisation air intake, if building the Mk.X. The instructions also show an interesting item. The side panel, where the camera port is at, the instructions show you either fill it in with putty, or add "clear fix" to the port. I would go a little farther. If the option I'm building has the camera and its port, then I will drill out the hole and add something like Kristal Kleer to give the effect of a window (and ensure the inside of the fuselage is "blacked out" in this area). KP does not provide clear parts for any camera ports.
Note that KP provides both four- and five-spoked wheels.
It's interesting that KP provides separate under-wing camera ports, but doesn't call them out in the instructions. It appears the Mk.XI needs them so you'll need to resort to external references to figure out how they're attached.
Conclusion
As far as I know, this is the first injected kit for these two PR Marks of the Spitfire. I think they're nicely done and should build up well. The proof is always in the building but overall the kits look very nice.
Many thanks go to Kovozávody Prostějov for the review kits.
