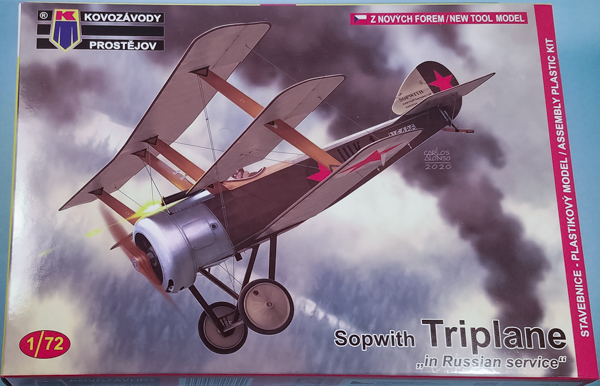
Kovozávody Prostějov 1/72 Sopwith Triplane "In Russian Service"
By Matt Bittner
Introduction
Taken from Wikipedia:
"The Sopwith Triplane was a British single seat fighter aircraft designed and manufactured by the Sopwith Aviation Company during the First World War. It has the distinction of being the first military triplane to see operational service."
The Russians had one example that was painted differently throughout its life, first with the Imperial Russian Air Service (IRAS) then with the Soviet Air Force.
I built the Revell kit eons ago so any comment about that kit is really stretching my memory. If I leave something out, or don't have something quite right about the kit, my apologies.
The Kit
The Kovozávody Prostějov (KP) 1/72 Sopwith Triplane "In Russian Service" consists of 35 pieces of gray injected plastic. In this release are decals for three variations of the same Triplane that flew with the Russians:
- Russian Revolutionary Air Force, May 1917 (red stars painted on top of green-overpainted British roundels and rudder stripes)
- Russian Revolutionary Air Force, May 1917 (red stars painted directly on top of British roundels and rudder stripes, and wheel disk NV10)
- Russian Revolutionary Air Force, May 1917 (it appears the fuselage is entirely overpainted in a British NV10 while the rudder and fin, and forward fuselage and wheel disks are green, while the cowl is left natural)
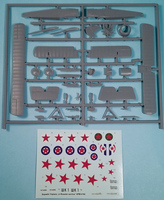
All undersurfaces are left Clear Doped Linen (CDL). Decals appear nice and in register, and include seat belts. KP alludes to the fact the third Triplane was a different aircraft but the Russians/Soviets had only one example.
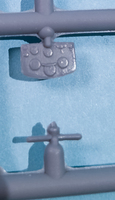
Construction starts with adding the control column and rudder pedals to the lower wing, after painting of course. Step two has you add the "faux" center struts to the cockpit sides (on the real thing the center struts were attached to the bottom longeron of the fuselage and reached to the top-most wing) again, after painting everything. Once painted and attached then the fuselage halves are assembled. The next step has you paint the instrument panel and the upper fuselage piece and then glue the instrument panel to that part.
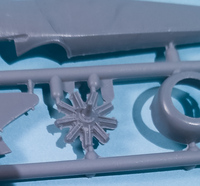
Now the aircraft starts taking shape. Glue the lower wing to the fuselage. Glue the exhaust channel to the fuselage, then glue the engine to the front of the fuselage (after painting, naturally). Then both the cowl and the lower cowl piece are attached to the fuselage. Then the painted seat - with decal seat belts - are added inside the cockpit.
|
Here's where the instructions become slightly confusing if you don't have any other Sopwith Triplane references. There were some Triplanes that had two Vickers guns mounted, others with only one Vickers. There are also two different horizontal tail pieces and two different propellors. Because KP has released this kit with different decals the instructions are "universal". Unfortunately completely universal and give no clue as to one or two guns, or which stabilizer or prop to use for the Russian aircraft. You'll want to use horizontal tail part #7, prop #31 and a single gun.
So that's the next step, is adding the single gun, but this is probably best left off until the end of construction and painting.
|
Next, you add the middle wing including the one-piece interplane struts and the center struts. There may be gaps in the middle wing as the single piece interplane struts pass through that wing. This will only come to light during construction.
Now you add the upper wing; however, I would wait until after painting and decaling so as not to interfere with painting the lower and middle wings. In fact, dependent on the middle wing-interplane strut gap, I may paint and decal everything before even adding the middle wing. Again, something not known uintil construction is started.
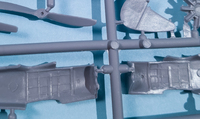
Steps 11 and 12 are where you add the tail surfaces and where the confustion can come in if you don't have any other references on the type. There are two horizontal tail pieces so you need to figure out which version for the plane your modeling. It appears that for the Russian aircraft part #7 is the one to use.
|
Now is the time to build the undercarriage and attach it to the model along with the tail skid and another piece for behind the cowl, over the exhaust channel. Finally you add the prop; again, there are two different types sbut the Russian Triplane flew with part #31.
KP does include a rigging diagram but I would also rig the aircraft using period pictures. You can never have too much information.
Conclusion
It would appear Kovozávody Prostějov has two different mold makers. I have their new Dewoitine D.500 for review, and that model is truly exquisite. This Sopwtih Triplane has a lot of soft features. The interior detail is soft; the guns and engine as well. In fact, it's my intention to replace both the gun and engine with aftermarket items as I think aftermarket would be a vast improvement. I'm also hoping "someone" will release photoetch for the model to replace the very soft interior detail. Would I still pick up a Kovozávody Prostějov Sopwith Triplane with these issues? Definitely. I've seen how the molds have deteriorated on the ancient Revell kit and just dealing with the sink marks/divots on the wings would be very problematic. Plus there is no interior detail at all in the Revell kit. But I also wish the "other Kovozávody Prostějov team" would have created the masters for the Triplane; the same team that created the D.500 series of models. But be that as it may, it's still a very nice kit and will look great once built.
My thanks to Kovozávody Prostějov for the review model.
