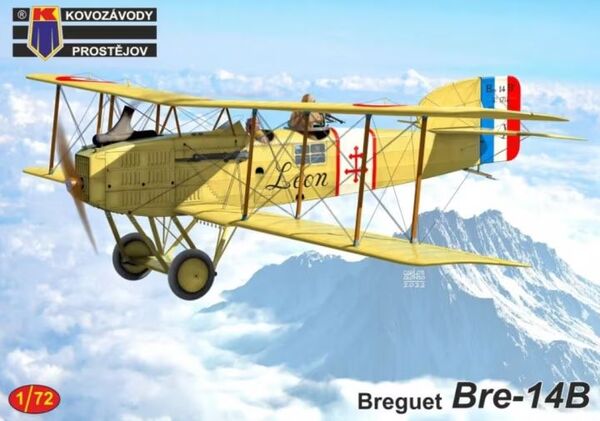
Kovozávody Prostějov 1/72 Breguet Bre-14B
By Matt Bittner
Introduction
The Breguet 14 was an important aircraft for the French during WWI. They used it both for reconnaisance and as a bomber, and it served in a number of Escadrilles (squadrons).
In addition, it served in quite a lot of air forces post-war. China, Czechoslovakia, Finland, etc. It served with distinction in all facets.
Unfortunately there isn't a lot written about the Breguet 14. The best book on the subject is an old Datafile Special that came out in 2003 by Alan D. Toelle put out by Albatros Productions. While this title is still in print, there's still a need for a new treatise on the type.
There have been a few kits produced of the Breguet 14, in 1/72 the best being originally from AZ Model, now re-released by Kovozávody Prostějov.
The Kit
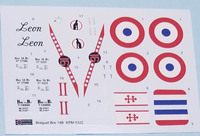
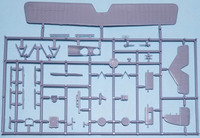
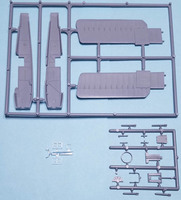
The Kovozávody Prostějov (KP) 1/72 Bregut 14B2 consists of 51pieces of gray, injected plastic and a clear sprue with four pieces (windscreens for the pilot and back-seater, and side windows for the bomber version). Decals are for three French Breguets:
- Squadron BR 504, Salonika, French Air Force (finished overall in Clear Doped Linen (CDL) with yellow metal panels (something KP doesn't show))
- No. 12203, "Red 16", French Air Force, 1918 (finished in French five-color)
- No. 17188, "Red II", French Air Force 1918 (finished with a dark green fuselage and upper flying surfaces, with the underside left n CDL)

|
Decals look nice but the truth will be in applying them. I had no luck with the decals from their Dewoitine D.500 so hopefully these will perform better.. Note that the French five-color scheme had undersurfaces that were finished in a light yellow called ecru, and NOT left in natural linen as KP has stated. This might also be the case for the last aircraft that KP calls for Dark Green, ecru for the undersides and not CDL.
One thing needs to be mentioned right up front. When AZModel first released this years ago, they included a wonderful photoetch fret, unfortunately no longer provided. This was awesome - and needed - for a number of reasons, primarily because the French "bomb hangers" for the B2 version were unique and something best catered for in photoetch. These are no longer provided, unfortunately, and I seriously hope someone comes out with a photoetch fret for at least the "bomb hangers".
Naturally construction starts in and around the cockit. One thing is very important: do NOT follow KP's guidance in step 1 and glue the fuselage halves together. Most will realize this but I wanted to point out that gluing the fuselage halves together should NOT take place until all the cockpit detail is added to one fuselage half. The only thing you want to do in step one is add the clear sides. The instrument panel is added to the upper, forward fuselage piece and this time KP does provide an instrument panel decal. Now the floors are added (after painting, of course) to one fuselage half, along with the rest of the cockpit detail. KP also provides decals for the seat belts.

|
One step that might be confusing is how the tail skid is glued in. After joining the fuselage halves, you'll need to provide your own "rod" that stretches from each side of the fuselage. The strut on the tail skid, mid-way on the part, rests on this "rod". You could probably get away with adding this after painting, by flexing a piece of plastic rod into the marked areas inside the fuselage.
Unfortunately, if you ignore joining the fuselage halves in step one, there is no other step showing the gluing of the halves together. I have an older AZModel kit, and this is true for those instructions, too. Granted, it's not a big thing if you've built an aircraft model or three, but it does need to be pointed out.
Now that you have the fuselage halves assembled construction continues by adding the upper fuselage piece along with the exhaust. This is followed by the radiator/nose along with the "prop shaft" and prop. If you want your prop to spin then you'll want to glue the shaft to the prop without gluing it to the radiator piece. However, this means your prop will need to be painted first and masked, and will probably get in the way of final masking and painting.

|
KP now have you add the center struts, both horizontal and vertical tail surfaces along with the venturi tube and gun. Personally, I will leave everything off except the tail pieces until right before gluing on the upper wing. Next in sequence is gluing the landing gear struts to the gear "bar" and gluing that to the fuselage. Again, this is best left until after masking and painting.
Two instruction steps show how you add the upper wing to the model, after adding the lower wing of course. KP includes a rear gun ring with guns, but check your sources to see if the machine you're modeling carried them. The one I have in mind did not.
Finally you add the rear-view mirror to the upper wing along with each windscreen. Plus, KP has you add the bombs to the underside, if using. No hangers, just bombs glued direct. Finally - and thankfully - KP includes a full rigging diagram.
Conclusion
This is a thankful re-release of the Breguet 14 by KP. Unfortunately they left out the photoetch they had included when the model was first released but you still could get away without having the "bomb hangers" if accuracy is not an issue.
Many thanks go to Kovozávody Prostějov for the review kit.
