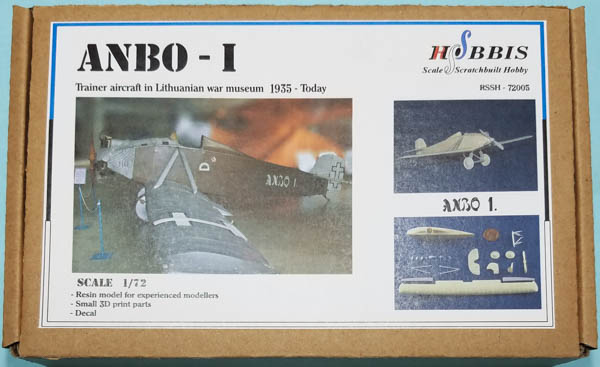
RSS-Hobbis 1/72 Gustaitis ANBO-I
By Matt Bittner
Overview
Just a short time ago I reviewed the Hobbis 1/72 J. DobkeviÄius DOBI-I. Hobbis has been creating Lithuanian-designed 1/72 aircraft models for a short time, and they have turned their attention to the Gustaitis ANBO-I.
The ANBO-I was another monoplane designed during the time of biplanes and appeared to fare well. Taken from the site History of Lithuanian Aviation 1919 - 1940, with translation provided by Google:
"Since its establishment, serving in the Lithuanian Air Force, flying German planes of the First World War and following the development of global aviation, Antanas Gustaitis formed his own view of what training, training and combat planes should be. Observing the high-speed airplanes of his comrade - military pilot and designer Jurgis DobkeviÄius, evaluating their successes and failures, he decided to try his hand at creating airplanes."
"Like J. DobkeviÄius, A. Gustaitis was a supporter of monoplanes (single-winged airplanes) and considered biplanes obsolete due to their lower aerodynamic quality, although they were still popular in the world for a long time. He never forgot about sufficient control (especially when crouching), visibility from the cockpit, as well as the minimum weight and dimensions requirements. For training and educational planes, they chose engines of lower power, which used less fuel and were cheaper."
For a more comprehensive history on the ANBO-I, definitely visit its page on the aforementioned History of Lithuanian Aviation 1919 - 1940 site. It's awesome that the first ANBO-I still exists to this day, in the Lithuanian Aviation Museum.
The Kit
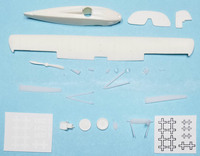
The Hobbis 1/72 ANBO-I consists of 20 pieces of cream and white resin, two clear windscreens (based on which version you're building) and a decal sheet with Lithuanian crosses and the "ANBO-I" text for the fuselage sides. The molding on this kit is exquisite and some of the best resin casting I have ever seen. The vanes on the engine cylinders are visible and to scale!
There is a support with instruments on it that must be inserted into the cockpit cut-out from the bottom of the one-piece fuselage (best glued in after painting, of course). The seat - and control stick that needs to be provided by the modeler - are attached to the top of the one-piece wing before the wing is glued to the fuselage.

|
You will need to decide if you're building the operational ANBO-I or as it is displayed in the museum. This will decide which windscreen you're using along with the fuselage fairing behind the upper engine cylinder. It is here where you would attach that fairing if using, along with the the tail pieces and ailerons. While the instruction step shows you adding the wing struts at this point, I plan on leaving them off until after painting, making masking easier. Same goes with the engine cylinders and propellor. The final instruction step has you add the landing gear (mine unfortunately broke during shipping), wheels, tail skid and I'm guessing some sort of engine intake to the fuselage underside.
Note that the instructions show the wire you need to add for the control stick, rudder and propellor attachments. Unfrotunately it doesn't show that there was some rigging, just between the landing gear struts.
Conclusion
Just like the DOBI-I, the Hobbis ANBO-I won't take long to assemble. I forgot to mention in the DOBI-I article, but Hobbis provides all parts removed from all pour blocks and supports. The only thing you have to worry about is some dry-fit then actually assembling the model. This makes it really quick and easy to finish this lovely, superbly molded model.
If interested in obtaining any of the Hobbis models, including this DOBI-I, email them direct at rss.hobbis@gmail.com.


