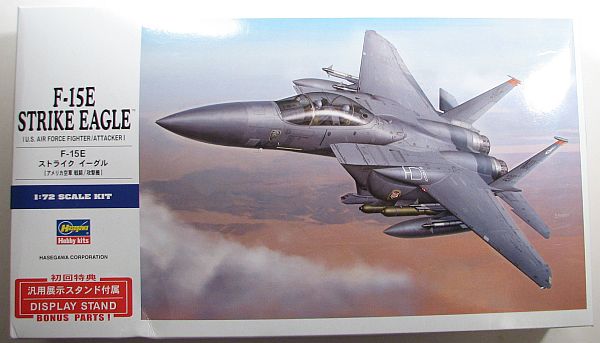
Hasegawa 1/72 F-15E Strike Eagle
By Matt Bittner
Introduction
Unfortunately the 1/72 world of the F-15E has been storied. While the Airfix kit appears to be the most accurate in terms of "Strike Eagleness", it's not the best kit around in terms of surface detail. Later F-15E kits are much better in terms of surface detail, but lack the distinctive "Strike Eagleness", opting to release an F-15C/D kit with what were thought to be correct Strike Eagle additions. Unfortunately most manufacturers missed the mark. The latest "1/72" F-15E released before Hasegawa re-did theirs had most of the prerequisite "Strike Eagleness" in the box, but unfortunately was not 1/72. Fujimi used some "wrong-scaled" plans to create their "1/72" F-15E, which means it isn't truly 1/72. Plus the price is exorbitant.
The Kit
When it was announced Hasegawa was re-doing their 1/72 F-15E, the modeling world was hopeful, but guarded. All these years no one has created a "true" 1/72 F-15E, most adding bits and pieces (most of those not correct) to an F-15C/D kit, which isn't correct. People thought that maybe Hasegawa was going to go down the same road and "miss the boat". That is definitely far from the truth.The biggest misses so far have been the Conformal Fuel Tanks (CFTs), those external fuel tanks that fit to the sides and underneath of the intakes. Most were misshapen, and those that weren't had the wrong points for the external pylons. That was the other problem with prior kits, the pylons that attached to the CFTs. Most were the wrong shape and those that weren't, were in the wrong places.
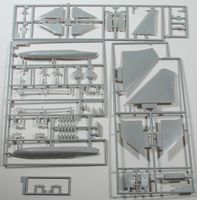
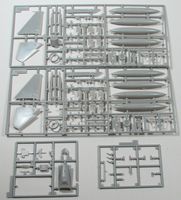
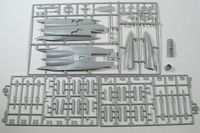
Thankfully one of the new sprues that Hasegawa contains in the kit contains new CFTs and new pylons. All of those are spot on. What is surprising, though, is the other changes Hasegawa has made. For example, they have changed both instrument panels to better reflect those in the F-15E. They have also provided a blanking plate after cutting off the old tail hook (and provided a correct tail hook to be added afterwards), as well as two sets of tail fairings. Hasegawa has also included a new set of bulged, main landing gear doors. In addition, you receive the sprue from Hasegawa's separate ACW IX weapon set.So, it appears we finally have a relatively accurate F-15E in 1/72, finally.
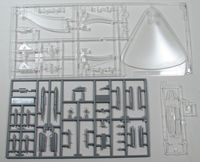
There are 195 pieces of gray, injected plastic along with a sprue of 5 clear pieces. Everything is up to Hasegawa's usual high standards molding-wise, and the decal sheet (which appears to be in register) contains markings for the following aircraft:- USAF, 366 WG, 391 FS, 2001 (MO207)
- USAF, 4th FW, 366th FS, "Rocketeers" (SJ336FS)
As with most aircraft models, construction starts with the cockpit and there are two options right off the bat. You can either paint the raised detail on both the instrument panels and the side consoles, or you can sand off all that raised detail and use decals provided for those areas. I'm not sure if you can combine the two, something I may try. Once that is figured out then you can paint the cockpit tub, instrument panels and control sticks, and glue all that to the cockpit tub. Then you'll assemble both ejection seats (each one consisting of four pieces) and after painting those then those can be glued to the tub (note there are no seat belts provided). At this time the shroud covering the rear-seater's instrument panel is also attached to the tub and the cockpit is complete. The tub is then glued to one side of a nose-half, and the halves glued together followed by a separate rear piece. After deciding on which holes to open in the lower fuselage assembly, then the jet fan blades and inside of the intakes are glued to the lower fuselage half.
From there you glue the intake "ramps" to the upper fuselage, glue the intake halves together (creating two intakes) then gluing them to the upper fuselage. It is also in this step you remove the ends of the tail, which are replaced with new, separate pieces, after the fuselage halves are brought together. (Be sure to study the instructions, especially the smaller, inset drawings to attach the pieces into the correct locations.)Now the wing halves are glued together, and the wings, nose and vertical and horizontal tail surfaces are glued to the fuselage. This step also has you build the multi-piece exhaust cones and attach them as well, but assuming the fit is good in this area I would leave those off until the end. Once the flying surfaces are all glued then the CFTs and all bits, pieces and pylons associated with the CFTs are glued on. Again, definitely study the instructions to be sure the correct pylons are put into their corresponding locations.
From here the rest of the pieces are best left off until after painting. Landing gear, gear doors, weapons, targeting pods, etc., all best left off until the very end.Conclusion
It appears that Hasegawa has re-created a winner. With the new items in their 1/72 F-15E it appears we can now finally build a relatively accurate F-15E out-of-the-box. There are plenty of parts, so it could take a while to build, but once finished you can be certain it will look more like an F-15E than any other kit released so far in 1/72.
Huge thanks to Hasegawa for sending this Mud Hen in for review.

