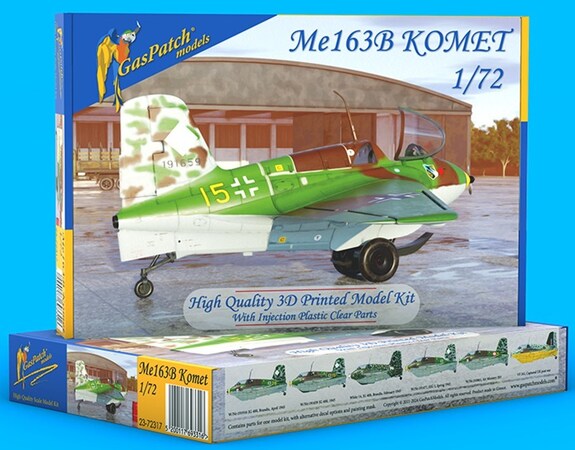
GasPatch Models 1/72 Messerschmitt Me163B "Komet"
By Matt Bittner
Overview
Many readers of Internet Modeler know what the Me 163 is and how it was somewhat important at the end of the war. It definitely showed where Germany was headed and helped other nations figure out jet - and rocket - propulsion once the Me 163 was known and studied.
A few years ago GasPatch Models released an injected plastic Me 163 in 1/48. They follow up that excellent kit with this 1/72 release, mostly 3D printed and is quite stunning.
The Kit
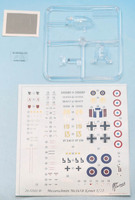
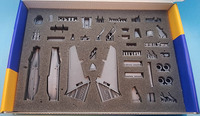
First up an apology. There are a lot of very small parts to this model and to avoid any loss, I took pictures with them still in the lazer-cut foam that contains the parts. You read that correctly: GasPatch has provided a piece of lazer-cut foam that holds all the parts for shipping. Amazing! Then you get into looking at all the parts and the rest of the model. The GasPatch Models 1/72 Messerschmitt Me163B "Komet" consists of 75 pieces of 3D printed resin, and a clear, injected plastic sprue for 3 parts: the canopy, windscreen and rear windows. Also included is an acetate sheet for the small windows behind the seat's bulkhead and a set of vinyl masks for the clear parts. There are a lot of options provided in this kit: open or closed main-skid; open or closed ammo-loading/gun access panels in the wings; top access panel open or closed; raised or lowered flaps; retracted or extended tail wheel (and two types of tail wheel); and the use of the beaching wheels. There are decals for six Komets:
- W/Nr:191916 JG 400, Brandis, April 1945
- W/Nr:191659 JG 400, Brandis, 1945
- White 14, JG 400, Brandis, February 1945
- W/Nr:191477, EJG 2, Brandis, Spring 1945
- W/Nr:310061, Air Ministry 203 (French markings)
- VF 241, Captured UK post war
Before I talk about how the kit will go together, I want to type about the instructions. Not only has GasPatch Models created the most detailed 1/72 kit ever, they have also created the most detailed instructions, ever. Not only are the steps provided for assembly and painting, but they also show where the modeler is to "snip" to remove the parts from their printing posts. Nice!

|
Of course construction starts in the cockpit and you'll spend a lot of time building this area. There are a lot of pieces and GasPatch provides detailed information on how each piece is cut from the posts; where it's placed; and how it's painted. This is one model you'll definitely want to display the canopy open.
You definitely want to take your time to study the instructions and then assemble the rest of the model. There is a lot to think about and do, and best to go over each and every step. Plus, don't doubt how the steps are laid out and follow them in order. That will help finish this superlative model.

|
Granted, there are pieces you'll want to leave off prior to painting, various antenna and landing-flap indicators, etc., but feel confident that GasPatch has your construction sequence figured out and follow it.
Conclusion
GasPatch has provided THE MOST 1/72 detailed model, ever. They have set the bar very high and it will take a lot of companies a lot of time to reach this bar, and here's hoping more do. This model is truly a work of art and will an awesome addition to your built-model shelves.
Huge thanks to GasPatch Models for supplying the review kit.


