Eduard 1/72 Fokker D.VII (Alb)
By Chris Banyai-Riepl
Overview
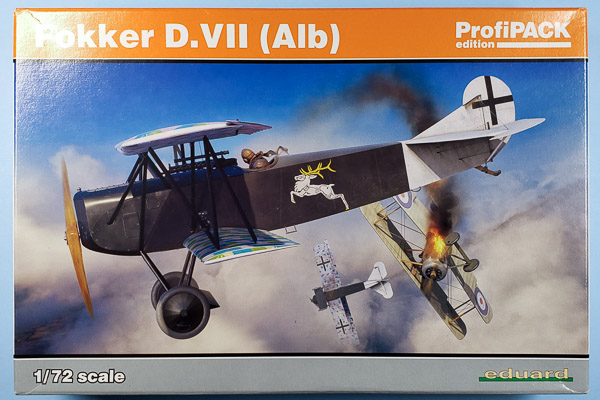
 Eduard's new 1/72 Fokker D.VII sets a high benchmark for modern new-tool WWI biplane aircraft. The kit is beautifully molded and thoroughly researched to cover all the different variants that existed in the D.VII line. In the box there are two fuselage types, two engine types, three wheel types, eight propeller types, nine radiator types, and many other detail options. Because the kit includes all of these options in the box, whatever boxing you get will have the same parts, so for a more detailed inbox review of the plastic parts I'll refer you to our previous review of the OAW release, which is also a Profipack release that includes the photoetch and masks.
The Markings
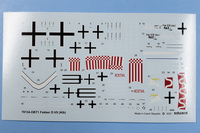
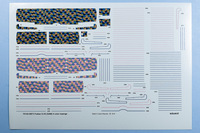
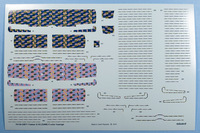
There's a reason that Eduard has included everything you need in the box, plastic-wise, and that's to cover as many marking options as possible in each release. For this D.VII (Alb) release, there are five options, all of which are colorful and interesting in their own way. Even with all the options included in the box, though, there are some additional modifications required so choose your option early and follow the directions closely. Before getting into the individual markings, a word about the lozenge decals. These are very nicely produced, with both 4-color and 5-color patterns provided for the entire airframe, including separate rib tapes and tape surrounds for the flying surfaces and a muted portion to go on the inside of the cockpit. Be ready for a lot of decaling with this model.
 The first option is Ltn. Carl Degelow's black and white D.VII from Jasta 40 from Lille, France in August of 1918. This plane is finished with 5-color lozenge on the wings with pale blue rib tapes. The fuselage is split into black and white, with the entire tail painted white. Degelow had a leaping stag on the fuselage side, and a white diagonal stripe on the upper wing, both of which are done as decals. Overall, this is probably the easiest option to do in this kit as all you have to mask is the straight line on the fuselage and only two colors to paint.
Next up is Ltn. Josef Raesch's red and white D.VII from Hasta 43 in Santes, France in June/July 1918. This plane has 4-color lozenge on the wings with pale blue ribs, while the fuselage is split between red and white. This has a diagonal demarcation line on the fuselage side right behind the cockpit, and over the top of that is a black three-pronged fork. Like Degelow's scheme, this will be a fairly simple scheme to finish.
 The third option is probably the most challenging for both painting and decaling. This is 5278/18 from Jasta 27 at Mons, Belgium in October 1918. This plane has 4-color lozenge on both the wings and fuselage with pale blue ribs. The tail end of the fuselage is painted white, while the nose is painted yellow along with the landing gear. The plane has the name HERTHA painted on the fuselage sides, and there is a red and white checkered and striped band around the fuselage and on the upper wing. With all the national markings, personal markings, and lozenge, this option will have you applying a lot of decals.
Fourth up is Offstv. Fritz Blumenthal's D.VII from Jasta 53 out of Vivaise, France in August 1918. This plane has an interesting blend of lozenge, with the fuselage and lower wing finished in 4-color lozenge with pale blue ribs, while the upper wing is finished in 5-color lozenge with pale blue rib tapes. The nose and tail are painted white, and the aircraft has a white diagonal band around the fuselage behind the cockpit. It also has the name Nickchen IV on the fuselage sides. The interesting blend of the two styles of lozenge definitely makes this an interesting choice.
Finally, the last option is Ltn. Ludwig Beckmann's plane from Jasta 56 in Rumbeke, Belgium in the summer of 1918. This plane is finished with 4-color lozenge and pale blue ribs. The fuselage is painted light blue and red, with the nose and tail red, along with the landing gear. The vertical tail and rudder is white, and there's a red band with a white squiggle around the fuselage behind the cockpit. This is provided as a decal, so you'll have to match your red for the nose and tail to the red of the decal (unless you want to try to mask that squiggle).
 All of the decal options are nicely printed, and while there will be a lot of decaling regardless of scheme, the quality of the decals should make this process fairly easy.
Conclusion
The biggest challenge with this kit will be picking the single option out of the box, as the build looks to be a quite enjoyable one. In fact, this might be a good one to pick up some overtrees just to build more than one option. To help with that, Eduard has released both 4-color and 5-color lozenge sheets as aftermarket releases. My thanks to Eduard for the review sample.
