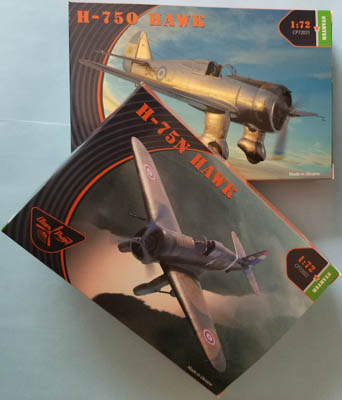
Clear Prop! 1/72 H-75 Hawks
By Matt Bittner
Introduction
The Curtiss H-75 Hawk series was the predeccesor to the P-40 series of aircraft. The H-75 series was truly an international aircraft, flown by a number of countries, these two releases are evidence of that. For the best and most comprehensive reference on this aircraft, look to the the book put out by European Airlines, Curtiss Design 75 Hawk: P-36 and International Derivatives. This book is a must for the Curtiss H-75 student.
The Kits
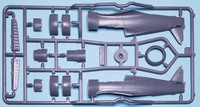
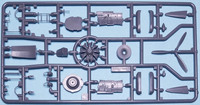
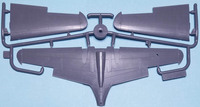
So far, Clear Prop! has released two versions of the H-75 Hawk in 1/72, the H-75N Siamise (Thailand) version, and the H-75O as flown by Argentina. The three, largest sprue contained in each are common to the boxings; it's the smaller, fourth sprue that makes up the separate parts, and for these two versions that sprue contains just landing gear pieces.
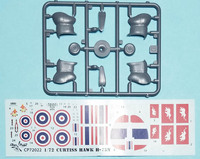
The first kit, CP72021 contains markings for four Siamese (Thailand) H-75Ns:
- Curtiss Hawk H-75N, 60 Squadron, 66th Wing Nakhon Phanom, Thailand 1940
- Curtiss Hawk H-75N, 5th Air Wing RTAF
- Curtiss Hawk H-75N, 16 Squadron, Lampang, Thailand 1944
- Curtiss Hawk H-75N, unknown unit, 1941
The first and third aircraft are colored in tan, brown and green, with light ghost gray undersides; the second is finished just with tan and green on top, with light ghost gray undersides; and the fourth is overall "silver".
|
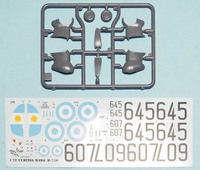
CP72022, the H-75O, also contains markings for four aircraft, this time all from Argentina:
- Curtiss Hawk Н-75O, Grupo 1 de Caza, Argentina Air Regiment 2, Army Aviation Command, 1944 (overall silver)
- Curtiss Hawk Н-75O, Air Regiment 2, Army Aviation Command, 1946 (green topsides, light blue undersides)
- Curtiss Hawk H-75O, Grupo 1 de Caza, Argentina Air Regiment 2, Army Aviation Command, 1944 (overall silver)
- Curtiss Hawk H-75O, Air Regiment 2, Army Aviation Command, 1946 (green on top, light blue on the bottom)
|
Decals look stunning and are really well printed.
Naturally construction starts with the cockpit, and out-of-the-box it truly is spectacular. The instrument panel has raised detail as well as a decal to place over it. Decals also provide the seat belts. The rudder pedals are molded separate; the control column is made up of two pieces, the seat three; etc. Out of the box it's a stunning cockpit with the cockpit sides provided as separate parts with a lot of detail molded-in. In fact, you build up the entire cockpit separately - including the sides - before adding it to a fuselage half. The first seven steps in the instructions are just for the cockpit.
|
Once the cockpit is built up then Clear Prop! has you work on the engine. They have a diagram to show how the wires are to be added (with your own material) as well as the painting of the engine along with assembly. Clear Prop! provides the means to have a spinning propeller, if that's something you enjoy.
Instruction step ten has you add the part that contains the "gun butts" to the upper, forward fuselage (after painting, of course) and then you glue in the cockpit and engine to a fuselage half prior to gluing the halves together.
Pay attention at step 11. This is where you glue the upper wing parts to the single-piece lower wing, along with the landing light and connection points for the landing gear. The Siamese version has you drill out holes for the underwing guns, though, since the H-75N flew with those. Not the H-75O, though, as the Argentinians didn't have the underwing guns.
|
Now you drill out the hole for the wire antenna under the cockpit and glue the wing to the fuselage, followed by the underside chin. After that is accomplished you build the cowl, in three pieces, around the engine, after painting the interior surfaces, of course.
Step 15 has you add the tail parts along with the separate ailerons (I wish all companies would provide separate control surfaces) and the separate rudder. The only thing that isn't separate are the stabs, the horizontal tail pieces are all one-piece. It's this instruction step that's different between the marks. The H-75O had in-wing guns while, which was already mentioned, the H-75N flew with underwing gun-pods. Clear Prop! does not include the barrels for the wing guns, relying on you providing plastic rod, or - which I will do - use metal tubing. The next step for the H-75N is building those underwing gun-pods but Clear Prop! DOES include the barrels for that (although maybe Master will provide something for that in the future?).
|
Now you assemble the landing gear "pants" and wheels together, the H-75O having two different types. Those are then glued to the underside of the model, along with the tail wheel, underwing gun-pods (for the H-75N) and exhaust shrouds. Then you turn the model over and glue on the clear pieces, nose guns (which ARE provided), prop and pitot, some of those best left off until after painting, of course.
Conclusion
These are stunning kits. The level of detail is outstanding and these truly can be built out-of-the-box and look just as good as - if not better than - those with aftermarket items. With that being said, though, Clear Prop! has released a photoetch set, a set of masks as well as updated pitot tubes provided by Master at the same time the kits were released. While I feel masks are mandatory now-a-days, the other two is down to personal preference. Me, I prefered them so bought them at the same time. Here's hoping Clear Prop! continues their line of H-75 Hawks and brings out every single version. I know I will definitely be picking up each and every one.
