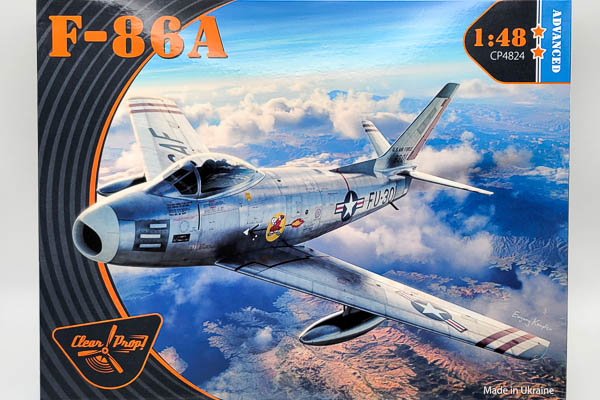
Clear Prop 1/48 F-86A Sabre
By Chris Banyai-Riepl
Overview
The history of the F-86 Sabre is well documented in lots of places, both online and in publications, so rather than go over all of that, I’ll just hit on why the F-86A is such a sought after kit subject, and try to cover some of the challenges with identifying specific early F-86 variants. The first part of that is easy to answer, as the F-86A only saw service in the United States military, and the Korean War highlighted flaws in its design that needed immediate addressing. The resultant F-86E and later F-86F became the main Sabre variant and it was those variants that ended up being license-produced by Canadair and operated by nations all over the world. With that broad of a service history, it’s no mystery why kit manufacturers chose that type as their subject for Sabre kits.
Back the F-86A variant, the primary visual difference between the F-86A and later F-86E/Fs is the tail. The F-86A variant used a traditional stabilizer and elevator approach that had been common on fighter aircraft up to that point. With the F-86E variant, that changed to an all-flying tail, where the entire stabilizer moved instead of just the trailing edge elevator. This resulted in a larger tail-fuselage fairing to both move the stabilizer further out for more range of motion and to make space internally for the control systems needed. This is a very noticeable difference and not an easy one to change on a model kit, so a separate kit for the A variant really is needed to accurately represent the type.
Diving deeper into specific F-86A variants, as this was an early foray into swept wing jet fighters, it understandably went through a lot of initial changes. North American Aviation started their F-86A production under the NA-151 program, which included the F-86A-1 (47-605 to 47-637) and early F-86A-5 (48-129 to 48-316) variants. During this program, North American changed the leading edge slat design from the 116th F-86A-5 aircraft on (48-210) to the style used on all following Sabres. The F-86A-5 line then continued (49-1007 to 49-1339) in the NA-161 program, which halfway through introduced new short-chord ailerons, which also were then used on all following Sabres. Both the slats and ailerons were retrofitted to earlier F-86As, though, so depending on when an aircraft existed, it could have been an early NA-151 Sabre with all the later NA-161 options.
 Further changes include the gunsight and pitot tube. The original gunsight used in the F-86A was the Sperry Mk 18 gunsight, while the NA-161 program switched that to the A-1B/C gunsight with the AN/APG-5C ranging radar. This is immediately identifiable by the fiberglass cover in the intake lip. The early F-86As also had no wingtip pitot tube. This was added at some point in the NA-161 program, but was quickly retrofitted to older F-86A-5s as well. Retrofits of earlier F-86A-5s to incorporate the latest engine, wing, and gunsight changes became the F-86A-6 variant, while the F-86A-7 variant were redesignated new production aircraft (49-1316 to 49-1339) as well as retrofits. Finally, the F-86A had doors over the gun openings on the nose. As the aircraft testing and operations progressed and the design evolved, these were found to be problematic. So they were modified to initially be held open, then removed, before finally the gun opening section was redesigned to not have any sort of door component at all.
Given all of that, what does it all mean? Well, it means that, for a plane that had a total production run of around 500 aircraft, there are a ton of changes that include both production and retrofits, making identifying just what you need for a specific build insanely challenging to sort out. Now that we have a new-tool kit of the F-86A, all I’ll say is good luck, research as much as possible, and be ready to use the phrase “oh, that photo shows it earlier, I modeled it later after the retrofit.”
The Kit
 Now that we know (?) everything about the F-86A, let’s jump into the kit and see what we have. The box accurately identifies this kit as an F-86A, and it is indeed an F-86A. A closer inspection shows that this is an early- to mid-F-86A-5 that is representative of a stateside-based USAF F-86A. That does limit the marking options, but I’m sure later releases by Clear Prop will cover the Korean War F-86As as well as the ANG and later USAF units. The fact that we have that level of awareness in the kit definitely shows that Clear Prop has done their research, and I can easily say this is the absolute best 1/48 F-86A kit out there. Going over the basics, the kit has recessed panel lines, loads of cockpit detail, separate flaps and slats, and three decal options.
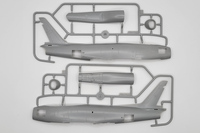
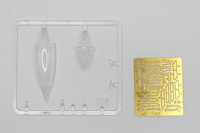
Jumping into the basics of the build, I’d have to say this is likely the best example of a 1/48 F-86 cockpit in an injection—molded kit. The instrument panel includes the Sperry Mk 18 gunsight and overall looks pretty decent. Decals provide the instrument faces as well, and it should turn out pretty well. The sidewalls are made up from three main pieces for each side, with separate parts adding to the detail. The seat is likewise well done, with photoetch seatbelts provided. All told, there are nearly three dozen parts in the cockpit alone, so those who want a detailed out of the box build will not be disappointed.
|
|
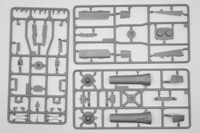
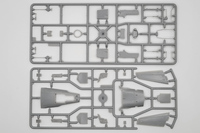
The kit comes with an intake trunk, split into an upper and lower piece with a separate engine face blocking off the back side. This same assembly also incorporates the nose wheel well, with the sides of the well built up from four separate pieces. Similarly, the exhaust pipe is built up from two sides, an end ring, and an engine exhaust piece that incorporates some photoetch vanes that will block off the end of the pipe. These two assemblies, plus the cockpit, gun port inserts, and air brake wells all get fitted inside the fuselage halves. With all of these bits and pieces, you’ll want to make sure you test fit several times before gluing, to make sure everything is fitting right and not interfering with the fuselage assembly. The instructions also indicate needing 11 grams of weight, something you will not want to skimp on.
|
|
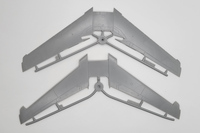
Up next is the wing, and this has some interesting engineering to it. The main wheel well is where we start, and this is a separate assembly with seven pieces building up the wheel well assembly. This is sandwiched between an upper and lower wing half, covering the whole wingspan. The leading edge and trailing edge of this main assembly is separate, with separate flaps, ailerons, and slats. The slat assembly is particularly well thought out, with both separate slats and a separate insert for the underside area of the slats. In a marked departure from other Sabre kits, this one also has a separate front and rear lower fuselage pieces. This allows for both crisper detailing on the underside and the potential of later variants.
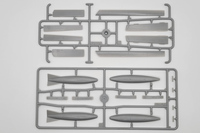 The landing gear is next, and these are likewise highly detailed. For example, the main wheels in this kit are made up of five pieces. Two halves for each tire, with the hub built up from an additional three parts. The main gear strut has a two-piece oleo scissor, adding to the detail. The nose gear has a separate scissor as well (a single piece) along with additional detail pieces in both plastic and photoetch, while the nose wheel has a separate two-piece hub and a two-piece tire. There are two styles of hubs as well for the nose wheel. All the various wheel door actuators are well detailed as well, with photoetch and plastic details finishing out these assemblies.
Final assembly bits include the air brakes, with three plastic part and an additional photoetch part providing the small details. The cockpit gets some extra plumbing bits and gunsight detail parts, while the rear canopy has six separate detail parts to fill that empty space. This is easily the best canopy detail in any 1/48 Sabre kit. The final bits in the kit are the drop tanks, which are the early 120-gallon style.
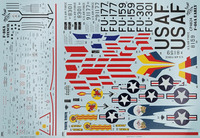 Marking-wise, the decal sheet provides three options, the 94th Fighter Squadron, the 62nd FIS, and the 334th Fighter Squadron. The 94th FS aircraft is 48-159 in 1949, when the 94th was at March AFB in California. This plane has a blue flash on the fuselage side and red and blue stripes on the tail. The 62nd FIS aircraft is 49-1177 at Selfridge AFB in Michigan in 1950. This option has the squadron emblem on the fuselage side with a red and yellow wavy flag behind it, and tail stripes of yellow, red, and blue on the tip. The final option is 48-301 from 334th Fighter Squadron at Langley AFB in Virginia during the USAF Gunnery Meet in 1950. This plane has the unit emblem on the fuselage side, with a red rudder and red stripes on the wings and stabilizers. The decals look to be well printed and a quick search of images of these aircraft show that they match well with the options in this kit, so again Clear Prop had done their research quite well.
Conclusion
Hands down, this is the best Sabre kit I’ve seen, and the fact that it’s an F-86A variant is even better, given that the F-86A has never been given its due in kit form. The potential in this kit has me excited to see the follow-on variants, both with the different F-86A variants and later F-86s that I truly hope are coming. For anyone wanting to build an F-86A, this is the kit to have, but if you have a specific aircraft you want to model, do your research and figure out if this release is the specific one that will make that, or if you might need to do some extra details or changes. My thanks to Clear Prop for both the review copy and for taking on the F-86A when everyone else has avoided it.
