
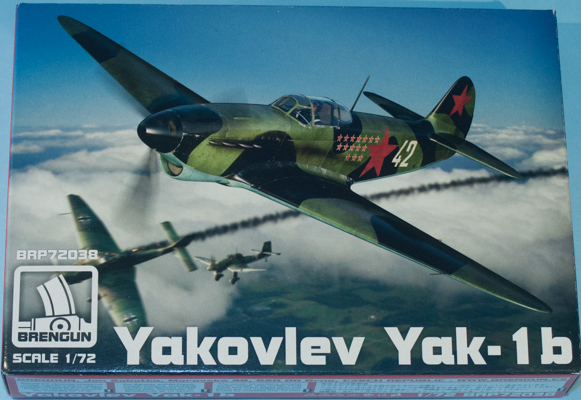
Brengun 1/72 Yak-1b
By Matt Bittner
Introduction
A few months ago I reviewed the Brengun 1/72 Yak-1. While I didn't say so, I thought it inevitable they follow up with the later Yak-1b and they have. Now we finally have an excellent rendition of this important VVS GPW fighter.
The Kit
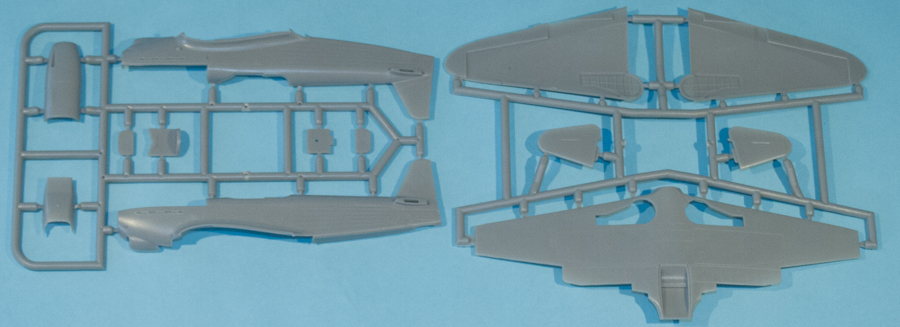
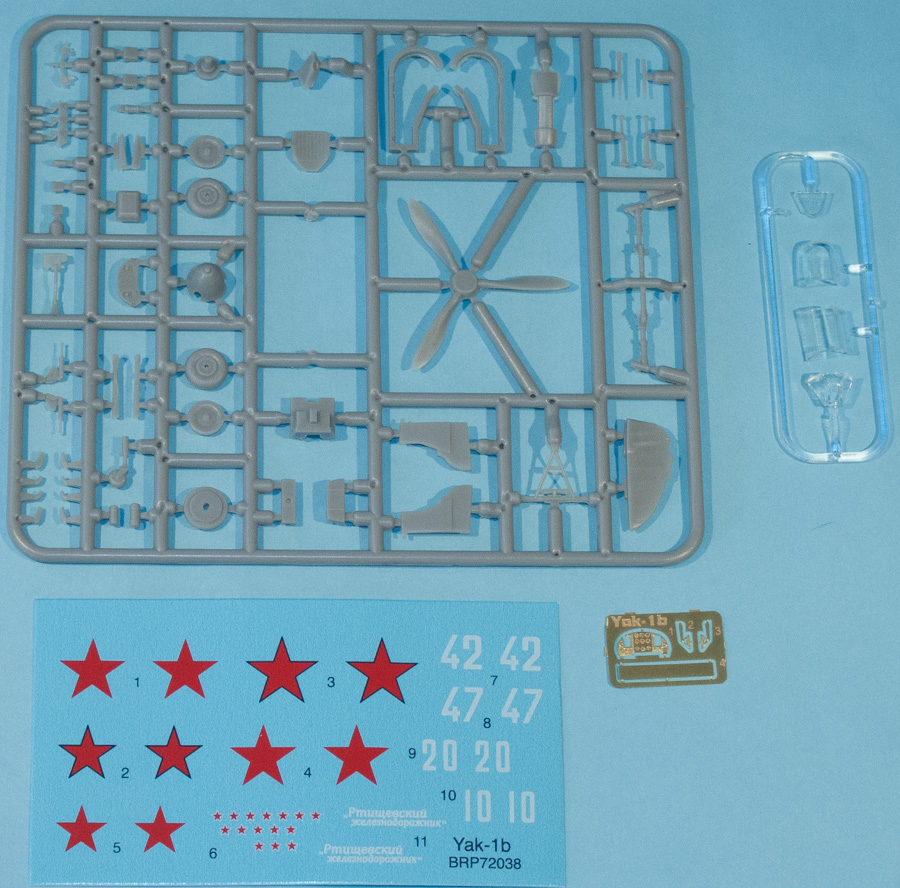
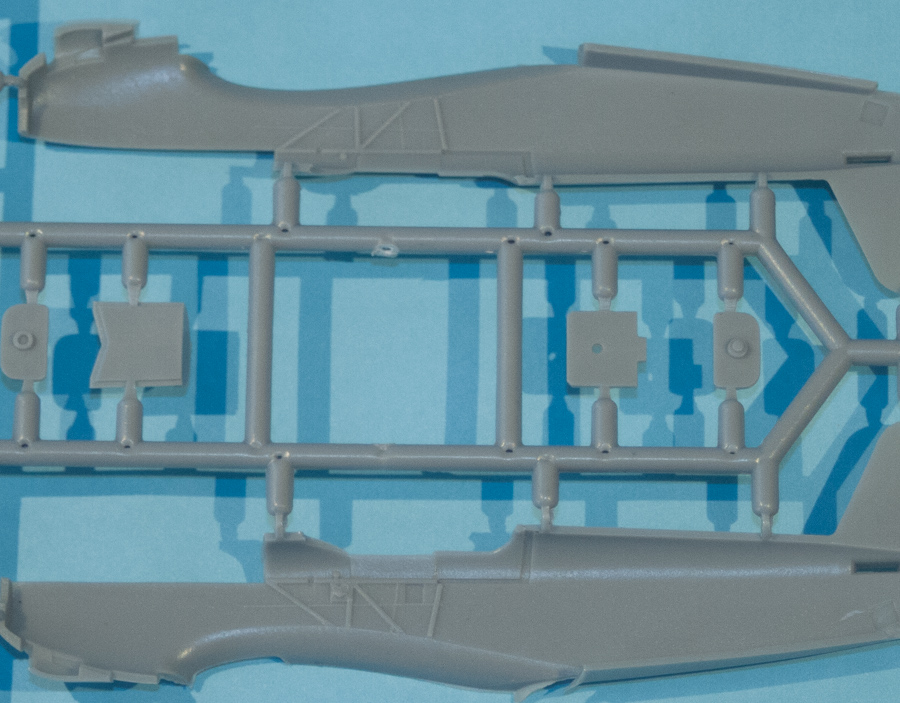
The Brengun 1/72 Yak-1b consists of 68 pieces of gray, injected plastic; four pieces of clear injected plastic; and a photoetch fret with X pieces. Decals are for Y aircraft:
- Yak-1b, 1943, 586 IAP (Women Fighter Group)
- Yak-1b Nikolai A. Kozlov, 910 IAP, February 1943
- Yak-1b Lt. L. P. Savkin, 3 GIAP, Baltic Region, 1943
- Yak-1b A. F. Lavrenov, 291 IAO, 1943
All aircraft but the first (586 IAP) are finished in green and black on top, with light blue underisdes. The 586 IAP machine is over-all Green with blue undersides. Decals look good and appear to be in register.
Since this is an aircraft model, construction inevitably starts with the cockpit, which is a mixture of plastic and photoetch pieces. However, there's one important item missing: seat belts. It comes as no surprise, even though it is a disappointment, that this Brengun kit – while supplying a photoetch fret – does not come with seat belts. This is due to their business model, I'm assuming. Brengun usually releases another photoetch set to complement most kits they put into production, and this is no exception. To be released in the near-future is a separate photoetch fret, that will more than likely contain seat belts.
|
Be that as it may, the first item assembled is the instrument panel, which consists of a plastic "back" with a photoetch "front". Not included, though, are any semblance of dials for the instrument panel. Once these pieces are glued together than you move onto construction the seat, which consists of a back "frame", seat back and seat bucket in plastic with photoetch side supports. Now you build the cockpit floor. This consists of plastic and one photoetch piece that is folded and glued to one of the plastic parts. The rest of the parts are assembled resulting in an accurate-looking cockpit floor. To that is attached the control stick and front bulkead.
Now that you have these parts assembled the rest of the fuselage is assembled. Glue the cockpit floor, seat assembly and instrument panel into one half, along with some side-wall detail, underside nose scoop, prop "shaft" and tail wheel supports and you can glue the fuselage halves together. To that you glue the separate rudder.
|
Construction now moves to assembling a few of the smaller pieces. Glue the oleo to the othewise single-piece tail wheel; assemble the prop, spinner and backing plate; and glue the all-plastic underside radiator together. The next construction steps have you add the horizontal tail pieces; upper, forward fuselage piece; and armored glass behind the pilot's head.
Now the wing is assembled. First glue the landing gear well "walls" to the upper wing parts then glue the lower wing to the upper wing "halves". Once this is all together then add the under-wing radiator that was built in a previous step.
Finally the airframe is all brought together with gluing the wing to the fuselage. This step also has you add the tail wheel and gear doors but I would leave them off until the end.
There are two "unique" aspects to this kit, and the next instruction steps is where these come into play. The first are the exhaust stacks. Each "stack" is a separate piece: instead of having a single "bank" of exhaust stacks, Brengun molded each individual stack separate. So care and patience must be taken when adding these to the fuselage. Again, you might want to leave these off until closer to the end of construction - after painting and decaling - so you can paint these separately. Unfortunately there is flash on a few of them and they are not "indented" or show any other form of "hollowing" at the ends.
|
The other unique aspect to the Brengun Yak-1b is the assembly of the main landing gear. Each gear consists of five pieces to create one landing gear leg. This is an area that patience will also be needed to get the landing gear together. However, this also means the level of detail is really nice on the gear and it truly is. But, I might leave the retraction struts until the main landing gear is glued inside the gear well, to ensure the correct placement of those parts.
The wing-root intake is a separate part and it is here where it is glued to the wing/fuselage. The wing pitot is also added but again, best left until the end. Also as final steps the landing gear, wheels/tires (which consists of one-side of a separate hub) and gear doors are added to the underside, along with gluing on the prop. Now you have a Yak-1b to add to your shelves.
Conclusion
Brengun has some unique aspects to their 1/72 Yak-1b, including the assembling of the landing gear and the separate exhaust stacks. But don't let that deter you to pick up this kit. It just means you have more modeling pleasure with your build. This is definitely a very nice Yak-1b and will look great once finished.
My thanks to Brengun for the review kit.