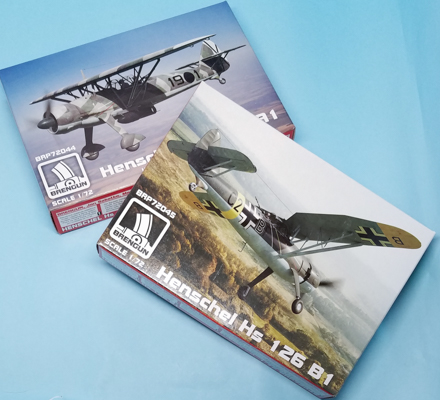
Brengun 1/72 Henschel Hs 126
By Matt Bittner
Introduction
Taken from Wikipedia:
"The Henschel Hs 126 was a German two-seat reconnaissance and observation aircraft of World War II that was derived from the Henschel Hs 122. The pilot was seated in a protected cockpit under the parasol wing and the gunner in an open rear cockpit. The prototype aircraft frame was that of a Hs 122A fitted with a Junkers engine. The Hs 126 was well received for its good short takeoff and low-speed characteristics which were needed at the time. It was put into service for a few years, but was soon superseded by the general-purpose, STOL Fieseler Fi 156 Storch and the medium-range Focke-Wulf Fw 189 "flying eye"."
Note that we've reviewed not ony the "full" Mushroom Model Publications book on the type, but also recently their "Single" which is geared more toward the modeler and only looks at the 'B-1' version of the Hs 126.
The Kits
Brengun has released two versions of the Henschel Hs 126, the 'A-1' and 'B-1' versions. As far as I can tell, the only differences with the kit parts are there are some landing gear legs that are only for the 'B-1'. The main difference between the two, the engine, is not catered for in these kits. The 'A-1' used a BMW 132 while the 'B-1' used a BMW Fafnir 323. The kit's engine more closely resembles the 'Fafnir'. In addition, each type had its own propellor. The kit's prop more closely resembles the Hamilton-type Junkers propellor of the 'A-1' versus the VDM prop of the 'B-1'.
To be fair, though, not much will be seen of the engine in the closely-enclosed cowl and the spinner on the prop. In fact, with the spinner attached you can't really tell which prop the kit provides. So while Brengun only offers one prop and one engine, only the pedantic will truly want to source replacements.
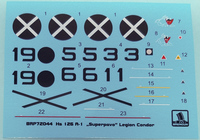
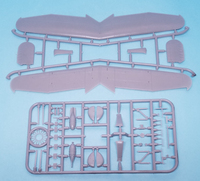
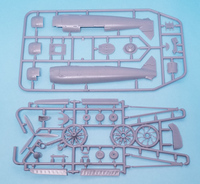
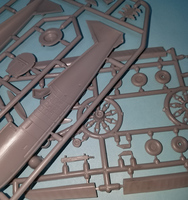
Each Hs 126 kit consists of 78 pieces of gray, injected plastic; two clear, injected canopy parts (windscreen and pilot's canopy) and a photoetch fret with 11 pieces. Decals are nicely printed and appear in register. For the 'A-1' version of the kit there are markings for four Spanish Civil War (SCW) aircraft, all with the 5.a/88 Legion Condor, Spain, 1938:
- 19.3, finished in the multi-colored, early SCW scheme on the upper side, with RLM 65 underneath
- 19.1, finished the same as 19.3
- 19.6, finished in the "typical" Luftwaffe finish of RLM 70 and RLM 71 on top, with RLM 65 undersides
- 19.5, finised the same as 19.6
|
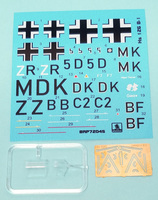
There are also markings for four aircraft in the 'B-1' release (including an 'A-1'), all finished in the typical early Luftwaffe "splinter" scheme of RLM 70/RLM 71 on top, and RLM 65 on the undersides:
- Hs 126A-1, I.LLG 2 (I. 2nd Flider Assault Wing), Practica di Mare, Italy, 1943 (this one also has a yellow fuselage band and yellow, underside wing tips)
- Hs 126B-1, Russia, 1941 (another with the fuselage yellow band and yellow underside wing tips)
- Hs 126B-1, 2.(H)/31 "Major Steiner", France, 1940
- Hs 126B-1, 2.(h)/31, "Giesse", France, 1940
|
Unlike most aircraft models, the construction sequence of the Brengun Hs 126 starts with assembling the engine, and out of the box it's a really decent one. The engine itself consists of four parts (the actual engine split in half) which is attached to the separate firewall. Once that is all painted and assembled then construction moves to the cockpit.
|
And out-of-the-box the cockpit is really nice. While there isn't an instrument panel decal, the plastic instrument panel has nice relief which will definitely help it look nice. The rear gunner/radio operator has a really nice front bulkhead, made up of four pieces. In addition that area also has a nice floor and seat with support. The pilot's area consists of a floor, control stick, seat as well as the instrument panel. Unfortunately Brengun doesn't supply any semblance of seat belts, instead relying on their separate aftermarket set released at the same time.
To the fuselage sidewalls are added two "consoles" at the front of the pilot on both sides, a bulkhead the rear gun is attached to, along with a spent shell/cartridge collector that is also glued to the starboard cockpit side. Once the pilot's and rear gunner/radio operator's areas are glued to a fuselage half, then the fuselage halves can be glued together.
Construction now turns to assembling more of the fuselage. The cowl is a five-piece affair with three pieces for the entire cowl and separate exhaust sections. Care will need to be take to ensure this comes out "round". Once the engine assembly is glued onto the fuselage then the cowl can be glued to it.
|
Now it's time to turn our attention to the rear of the plane, adding the horizontal tail pieces, their struts and the separate rudder.
While the next section has you add the spinner, prop and back-plate I would leave those off until the end of construction.
Now it's time to assemble the landing gear and here is where you have an option. For the 'A-1' release the instructions only show one type, but for the 'B-1' release there are two types of landing gear legs, along with spatted or unspatted wheels. The wheels are in halves, though, so take your time when gluing them together to ensure they're round.
|
For one of the 'B-1' schemes (actually the single 'A-1' marking selection) Brengun provides a photoetch glider towing assembly which is shown as the next step.
Now Brengun has you add the windscreen and canopy along with other items probably best left until final assembly, like the rear gunner's access step, bomb with bomb rack, etc.
The final three steps involve the wing. First it needs to be assembled since it's in halves, then the separate flaps and ailerons added. I'm currently unsure if you can pose those dynamically or not. Next is adding the wing struts and the photoetch smaller struts and aileron hinges. Finally the wing is added to the fuselage and assembly complete.
Conclusion
The Brengun 1/72 Henschel Hs 126 is definitely a step up from the earlier releases put out by Airfix, Italeri and Matchbox, all vintage 1970s kits. The complete interior is just one aspect but with the release of the Brengun kit, it is worth finding a different home for those older kits. It definitely will look great completed and on your shelf.
I definitely thank Brengun for the review kits.
