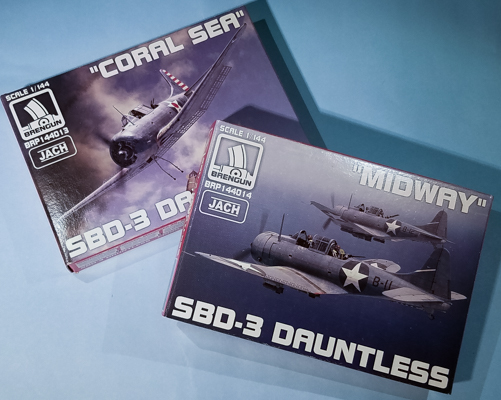
Brengun 1/144 SBD-3 Dauntlesses
By Matt Bittner
Introduction
From Wikipedia:
"The Douglas SBD Dauntless is a World War II American naval scout plane and dive bomber that was manufactured by Douglas Aircraft from 1940 through 1944. The SBD ("Scout Bomber Douglas") was the United States Navy's main carrier-based scout/dive bomber from mid-1940 through mid-1944. The SBD was also flown by the United States Marine Corps, both from land air bases and aircraft carriers. The SBD is best remembered as the bomber that delivered the fatal blows to the Japanese carriers at the Battle of Midway in June 1942.[1] The type earned its nickname "Slow But Deadly" (from its SBD initials) during this period."
The SBD-3 "began to be manufactured in early 1941. This provided increased protection, self-sealing fuel tanks, and four machine guns; 584 were built."
The Kit
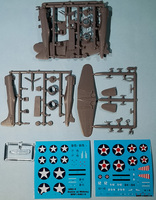
The Brengun 1/144 SBD-3 consists of 33 pieces of injected, gray plastic and one clear injected one-piece canopy. For this first release, Brengun has come out with two different kits "Coral Sea" and "Midway", the only differences being the decals in the respective boxes.
Coral Sea:
- CV-5, USS Yorktown, Coral Sea, 8 May 1942, Pilot LT(JG) Stanley (Swede) Vejtasa & Radioman Walter Schindler
- VS-3, NRAB Oakland, California, 30 Sept 1941, Experimental camouflage scheme
- VS-2 USS Lexington, Coral Sea, 7-8 May 1942, Pilot Ens. John Leppla & Radioman John Liska
- CV-6, USS Enterprise, VB-6 during Wake Island Raid, 24 Feb 1942
Except for the VS-3 machine, all aircraft are Blue Gray uppers with Light Gray undersides. The VS-3 machine has its uppers finished in Green but keeping the Light Gray undersides.
Midway:
- VS-5, USS Yorktown, Midway, June 1942, Ens. Leif W. Larsen & ARM3c John F. Gardner
- CV-6, USS Enterprise, VB-6 Midway, June 1942, Ens. G.H. Goldsmith and ARM3c J.W. Patterson
- CV-8, USS Hornet, VB-8 Midway, June 1942
All three are finished with Blue Gray tops and Light Gray unders. All decals are nicely printed and appear to be in register.
Construction naturally starts with the cockpit and it consists of a floor, both seats, the bulkhead that sits between the two pilots, and a rear bulkhead that attaches to the cockpit floor. Unfortunately there are no decals for either the instrument panel nor seat belts; no doubt Brengun will release a photoetch set for the kits that will contain those items. In addition, there is a two-part gun turret for the rear gunner with rudimentary "guns". Hopefully these too will have upgrades to them, and maybe Master will produce metal guns for the model.

|
Once all cockit pieces are assembled and glued into one fuselage half then the fuselage halves are glued together.
Next is assembling the majority of the rest of the model. After painting, glue the engine inside the cowl (and there are two cowls so a later-version SBD is definitely in the cards) and the cowl to the assembled fuselage. Glue on the one-piece wing along with the horizontal tail pieces (which are butt joins, by the way) and you have an actual aircraft. Two of the pieces called for in this step are best left off until after painting and decaling: the propellor and the forward antenna mast.
The next step in the construction sequence has you turn over the model and add the bomb swing-arm, the tail hook, the wing bomb racks and the landing gear. Some pieces best left off until the end. (Unfortunately one of my kits has a molding-flaw: one landing gear leg was not molded completely so some surgery will be required. It looks to be maybe a one off as the other kit has both landing gear legs molded completely.)
Next, you add the bombs and the landing gear doors but again, most are best left off until the end. Finally the one-piece canopy is added. Now you have a 1/144 model of the Douglas SBD-3 Dauntless.
Conclusion
There's no doubt that Brengun will release aftermarket for these kits. I wouldn't be surprised to see a photoetch set, masks and vaccuum-formed replacement canopies. While the dive brakes aren't "hollow", they do have indentataions showing the holes in them as per the real thing. It won't look the same as if they are "see through" - probably coming via photoetch - but adding a black wash to the plastic will definitely look better than not having any sort of perforations at all. Also, it shouldn't come as a surprise there are no instrument panel decals nor seat belt decals, since Brengun is known for their excellent photoetch sets. I am definitely looking forward to putting these together.
Many thanks sent to Brengun for both review kits.
