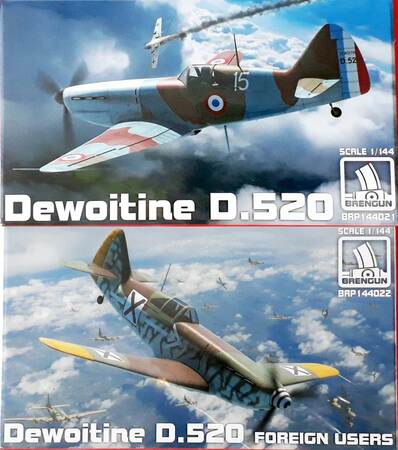
Brengun 1/144 Dewoitine D.520
By Matt Bittner
Overview
Most know the history of the Dewoitine D.520 and if not, there are plenty of articles and books written on the type. It was the best French fighter during WWII and was well liked.
As far as I know, this is the first injected-plastic kit of the D.520, and Brengun has done a very nice job. This review covers the first two boxings of the model; the only difference being decals and marking options.
The Kit
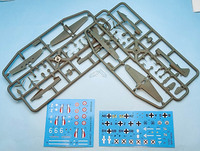
The Brengun 1/144 Dewoitine D.520 consists of 24 pieces of gray, injected plastic and one clear-sprue canopy, in its closed configuration. Markings included with the first box, BRP144021, are for the following aircraft:
- Mieczyslaw Mümler, GC II/7, France, 1940
- Pierre Le Gloan, GC III/6, Alger-Maison Blanche, 1940
- Josek Stehlik, GC III/3, France, 1940
- Yves Rupied, GC III/7, France, 1940
All of these aircraft are finished in the French four-color upper paints and underside light blue gray scheme of the period. The second boxing - BRP144022 "Foreign User" - contains markings for the following:
- Vassil Volkov, 6 Istribitelnyj Orliak, Marino Pole, 1944
- JG101, Pau airfield, Spring, 1944
- JG103, Brussels-Ever, Spring 1944
- 59 Gruppo, 232 Squadriglia, Italy, 1943
The first three mentioned above have upper surfaces in RLM 74 and RLM 75, with RLM 76 sides. The first two have RLM 04 undersides while the third has RLM 76 on its undersurfaces. The fourth mentioned above is the "typical" Italian scheme of Nocciola Chiaro 4 upper surfaces with blotches of Verde Oliva Scuro 2 sprayed over the Nocciola Chiaro 4; undersurfaces is Grigo Azzuor Chiaro. All decals look to be in register and are nicely printed.

|
Naturally construction starts with the cockpit, which consists of a floor, seat, instrument panel (but no decals), control stick and rear bulkhead. Once that is assembled then it can be glued into one fuselage half and the halves glued together. Important Note: Brengun does NOT include the area behind the pilot; the entire thing is open. This might not be a problem with a closed canopy, but if you open the canopy, it will be very noticeable there's nothing there. They have included a part that will fit back there in their add-on aftermarket set, so be aware of that going in. We shall see if the lack of that area is noticeable once the closed canopy is glued on.
Once the fuselage is assembled, the construction contiues by adding the horizontal tail pieces; nose; prop, and exhuasts. Personally I will leave those last two off until after painting and decaling.
Now the wing is assembled adding the underside radiator to it, then it is glued to the fuselage. While the next construction step has you add the landing gear, those are best left off until the very end. Finally the canopy and antenna are glued to the top of the fuselage.
Conclusion
I am definitely looking forward to assembling these. Coupled with Brengun's own vaccuum-formed canopy, separate aftermarket set and masks these will look great on your completed shelf.
I definitely thank Brengun for sending these to review.
