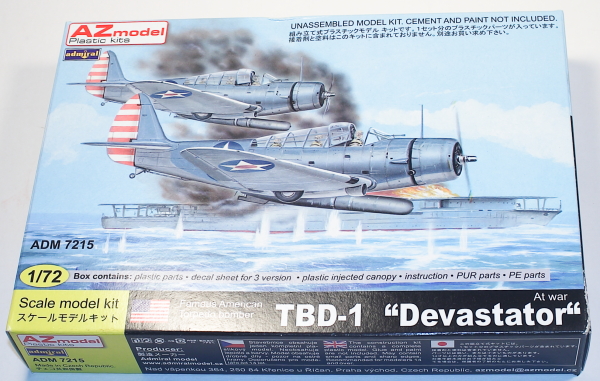
AZmodel 1/72 Douglas TBD Devastator
By Matt Bittner
Introduction
The Douglas TBD Devastator was a first of many kinds for the United States (US) Navy when it first flew in 1935. It was the US Navy's first all-metal aircraft; the first aircraft with hydraulically-assisted, foldable wings; it was the first that had brakes on its wheels; and it was the first two-seat US Navy aircraft that had an entirely enclosed cockpit. At the time of its inception the Devastator was the most advanced aircraft at that time. However, given the state of aircraft-design advancement at that time in history it didn't hold that distinction for very long.
The Devastator saw action during the early parts of World War 2 (WW2). While it served with distinction during the hunting down of the Japanese fleet during this early time, it was also considered a death-trap when not supported by a fighter escort. The aircraft was slow and not heavily armored, and the guns it used were no match against the Japanese aircraft of the time. It was after their use in Midway the TBD was withdrawn from service and there were a total of 129 TBDs built.
The Kit
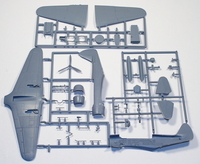
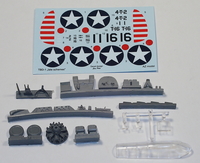
 The AZmodel 1/72 Douglas TBD Devastator consists of 46 pieces of grey, injected plastic; four clear pieces; and 26 pieces of resin. All parts look really well molded and should build into an excellent example of the TBD. There are decals for 3 aircraft:
- TBD-1, BuNo. 1506, T-16 of VT-8, USS Nornet, 4 June 1942
- TBD-1, BuNo. 0319, "1" of VT-5, USS Yorktown, March 1942
- TBD-1, 4-T-2, of CV-4, USS Ranger, 1942
All are finished in the standard scheme of Blue-Grey over Medium Grey undersurfaces. Decals appear to be in register and are nicely printed.
Construction naturally starts with the two-place cockpit, and most of it is built with resin parts. After painting each part as shown in the instructions then they are combined to complete the cockpit. It is at this point that you'll also assemble the rear gunner's gun-ring and gun (different dependent on the version). Once the pieces for the cockpit come together, then it is all added to the starboard fuselage half (again, after painting the interior of the fuselage halves). After the entire cockpit is added then the fuselage halves can be glued together.
The next step in the instructions is to assemble the torpedo, which consists of both injected plastic and resin parts. Naturally this is best left off until the very end.
Wing halves are now assembled and then glued to the fuselage. (I'm not sure if you want to deviate from this form of construction because the center of the wings - close to the fuselage – are corrugated so you'll need to line up the corrugations on the top and bottom of the wings. If you think that adding the bottom part of the wing to the fuselage first will get better fit could lead you to the corrugations not lining up, and looking a lot worse than if you have a seam to fill.) It is here where you'll add the already assembled cowl and horizontal tail pieces to complete the airframe. The instructions also have you glue the one-piece canopy on at this time as well.
 There are two things I wish this kit had. The first is an easy way to display the canopy open (the cockpit is very nicely detailed and it will be a shame to leave all of that closed up); the second is a set of masks for the canopy. There are a lot of panes of "glass" on this canopy where a set of masks from the likes of Eduard would be very beneficial. As far as opening the canopy goes, there are a few options. Cut the kit canopy up; use the kit canopy as a master to squash-cast a few canopies to cut up; or track down the Falcon vacuum-formed canopy. Granted, the Falcon canopy is for the Airfix kit, but you might be able to get it to fit on the AZmodel kit.
The last step in the instructions are to add all those pieces that are best left off until after painting and decaling are finished – adding the landing gear legs (and you'll need to pay close attention to the instructions as there are some pieces that need to be scratched) and adding the antenna. While the kit offers a torpedo there is nothing in the instructions to show you how to mount it to the finished model. Odd.
Conclusion
While the Airfix kit isn't a bad kit, it suffers from its age, mainly with the lack of a cockpit and raised details. Thankfully the AZmodel is more up-to-date with nicely recessed panel lines and a very complete cockpit. It should look really nice when finished and sitting on your shelf.
Many thanks to AZmodel for sending their Devastator to review.
