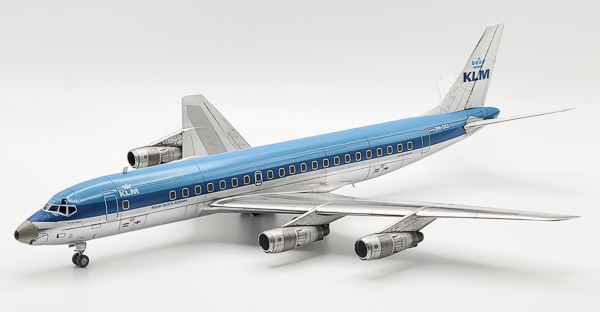
X-Scale 1/144 KLM DC-8-53
By Chris Banyai-Riepl
Overview
For the longest time, the only game in town for a DC-8 was the old Revell kit, but then we got the Minicraft Super DC-8s, the long fuselage 60- and 70-series. By chopping those down you could get a -50 variant, but it was a bit of work to get there. X-Scale fills that gap with their recent DC-8-30 series and now the DC-8-50 series. Having looked at the plastic in the box, my thoughts were that this could be a pretty nice DC-8, and I think the results verify that initial analysis.
The Build
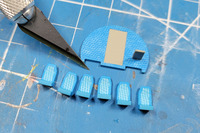
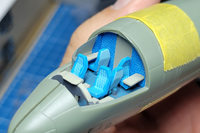
So let’s jump into the build of this nice kit. With most models you’d start with the cockpit detail, but that’s not generally the case with airliners. However, this kit is not a normal airliner kit, so we get to jump right into a pretty nicely detailed cockpit. Five seats, two tables, an engineering section, an instrument panel, and a center console. So of course I went to town on this. I did a textured paint job on the bulkhead and sidewall, and a different texture on the floor. I did this by airbrushing through a photoetch template to get the patterned effect. I did the same on the seats, painting the edges afterwards to give a two-toned effect.
|
|
In addition to the paintwork, I dug into the decal spares box and found some relevant decals to provide both details on the instrument panel and engineering section. Additional decal strips provided the seat belt detailing. With this, plus some detail painting, resulted in a nicely detailed cockpit interior, which of course will be fully visible in the finished model (he says sarcastically).
When it comes to assembling the fuselage, there’s some unique aspects with this kit. The cockpit tub fits into tabs, but those tabs are separate pieces that need to be glued into the fuselage. This may seem odd at first, but it does prevent sink marks on the exterior and let’s the modeler get perfect alignment. I did this by putting glue on the individual pegs, then putting everything in place and carefully fitting the finished cockpit tub in place to make sure everything lined up properly. It took a bit of dry fitting along the way, but the end result was a perfect fit.
At the same time, I assembled the nose wheel well from its multiple pieces and also glued a bolt behind the cockpit tub for the necessary nose weight. Another useful addition was adding in tabs along all the seam edges. This isn’t necessarily needed, but it did provide a solid alignment that pretty much eliminated the need for filler on the fuselage seams.


|
Speaking of tabs, let’s talk about the wings. The engineering of these is interesting, with a center lower section spanning the fuselage and part of the lower wing, with outer wing sections making up the rest. These fit into upper wing pieces that incorporate the complete trailing edge, with the seam on the underside falling on no clear panel line. This is both good and bad, as it means you can fill the seam completely, but it also means you have panel lines that cross the seam that will need to be rescribed.
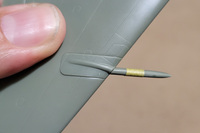
After looking at this assembly for a while, I decided to reinforce the lower wing joint between the outer and center panels, while gluing the upper wing directly to the fuselage to get as perfect a seam as possible on that joint. I then glued the lower wing assembly in place (also with tabs to make sure the central section was as smooth as possible to reduce the need for filler) and slowly added all the other bits in place, including the upper wing inserts around the engine pylons. This was probably the most challenging part, and I probably could have spent more time getting that just right.
|
|
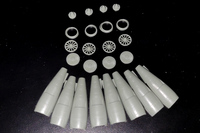
Speaking of engine pylons, the engines are simply amazing. No less than seven parts for each engine, plus the two-piece pylon. These were built up, with the individual parts painted separately, and the pylons were glued to the wing. Some filler was needed around the leading edge, but other than that, these went on without a hitch. The engines have a lot of variation in their metal finish, so having these be as detailed as they are is definitely worth it.

|

|
I decided to keep the engines off the pylons for painting and started the painting process by figuring out that KLM blue in Vallejo Model Air colors, which is the paint I lean towards. After several experiments, I discovered that the Electric Blue color in the Vallejo Game Air line was a good match. With that sorted out, I turned to the Vallejo Metal Color line and went to town on the natural metal portions. The majority was finished in chrome, with duralumin and aluminum sections on the upper wing, and aluminum sections on the fuselage. For the engines, I went further, with duralumin, pale burnt metal, exhaust manifold, burnt iron, and jet exhaust all being used. As an experiment, I also used the Molotow chrome pen for the separate intake lips, but the clear coat over that toned it down significantly. I like this toned-down look, but for other builds I would leave that chrome pen work until the final stage, so it remained bright and shiny. A clear coat over everything and it was time for decaling.

|

|
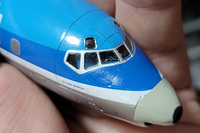
The decals are beautifully printed and reacted quite well to all the application techniques I applied. Dipping them in water, they immediately separated from the backing paper, and gave plenty of working time followed by excellent adhesion. The only fault I came across was that the white was somewhat translucent, so the overlap on the cheat line was noticeable. Other than that, though, the decals performed flawlessly and after a short session the DC-8 was fully embracing the KLM color scheme. Another clear coat and a panel line wash, and this one was ready for final assembly.
|

|
The final steps involved the landing gear, and this is another highlight of this kit. Both the nose gear and main gear are very well detailed, being made up from multiple separate pieces. The wheels themselves are all split into separate halves, so you will be responsible for the alignment there, but the detail is worth that extra step. Separate retraction struts and nose wheel lights add to the detail on these parts, and some careful painting plus some washes really make these assemblies come to life. And with those in place, plus a couple blade antennas, this build was done.

|

|

|

|
Conclusion
This was an absolute joy of a kit to build. Sure, it had challenges, but they were easy to work through and the result exceeded my expectations. While there were some challenges in building the kit, there wasn’t anything too difficult and I am quite pleased with the result. If you’re wanting to build an early DC-8, this is definitely the kit to have My thanks to X-Scale for the review kit, and I look forward to their future releases.
