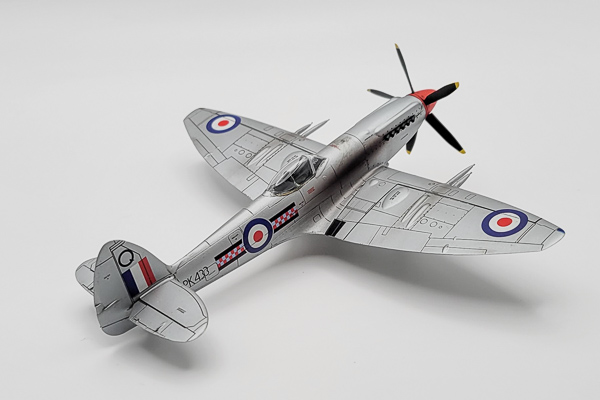
A Simple Trick for Perfect Seams on Wing Roots with an Airfix 1/72 Spitfire Mk 22
By Chris Banyai-Riepl
Overview
There are lots of small things we all do, almost subconsciously, when building models. When I picked up the Airfix 1/72 Spitfire Mk 22 for a quick build, I found myself doing just that and decided to call that out in a short article on that build. So here’s my method for getting perfect seams on wing roots.
The Tip
While most times I’ll start with the cockpit in my builds, with this one I decided to start with some assembly. The Spitfire has some of the nicest wing root transitions out there on a plane, and having to ruin all the scribed detail through a poorly fitting wing can really be annoying. So to get around that, I ignored the kit instructions and decided to attach the upper wing halves directly to the fuselage halves. With careful treatment of the mating edges, I got a clean fit. Careful gluing with close attention to the top seam gave me a smooth seam, and a piece of tape ensured that remained smooth while the glue dried. A bit of sanding and the wing root joint was perfect.

|

|
However, that is only part of the battle. The next step is to make sure the lower wing and proper dihedral is set. To get that done, after the cockpit was done up and the fuselage was glued together, I glued the lower wing piece in place. With lots of clamps all around and the occasional use of a hair dryer to warm the plastic up a bit as needed, I ended up with everything properly aligned and just the wing leading edge seam to deal with. That seam was simple to deal with, needing just a bit of filler at the leading edge of the wing root and some light sanding. Far easier and faster than dealing with a complex curve in the middle of a 90-degree joint on the top of the wing root, that's for sure.

|

|
The Rest of the Build
As this aircraft is finished in overall silver, having that smooth wing root definitely pays off. With all the other bits in place, I gave the whole plane a coat of Vallejo Model Air silver. While the wing roots looked great, I found a few seam issues on the fuselage, so a couple rounds of filler on those and some respraying, plus a gloss coat, I was ready for decals.

|

|
The kit decals went on nicely, an experience I’ve had with all Airfix decals, with the added benefit of having plenty of stenciling to otherwise break up the monotony of the overall silver look. A clear coat on these followed by a panel line wash and some light staining on the underside and I was ready for the final assembly. Landing gear bits and the big five-bladed propeller, plus some small antennas and this one was done.

|

|
Conclusion
This was a fun quick build and a great example to showcase this simple trick to get perfect wing root seams. Give that technique a try next time you want to build this Spitfire kit, or any plane that has these kinds of wing root seams.
