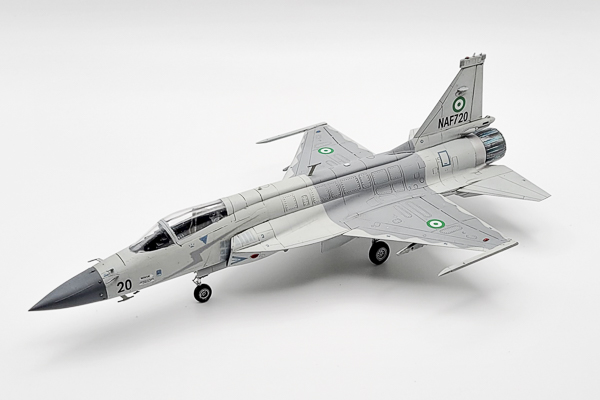
Tips, Tricks, & Techniques: Laser Printing Decals for a Trumpeter 1/72 JF-17 in Nigerian Markings
By Chris Banyai-Riepl
Overview
For those of us who find small air forces fascinating and want to replicate them in the scale world, finding usable markings can be quite challenging. If we’re lucky, someone will have provided the markings as an option on an aftermarket sheet filled with more mainstream nations. But when you combine a small air force with a lesser-known aircraft type, those options aren’t available. So for those schemes we have to take matters into our own hands.

|

|
The Options
The subject of this build is the Trumpeter 1/72 JF-17 Thunder. I had started this kit a while back (a running theme with quite a few of my subjects), and I had originally planned on doing this one in Pakistani markings. However, when I came across photos of a JF-17 in Myanmar markings, with its colorful blue camouflage, I started thinking of other options for this build. While the Myanmar option was definitely a neat scheme, the ”roundels” (they’re triangles, can they still be called roundels?) would be challenging, and the camouflage color serials added further challenges. But, in the same search for JF-17s, the new Nigerian JF-17s showed up. This option was much easier, with traditional roundels and black serials. So this in hand, I went about finishing the model up.

|

|
The Nigerian option is painted up in a similar scheme to that of the regular Pakistan aircraft, with an overall light gray airframe with a darker gray section over the wings & upper fuselage. This meant I could use most of the kit decals, which included the lightning bolt on the nose and all the stenciling (although those are a bit more blue than I liked). The roundels, though, had to be sourced elsewhere. Luckily the ones that were in the Eduard 1/72 L-39 Albatros kit were close enough in size, so I could use those. The only thing needed were the tail and nose codes.
For those I got lucky, as these were painted black on the original aircraft. Black meant I could create my own decals using a laser printer, so that’s what I did. I drew up the artwork for the decals in Adobe Illustrator, but you could potentially do the same thing with a standard font in Microsoft Word or Google Docs. The key is to print out a regular paper version to test for sizing and dial in the exact size before printing the decals (printing multiple copies to be safe). Once finalized, the next step is the printing on the decals. Here it is best to just use a small section of decal paper, taped into a piece of regular paper. Another useful tip is to scuff up the decal paper before printing, to give the laser toner something to hold on to. Once printed, coat the decals with Microscale Decal Film and these are ready to apply.

|

|
While writing it all out seems complicated, it’s actually pretty easy and once printed, the decals went down quite well. I then turned to the other interesting bit of texture in this build, the exhaust. This was done with multiple layers of burnt metal paints coupled with clear blue effects. This turned out quite well, but I then discovered the problem with old builds: not knowing the proper constructions steps. I should have installed the exhaust assembly before gluing the fuselage together. Since it no longer fit, I had to cut off the length and shorten the assembly. Looking up the back end it’s obvious it’s been shortened, but other than that, it’s not bad. Next one I’ll definitely get that set properly beforehand.

|

|
With all of that in place, and a flat coat over the finished decals, this build was pretty much done. I kept the weathering to a minimum as these are new aircraft to the Nigerian air force. Lots of small antennas were added, some detail painting, and I had a Nigerian JF-17 on my shelf.

|

|

|

|
Conclusion
If you’ve been curious about printing your own decals, a subject like this is a perfect example to try your hand at. Simple black lettering that’s large enough to tinker with, plus a lesser known aircraft and air force, makes for a very fun little project.

|

|
