Roden 1/48 Junkers D.I
By Ken Murphy
Every genre of modeling has its own special challenges: cars require flawless finishes; tanks and armor just the right amount of weathering and wear; ships, watch-like tiny details; figures, realistic skin tones; jets, multi-toned metal finishes and the list goes on.
 For my favorite genre, WWII aircraft, the challenge is usually birdcage canopies of various complexities. For my other favorite genre, WWI aircraft, the challenge is rigging (something I’ve yet to master, but not for want of trying practically every method I’ve ever heard of). So after a particularly excruciating adventure in rigging, for my next build I was looking for something a tad less challenging. As I scoured the racks at the local hobby shop, I came across the Roden Junkers D.1.
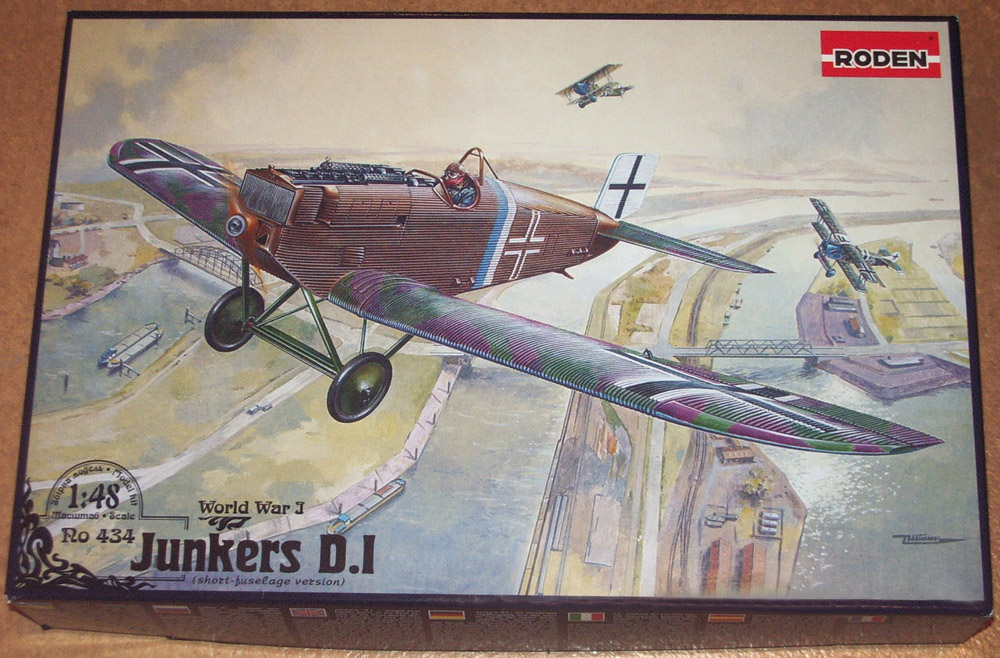
I was unfamiliar with this odd bird and I found its truck-like elegance to be less than appealing – even in romanticized box art. But there were two things about it that I found very attractive: no canopy and no rigging! This held the promise of the kind of easy build I had been looking for. I could hardly wait.
First Look
A quick look inside showed that I had in my hot little hands a pretty nice kit. It had the kind of clean molding and attention to detail that I have come to expect from Roden. And it had one thing I didn’t expect: the decals looked very good. I have a couple other Roden kits of WWI aircraft and I have been impressed with the plastic and disappointed with the out of register decals. These looked fine. Maybe it’s just that roundels look horrific if they are even the slightest bit out of register, but a cross is less critical. But for more information about how it looks in the box, please see Mike Whye’s First Looks article in the March ’09 issue. His is of the long body version, but the kits are essentially the same. More on that in a moment.
Backstory of the Bird
But first things first: I like to start by finding out something about the subject. Turns out that the Junkers is one of those obscure aircraft that non-the-less has real historical significance. In 1918 it became the world’s first all-metal fighter. The instructions give a surprisingly detailed history in pretty good English as well as in Ukrainian (Russian?) and German and include these tidbits of information:
The rapid development of the aviation during the WWI was aimed at improving speed, range and maneuverability. Structurally, aircraft from that period remained the descendants of the Wright brothers first flying machines - still produced from the traditional materials such as wood, canvas, struts and wires. However, the revolutionary designs of Hugo Junkers were a significant departure from all previous aircraft. The Junkers J.I, Junkers CL.I and Junkers D.I were made entirely of metal. The framework was made of duraluminum tubes and was covered with sheets of corrugated aluminum in a process Junkers patented in 1912.
Another innovation was the thick cantilevered low wing monoplane configuration which allowed for dispensing with the second wing and forest of bracing wires. The prototype (Junkers designation J.7) first flew in September 1917. The new design was plagued by a many problems, like vibration of the wings in flight and bad controllability of the ailerons. Nevertheless, the biggest problem was the absence of a suitable engine. The best engine available at the time was the Mercedes D.IIIa, which developed only 160 hp., enough for a traditional airplane, but not for the much heavier metal design.
After many modifications to the overall design, in July 1918 Junkers entered the Second Fighter Competition with the new J.7 and J.9 which incorporated a short fuselage for better maneuverability. Both planes were designated D.I and it’s interesting to note that, as I alluded to above, Roden has kits for both: the early long and later short fuselage versions (Kits No. 433 and No. 434 respectively). Mine is the short version.
The pilots that took part in test flights recommended it strictly as "an airplane for fighting with balloons and airships." Furthermore, as a low-wing monoplane, it had a limited view downwards from the cockpit, and this also resulted in disapproval from many pilots.
However, the Idflieg (Inspektion der Fliegertruppen - "Inspectorate of Flying Troops") were intrigued and ordered 100 aircraft, but by the end of the war only 41 had been built.
In October 1918, a few examples of the D.1 were shipped to the front lines but they were not a factor in any air battles.
After the war, D.I had one last opportunity to prove its worth. In 1919 German air forces assisted the governments of the Baltic countries in their struggle against Russia. Junkers all-metal aircraft had big advantages over wood and linen types. For instance, metal aircraft were not subject to the whims of the weather, while the canvas and wood of other machines deteriorated very quickly.

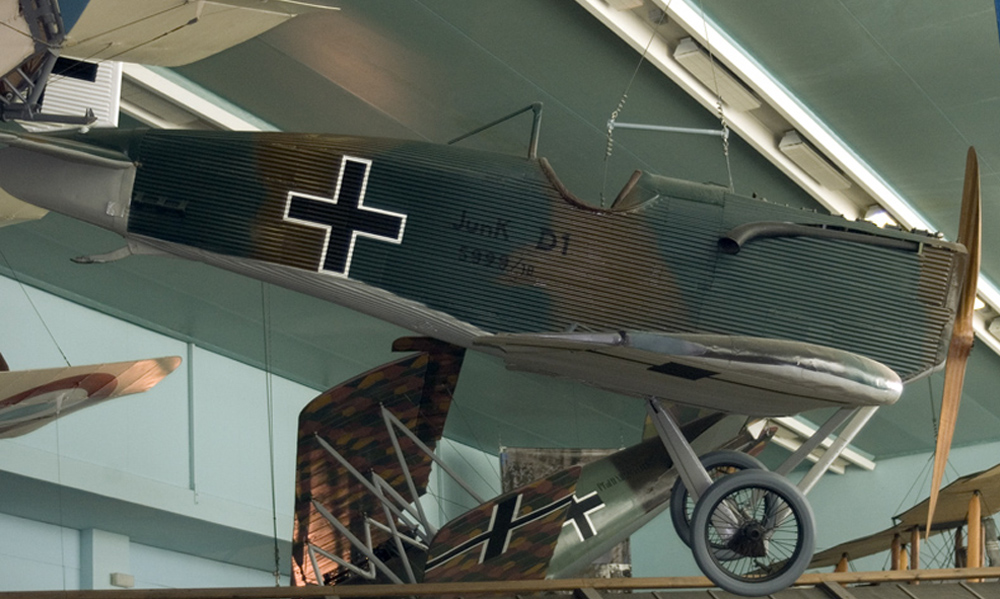
Only one original D.I survives to this day. It is hanging in the Musee de l' Air et de l' Espace at Le Bourget in Paris. I have it on no less an authority than Jim Schubert of IPMS Seattle, that the restoration of this aircraft has a number of historical inaccuracies, which a comparison of this picture with the model will confirm.
The Build
Uh-oh, my “easy build” bubble was burst. Checking out the sprues and admiring the excellent representation of the corrugated surfaces, it suddenly dawned on me. How am I going to handle the seams on these without destroying the corrugations? It seemed like an impossibility (pardon the pun). But as I fit the wings and fuselage pieces together, everything fit perfectly and the corrugations matched! A clever bit of great engineering on Roden’s part was to build up the fuselage from 4 pieces instead of 2 halves that would have required massive reconstruction. Building it up from a floor, 2 sides and a top allows the corrugations to fit together just like the real bird. Fears of corrugation abated, I got to work on the interior.
The nicely detailed interior is built up on the sled-like floor of the fuselage and consist of several internal frames, floor, engine and supports. The very unusual control stick was a challenge. It comprises 3 parts which have tiny points to glue together and which then have to attach to a control bar that runs under the pilot’s seat which attaches to the same bar by way of a thin vertical rod. It’s not as complicated as it sounds, but it was a challenge to my gluing skills and patience. As an added touch, I ran some control wires from the rudder peddles under the seat to the rear framework. You have to look hard to see them, but I know they’re there. All in all, it adds up to a pretty nice interior - almost a shame to put a fuselage around it. One more tricky bit: the machine guns have their ammo cases attached to the bottom of them and they slip into slots behind the engine. These took some fussing with to get them to sit parallel and straight. But other than that, the interior goes together nicely.
Now for the part I initially dreaded, buttoning ‘er up. But the sides and top fit perfectly and all the corrugations meet. No filler or sanding required. The only fix required was a divot in the end of the tail cone on one side that required filling, but that may have been merely a molding defect in my copy of the kit. The rest of the build was equally as easy. The corrugations in the wings fit nicely and the wing to fuselage joint is flat requiring no filling, filing or futzing. The separate control surfaces fit just as well. I opted not display the ailerons at an angle to better maintain the contour of the wings, but I drooped the tail feathers and put a slight angle to the one piece rudder. That was a bit tricky, as the post to attach it to the fuselage is as thin as a pin and the whole for it twice that size.
I had some trouble with the fragile and fussy landing gear. The tiny contact points of the struts to the fuselage are close to scale – they are very thin on the actual plane - but they make for a real gluing challenge on a model. As I was fussing with this, the only disaster of this build occurred. I was pushing the wheels onto the spreader bar, a tight fit, and the bar snapped in half. I glued it together as best I could, but I’ve yet to work up the courage to fix the obvious lump it left behind.
Only a few fiddly bits were left and the build was done. The only “rigging” is a pair of cross wires on the undercarriage (which I will add after I fix the spreader bar).
The Paint Job
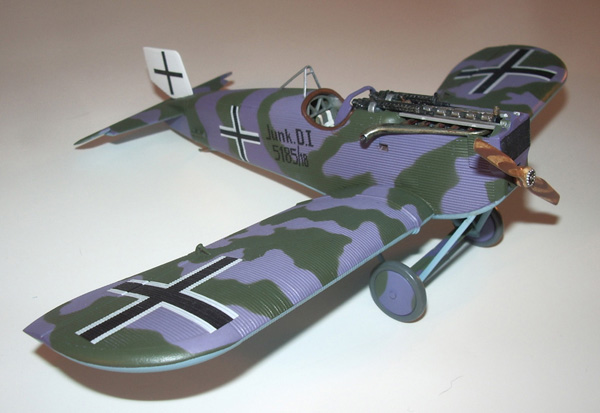
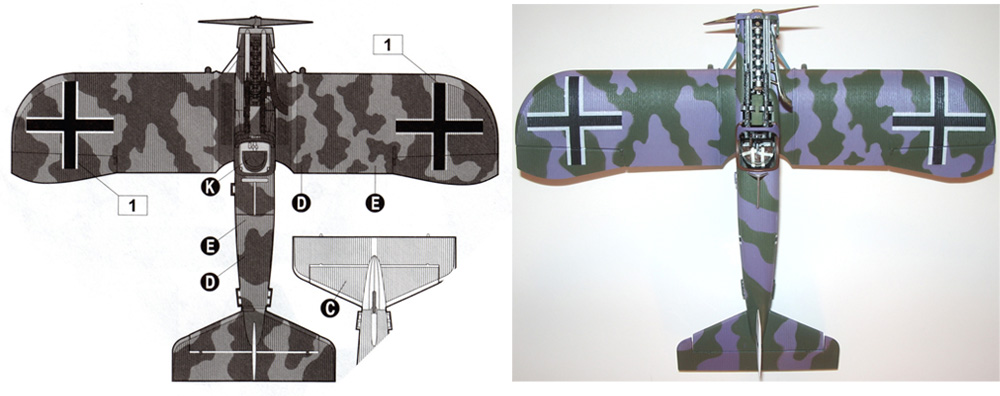
 The paint was done in stages throughout the build. Particularly the all white tail and the wheels and gear struts. The rest was done on the completed build. The instructions have call outs for Model Master colors, though I went my own way on some of the colors. Markings are given for two aircraft. I opted for the more interesting scheme for aircraft s/n 5185/18, Western Front, Autumn 1918. As you can see, it consists of typical German green and purple. For these I used Model Master RLM 62 with a touch of RLM 82 to darken and warm it up and Tamiya X-16 purple with a touch of white. For the undersides I used Tamiya XF-23 light blue.
To create the intricate camouflage pattern, I enlarged the image from the instructions and used the copy as a template to cut out the shapes from a rolled out sheet of modeling clay about 1/8th inch thick using an Exacto knife. I touched up the edges with a round stick them laid the pieces on the purple pre-painted airframe. Then it was just a matter of spraying exposed areas as perpendicular to the surfaces as possible to avoid too soft an edge. I hand painted the prop using a base coat of Tamiya sand brown and white then hand painted with Model Master leather to represent the laminations, then did a light coat of Tamiya smoke to give it a little blending and tone down the colors. I should mention that all these paints are acrylics.
The Decals
The weird thing is the decals turned out to be the hardest part of the whole build. Whodda thunk? I had read reviews of the kit and builds from other sources which warned of the problem. “I had problems getting the decals to settle over the corrugation.” What an understatement! I started with a cross under the wing. Repeated applications of Micro Sol made no impression whatsoever on the impervious slab, so I brought out the Big Gun – Solvaset, the strongest decal softener I have!
Nothing. Not even a budge. The decal had all the pliability of sheet steel. Another douse of Solvaset and light pressure with a soft cloth, then a little harder. Then harder still until I thought I was going to smash the wing! Then I tried pushing it into the corrugations with a Q-tip, then a stiff brush, then my thumb, then a jackhammer, a steamroller and
dynamite!!! Okay, okay, I didn’t actually use dynamite, I just wanted to. I have never in my life had such a hard time with a decal. In one review I read, the author abandoned the decals and just painted the crosses on. Not a bad idea, but I was not going to be defeated! Eventually I was able to make it work with a combination of gallons of Solvaset, FIRM pressure, slicing with an eXacto knife, more pressure and lots of touch up paint, and that’s it. Simply multiply this process by 10 and you’re done.
Conclusion
In the end, you have a very nice model of a truly historic and revolutionary aircraft that will really standout on the shelf. This is a very nice kit that I heartily recommend, but if you are looking for a plane with no canopy to fuss with or rigging to frustrate you, be careful what you ask for, because every kit (and every genre) has its challenges!
