
RSS-Hobbis 1/72 Junkers J 2
By Matt Bittner
Overview
The latest from RSS-Hobbis is the Junkers J 2 and it's a very nice kit. If you want to see what's in the box, be sure to check out my First Look.
Construction
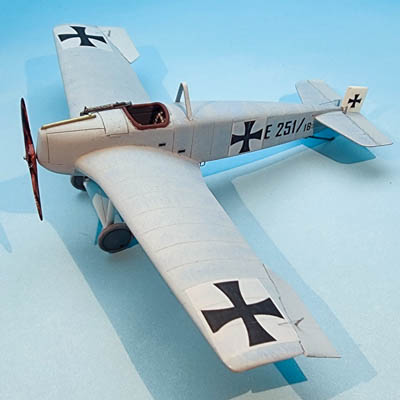
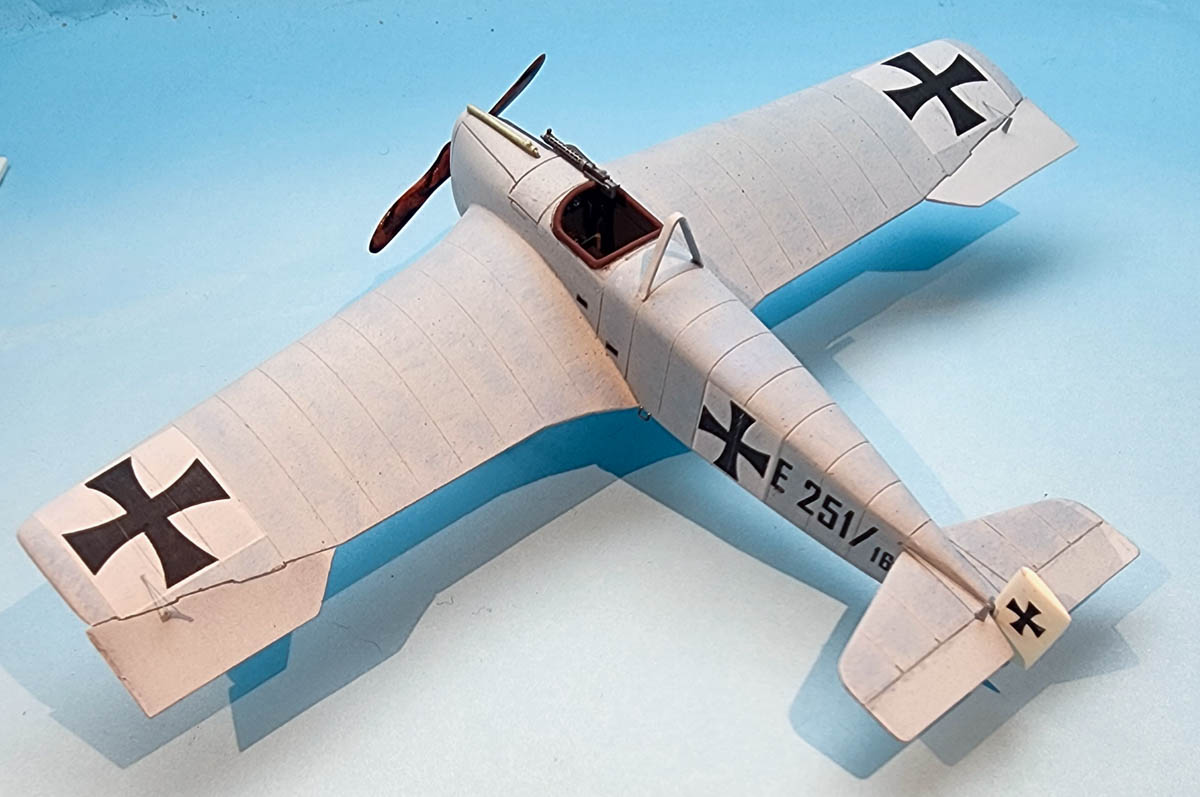
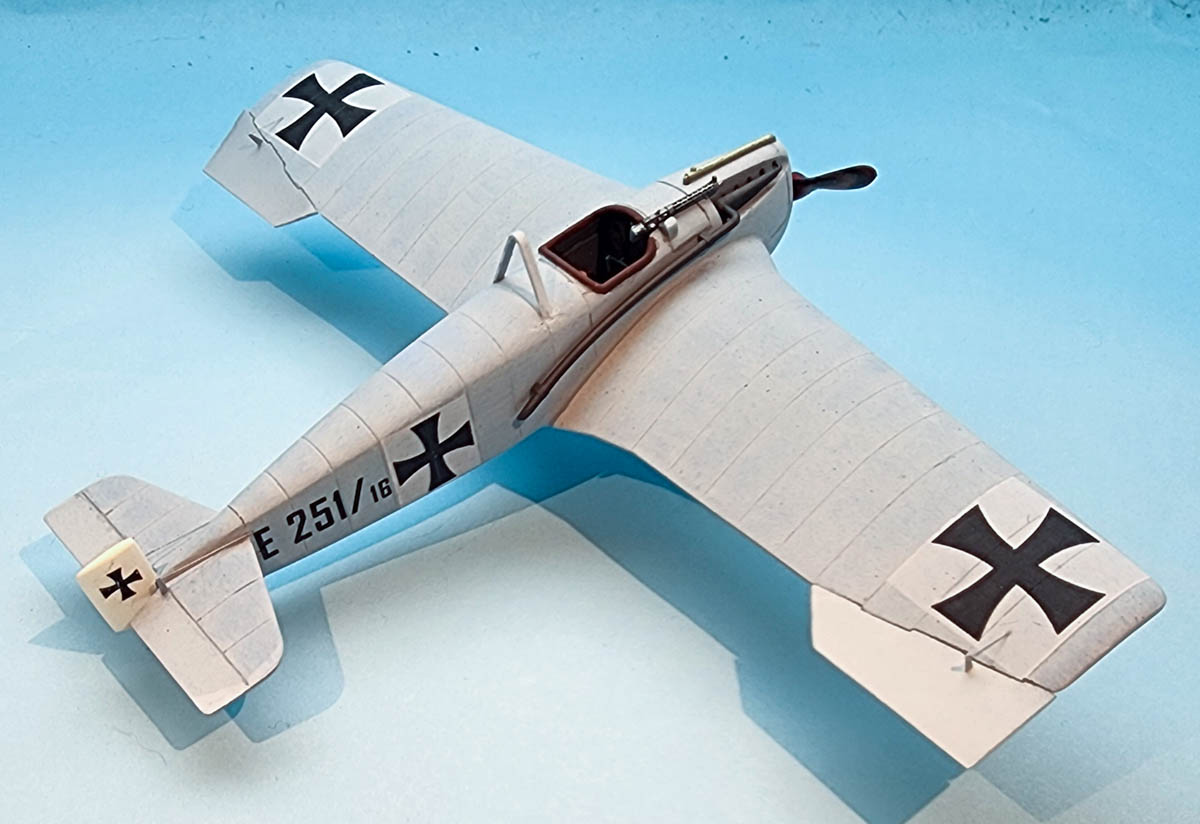
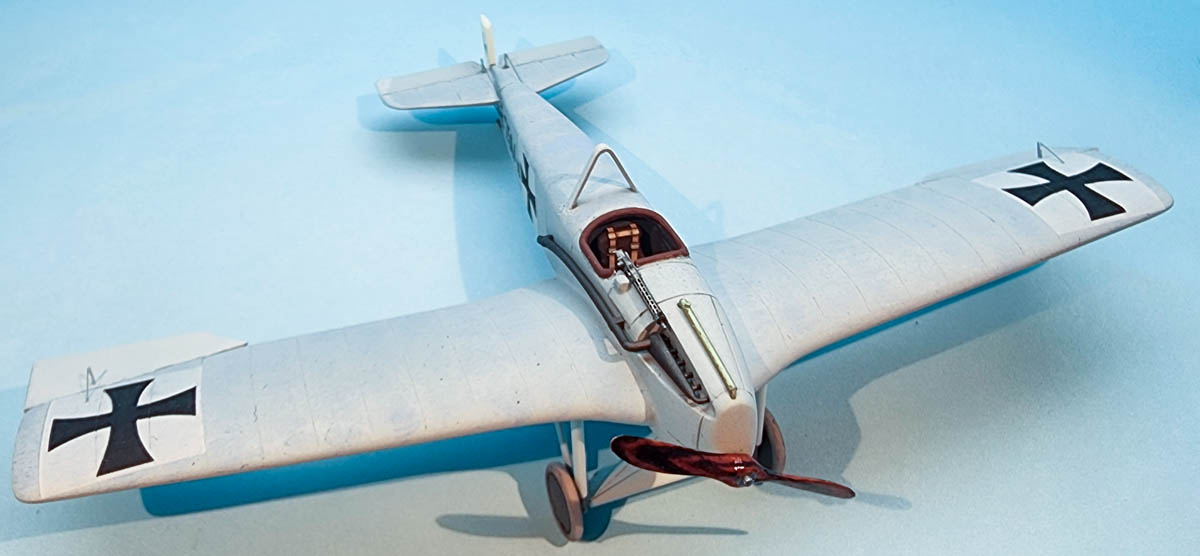
It's an old-fashioned LP vinyl on skip, but most aircraft models start with cockpit construction and this RSS-Hobbis Junkers J 2 is no exception. The only separate parts for the cockpit include the seat, control stick, rudder pedals and instrument panel. While the colors are truly unknown I figured it would be some type of gray on the interior so I sprayed the inside of the one-piece cockpit - and the separate upper fuselage piece - with a gray primer and left it at that. I used different paints on the other parts, though, an RLM 02-ish for the rudder pedals and black for the control stick. Then leather for the seat, wood for parts of the instrument panel and once it was all dried, I added Eduard German WWI seat belts. Once everything was dry I glued in all the parts and attached the upper fuselage piece. Unfortunately I needed to do some blending on this piece by sanding and a little putty but otherwise the fit was decent.
|
Now it was time to add the one-piece wing and I had to do more blending - sanding and putty - to get that acceptable, with most of the putty on the underside seams. It's nice RSS-Hobbis provides the ailerons as separate pieces so those were left off the model until the end and painted separately. Note that RSS-Hobbis does not include control surface control horns so I sourced those from Eduard and Brengun, drilling holes for them all the way through to ensure they lined up. Once the holes were drilled I then attached the horizontal tail and again, putty was needing for blending; I left the rudder off until the end as well for separate painting.
I was curious about the fit of the underside radiator and noticed it was going need blending as well, so I painted the interior of both pieces of the radiator then glued both to the model. I also attached the overturn-protection strut on the top of the fuselage as well before painting as there was a little blending needed there.

|
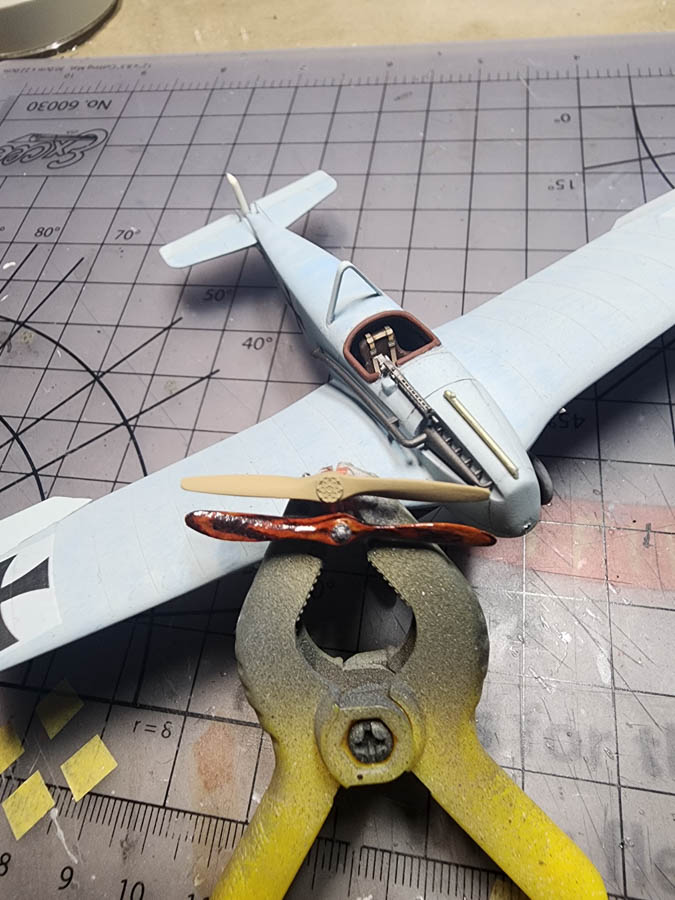
A little note about the landing gear. Thankfully RSS-Hobbis provides this as one-piece which makes installation a breeze, just be careful while handling. Unfortunately on my example the manufacturer used a different resin in his printer so over time of a few days, the landing gear started bending and the entire model was sinking. The same happened with the tail skid. Thankfully RSS-Hobbis sent a new set of landing gear using a more rigid form of resin and they're performing much better without issue. I decided to scratch my own tail skid out of brass as I think the kit part - aside from bending under weight - didn't quite match what was in the photos.
|
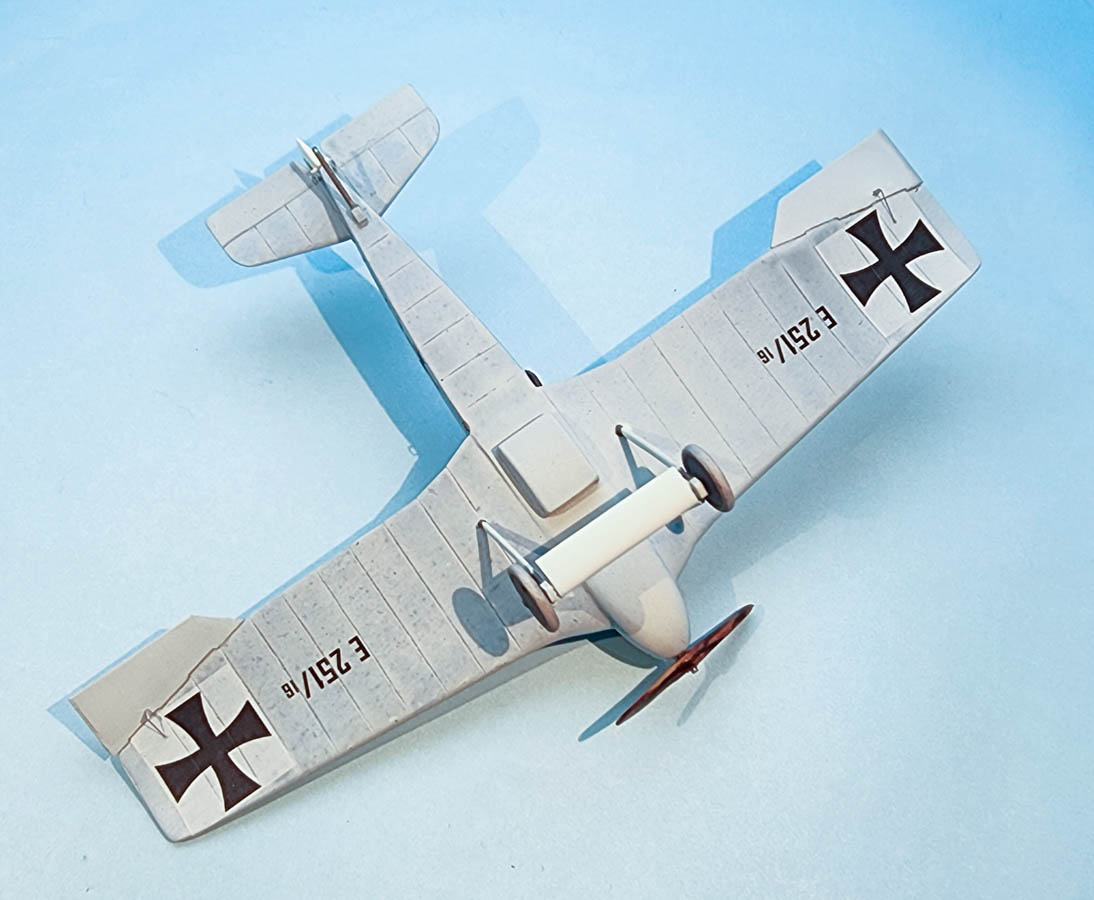
Now it was time to paint and thankfully Vallejo 71.306, Sky Blue was a good match. And naturally, it was after painting was finished I noticed a few things missing from the kit. First, the pilot's steps on the port side of the fuselage are missing; in the end I added mine with decals because I discovered them missing when it was too late. Next, the "corrugations" (for lack of a better term) are also not represented in the kit; in the end, I decided to darken the Sky Blue paint and tried to dry brush the "corrugation lines" in. It worked a little in some spots (a friend of mine actually scribed his in using his own tool on his Blue Rider kit).
|
In any event, the painting continued; after spraying the Sky Blue (and white on the rudder) then a coat of the last of my Future stash went on. Then it was time to add the decals and they actually went on well, using only the Micro Scale products. While the white backgrounds to the crosses are too translucent, I thought the effect was "good enough" and left them as-is. You may want to spray the area where these go white before adding these decals, though. And after I was completely finished, it came to my attention the serial numbers/letters on the side aren't "fat enough", but I find it negligible and it's too late to change anyway.
Another area I didn't think was accurate was the propeller. If you scroll to past the center of this page you can see what the actuall prop looked like. I replaced the kit provided one with a suitable prop from the Aeroclub white metal range.
|
Once the final painting, decaling, weathering (very light as I wanted it to be shown as it had rolled out of the factory like the pictures mentioned above) then it was time to put the finishing touches on. I added the kit's gun, exhaust and raidiator pipe above the engine surround. Then I noticed another pilot's step was missing, that right by the wing's leading edge. It appeared this was tacked directly to the fuselage so that's how I added mine which I made from wire. The wheels were glued on as well as the new tail skid. I rigged the model with .005 stainless steel wire and after that was added the model was complete.
|
Conclusion
This was a fun kit to build even with the issues I encountered. Given the past kit releases of this aircraft I can definitely say the RSS-Hobbis kit is the best. If you're looking for a resin/3D detail parts kit to start out with, I can honestly say this would be an excellent choice.
I definitely send thanks to RSS-Hobbis for letting me review this kit. As I already typed, it was definitely a fun build.
If interested in obtaining any of the Hobbis models, email them direct at rss.hobbis@gmail.com.