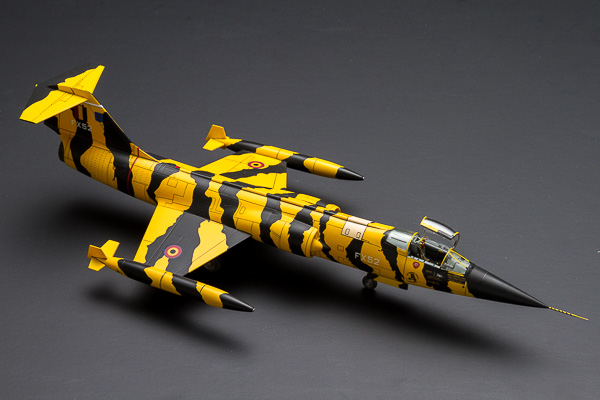
Painting & Finishing a 1/72 Tigermeet F-104
By John D. Miller
Airbrushing Tips, Tricks, and Techniques or How I Learned to Stop Worrying and Love the Airbrush
I've been an avid modeler for more than 40 years. Yup, 40, forty, XL. Nonetheless, I still get the biggest kick out of watching a model come to life on my workbench. For me, this especially happens when the project reaches the final painting stage. I still find myself staring in wonder at that final finish composed of paint, decals, and weathering that miraculously comes together and, in some small way, captures just the tinniest essence of the 1:1 subject. That is why I still build models. Having become enamored with painting and finishes early on, I've spent a huge amount of time focused on the finer points of airbrushing. That said, through trial and error and some profanity I have, over the years, learned a few basic airbrushing techniques that anyone can use to produce the finishes they're looking for. The best part of this hobby is that I learn a new painting twist or trick with every model I finish. There is always something new to try. That's the fun.
|
|
This is the first in a series of articles that will focus on various aspects of airbrushing. For each subject, I'll provide you with the tools and the types of primers and paints used as well as the mixtures, dilutions, and spraying pressures. I will try to give you some suggestions with regards to the handling of your airbrush and the results you should be looking for at each step of the painting process. I'll try to make you aware of potential pitfalls and possible alternatives and I'll always remind you to have fun. When possible, always have fun, especially when modeling.
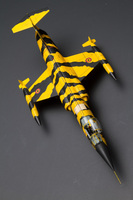
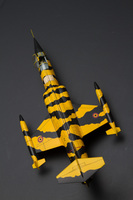
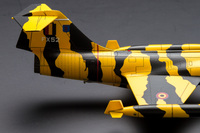
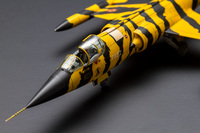
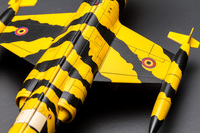
Our first model is a showcase for a beautiful decal sheet produced by Syhart Decals. The model depicts a Belgian F-104G in Tigermeet markings circa 2009. Now, it may seem odd to begin a series on airbrushing with a scheme involving black tiger stripes that are decals and the only paint sprayed is yellow, but bear with me. In my hands, getting these decals to perform was greatly dependent on surface preparation and the use of primers and clear coats that lend themselves to this application. But, I'm getting ahead of myself....
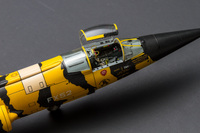
The kit is the old 1/72 Hasegawa F-104G (boxing #1002). The model was built OOB with the exception of the ejection seat, assorted parts from the CMK resin cockpit set (#7056), and a brass pitot tube from MASTER (#72-027). Because I'm lazy, Eduard canopy masks (#CX-081) were also used. All major components were assembled using Tamiya extra-thin cement. Small plastic and photo-etch pieces were attached with gap-filling CA glue (Bob Smith). The model comes together easily with no filler needed. Some of the softer inscribing was refreshed using the small scriber from UMM-USA (#UMM02). This tool is ideal for this application. Once assembled, the model was readied for primer.
Primer
 To prepare the surface of the plastic for primer, the model was first wet-buffed with Micromesh 6000. The model was then wiped down with a piece of tissue saturated with Polly S Plastic Prep de-greaser (#556007). This product may be out of production but the same result can be obtained using Crown Denatured Alcohol available at your local hardware store. A soft toothbrush was used to remove fine grit from inscribed details and the model was blown clean with compressed air and inspected for flaws. The model was then sprayed with Vallejo acrylic-polyurethane primer (white, #74.600) straight from the bottle. This primer sprays beautifully however it does dry onto the needle and overspray will produce a dry, pebbly build-up on the model. To reduce both, 1 drop of Liquitex can be added to the volume of primer contained in the average airbrush paint cup. I'm referring to a thumb-sized paint cup holding 4-6 ml when approximately 3/4 full. [Technically, 50 microliters of Liquitex (=1 drop) per 5 milliliters of Vallejo primer] If the paint cup on your brush is smaller/larger adjust accordingly but remember, an exact mixture is not critical.
This was sprayed using a Grex Tritium TG dual-action pistol-style airbrush fitted with a 0.3mm nozzle. The compressor (Iwata Studio Series) was set to deliver 20 lb/in2 but this was reduced to ~15 lb/in2 using an in-line Grex micro air control valve (G-MAC). Initial coats of the Vallejo primer were shot with the brush held far enough from the surface of the model and the paint flow adjusted so as to allow for partial drying of the paint before hitting the plastic surface. This would be called a dry coat. If shot properly, a dry coat should not result in a large change in the reflection of light from the recently painted surface. When spraying this primer (or any paint) it's wise to have a small cup of thinner (in this case Vallejo) and a microbrush close at hand to occasionally clean the needle of built–up primer/paint.
 With the dry coat shot, the brush was maneuvered closer to the surface of the model and the amount of paint delivered adjusted so as to achieve a "wet coat." When spraying a wet coat, it's best to cover small areas ~1-2cm2 per pass but keep the brush moving to prevent runs. There will be a noticeable increase in the amount of light reflected from a properly delivered wet coat. It will become shiny until the primer dries. Once the model was primed, it was set aside to dry for 24 hrs.
The next day the model was wet buffed with progressively finer grades of Micromesh starting with 4000 to 8000 and ending with 12,000. When wet buffing Vallejo primer it's best to periodically wipe the buffed surface with a clean cloth or tissue to prevent scratches from fragments of primer, filler, or plastic. Once buffed, fine details were again cleaned with a soft toothbrush, the model was blown clean with compressed air and inspected for flaws. A final buffing was performed with a folded square of Kimwipe optical-grade cleaning tissue. This is great stuff, especially on canopies.
Pre-Shading
 Major panel lines, sections of the rear fuselage, and assorted panels were pre-shaded using Gunze gloss black (#2) diluted to ~10% paint by volume with Mr. Color Leveling Thinner. This produces a paint mixture that is slightly less viscous than milk. For pre-shading and fine-line work I use a Harder & Steenbeck Infinity dual-action airbrush with a 0.15mm tip. This is simply the best, most reliable brush I've ever used and my go-to brush for all fine line work. I shot the Gunze black with the compressor adjusted for ~20 lb/in2 but reduced this with the Grex in-line air control valve to ~5-6 lb/in2. I also sprayed random patterns of black on the fuselage, wings, and stabilator that will provide some variation of the topcoat thereby giving it depth. However, with this scheme, much of this shading is covered by the black tiger stripe decals. Oh well. With the pre-shading completed, I inspected the model one more time and prepared to spray the primary color.
Primary Coat
As per the Syhart decal instructions, the model was shot with Gunze yellow (#H329) that was lightened by the addition of Gunze white #1 (10% by volume). This was thinned to ~25% paint (75% thinner) with Mr. Color Leveling thinner and sprayed at ~12 lb/in2 using a Grex TG airbrush with a 0.3mm nozzle. A light dry coat was delivered followed by a wet coat as described above for spraying Vallejo primer. After the model had dried ~2 hrs, the radome was taped off with Tamiya yellow tape, the fuselage/wings were wrapped with Parafilm-M and the radome was sprayed with Gunze gloss black #2 lightened with multiple drops of Gunze white (~5 drops in 1 ml or 1/4 a paint cup). After 24 hrs, the model was lightly wet-buffed with Micromesh 12,000, followed by a light buffing with a Kimwipe tissue, dried and prepared for it's first gloss coat.
Gloss Coat #1
 I've used Future floor wax as a gloss coat with great results for many years and I still occasionally use Future or "Pledge with Future Shine" as it is currently named. That said I find the new Aqua Gloss Clear (#ALC 600) by Alclad to be far superior to Future in practically every way. It sprays easier, dries faster and is more tolerant of decal solvents than is Future. I spray Aqua-Gloss straight from the bottle through my Grex TG airbrush (0.3mm nozzle) at ~15 lb/in2. Being aqueous (not lacquer as are most Alclad products) clean-up is easy using Vallejo Thinner (#71.161) or Iwata Medea Airbrush cleaner. Aqua Gloss dries rapidly (~30 minutes) but I allowed the model to dry for ~24 hrs before beginning the decaling process and quite a process it was.
Syhart Decals
Let me say up front that Syhart makes some of the most beautiful, intricate decal sheets this modeler has ever seen. The Belgian F-104G Tigermeet sheet (#72-067) is no exception. The biggest difference between Syhart and other decals is the noticeable lack of a carrier film. This obviates the need for trimming the decals prior to use. However, since there is no carrier film these decals are fragile and susceptible to distortions if placed in any solvent other than water. Each tiger stripe is composed of multiple, smaller, inter-locking decals most of which lined up perfectly. The black stripe that encompasses the fuselage and begins at the leading edge of the wing is comprised of eight individual decals.
For application, each decal was floated off its paper backing and slid into position on the model. These decals are sticky so the model was kept flooded with water while the decal was gently nudged into its final position with the tip of a small paintbrush. Once in position, water was wicked from under the decal with a cotton bulb and the decal left to dry. When dry, these decals show an amazing ability to conform to compound shapes, curves, and inscribed detail. When a portion of a decal failed to "melt" onto the surface, a very small amount of AK Decal Adaptor Solution (#AK582) was placed on the decal and after 5-10 seconds a moistened cotton bud was used to gently press it down. This worked beautifully but should only be tried when the decal is completely dry. In the few areas where the stripe decals did not line up, small touch-ups were performed with an extra-fine detailing brush and LifeColor gloss black (#LC52) diluted in LifeColor thinner. Decaling the F-104 took an estimated 50 hours of workbench time spread out over multiple weeks but I was satisfied with the end result. With the decals in place, the model was gently washed with warm water to remove decal adhesive and solvents and set aside to dry.
Gloss Coat #2 and the "Dreaded Tan Panel"
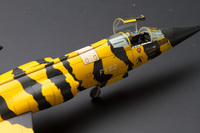
 To seal the decals onto the model, blend the edges of the decals onto the surface, and to prepare the model for a final clear satin coat, the model was again spayed with Alclad Aqua Gloss as described above. After 24hrs, the panel overlying the avionics bay just aft of the cockpit (tan colored) was taped off preparatory to spraying. Of note, Tamiya yellow tape was placed directly over the surrounding decals in order to spray the panel tan. Yes, this was a nail biter for sure. The panel was sprayed with Gunze Radome tan (#318) diluted to ~10% paint by volume in Mr. Color Leveling thinner using a Harder & Steenbeck Infinity airbrush sprayed at ~5-6 lb/in2. After this was dry (~15 minutes), the tape was ever so carefully removed revealing intact, unscathed decals. I attribute this to the tenacity of the Alclad Aqua Gloss; good stuff.
Final Coat
After 24hrs, the model was given a final coat of Vallejo Satin Varnish (#70.552) diluted to ~10-15% by volume in Vallejo thinner. This was sprayed using a Grex TG airbrush with a 0.3mm nozzle that was positioned sufficiently far from the model so as to deliver fine misting coats similar to a dry coat application. Vallejo Satin Varnish has a pronounced dulling effect so light misting coats will allow you to control the degree of dulling obtained without going to far. With the Satin coat applied, Tamiya tape and Parafilm-M masks were removed and the final tidily bits were carefully added. The Tigermeet F-104 I've been wanting for many-a-year was finally done.
Discussion
Well, I hope you enjoyed that. I did. None of the airbrushing techniques described in this article are beyond any modeler willing to spend a little time on the details. If you wish to spray any of the primers, paints, or clear coats described in this article, the dilutions and pressure settings provided would be a good place to start. Keep in mind however, that the ideal settings for you, your paint, airbrush, compressor, and hands will have to be found by trail and error. Likewise, although a little challenging, Syhart decals perform beautifully and I highly recommend them without reservation to anyone willing to spend a little time learning how to deal with their peculiarities. I've got more Syhart sheets in "the stash" so I suspect I'll be thinking about tiger stripes again pretty soon. Hello, 1/48 Slovakian Mig-29! Oh yea.
Happy Modeling!
