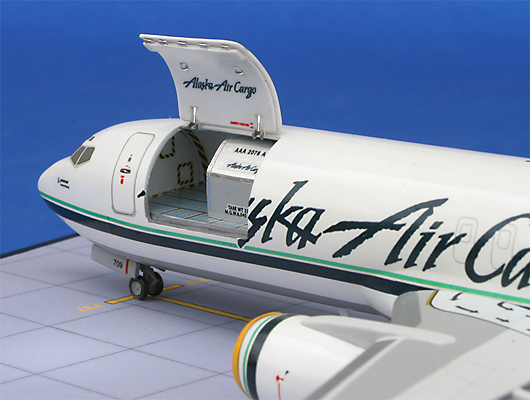
Minicraft 1/144 737-400 Alaska Air Cargo
By Tim Bradley
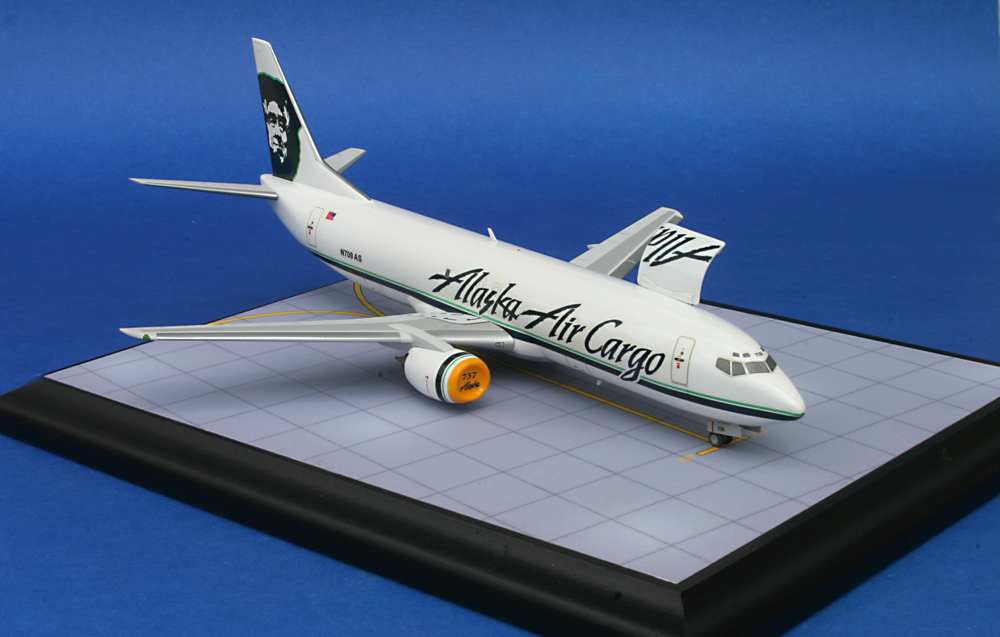
After my recent Curtiss C-46 build, my client requested another model. This time it was going to be something that was more timely and easier – so he said. He wanted a Boeing 737-400 cargo plane in 1/144 scale. This wasn't going to be a quick build. I had to have an open cargo door with a container can in place. I had a client's deadline to meet and there was a local contest ... could I meet both schedules?
 The first thing to tackle on the model was the cargo door and floor. Having ramp access at Sea-Tac airport, I made arrangements to photograph the real plane during an on-load. I shot all the details of the door and flooring. I took my trusty tape measure with me to get the right dimensions of the cargo door. Most decal cargo doors are not tall enough in height. With the reference work done, it was time to cut out the door on the model.
I had designed the decals for this paint scheme for DRAW Decals. With some extra decals I had, I applied the left side decal to the raw plastic fuselage half. This had the cargo door outline in the correct position. After it was dry, I then scribed over the decal cargo door line. The decal was removed with some tape. The door was cut out and the dimensions were checked. I now had to make a new door. I took a strip of Evergreen .020 sheet about four inches long and the width of the door and placed it in a pan of boiling water with my pliers. After a few minutes, I quickly formed it around the side of the fuselage next to the door opening. After it cooled, I cut it to shape. I then added a .010 backing for the inside of the door, just slightly undersized. Some thirty pieces went into the completed door assembly.
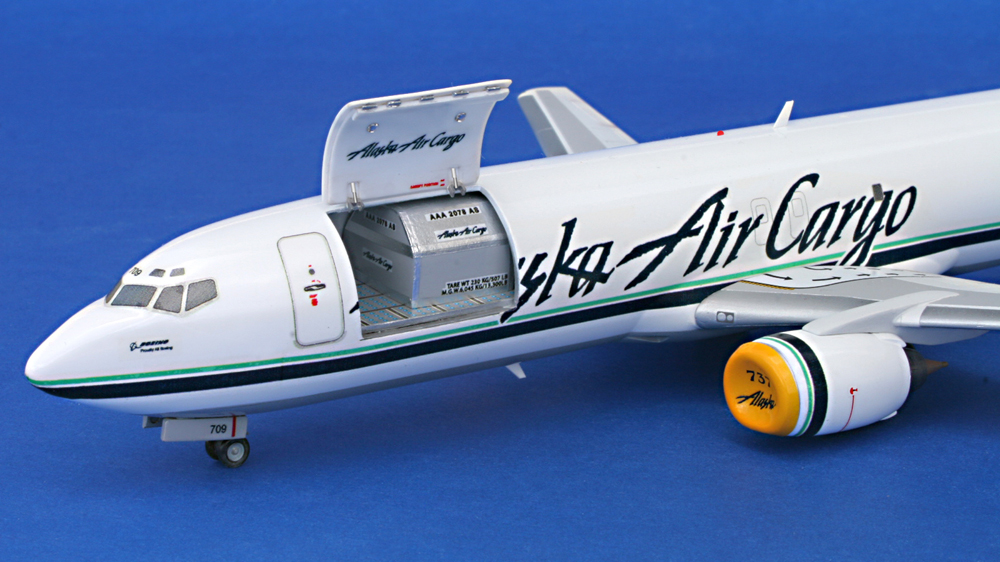 The floor was the easiest to make, a piece of .040 was used for the floor and the front bulkhead. The floor was located just above the lower sill of the door. A lot of double checking with sand paper on the right side of the fuselage to make sure there wasn't going to be any gaps when the two fuselage halves were joined up. Before I sealed it up, I sprayed the inside of the exposed cargo area white. I then took measurements of the floor. With the photos I took, I created a roller deck floor with my computer using Illustrator. This was made into a decal to be applied after the model was in final assembly.
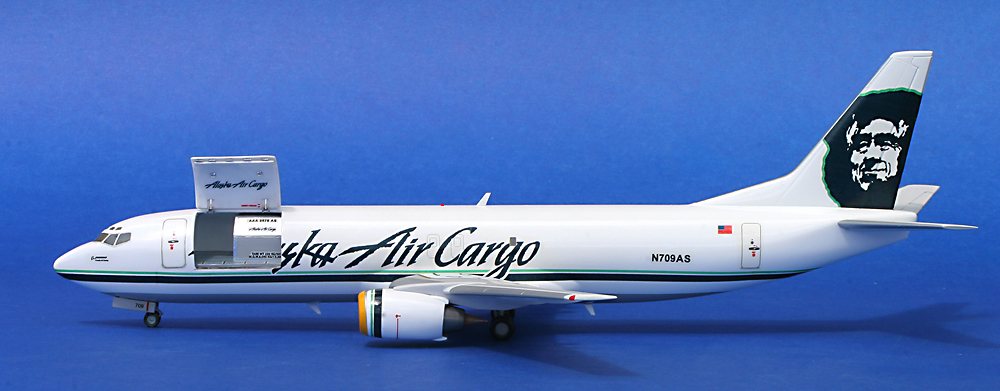 The model was sealed up and all the recessed doors and cockpit windows were puttied up. After the model was block sanded, it was primed with my favorite, Tamiya fine surface light gray primer. After a day or two, I shot another coat of primer, this time with the Tamiya fine surface white. Some small areas were corrected with some putty and reshot. The gray will come through on any high spots. The model was final coated with Tamiya's TS-26, pure white. This spray can paint is idiot proof. I love this stuff, it has a leveling agent in it so it always comes out like a glass marble and it never turns color with age. I always try to use one type of paint, thus avoiding any problems down the road years later. The decals were applied and sealed up with two coats of Future.
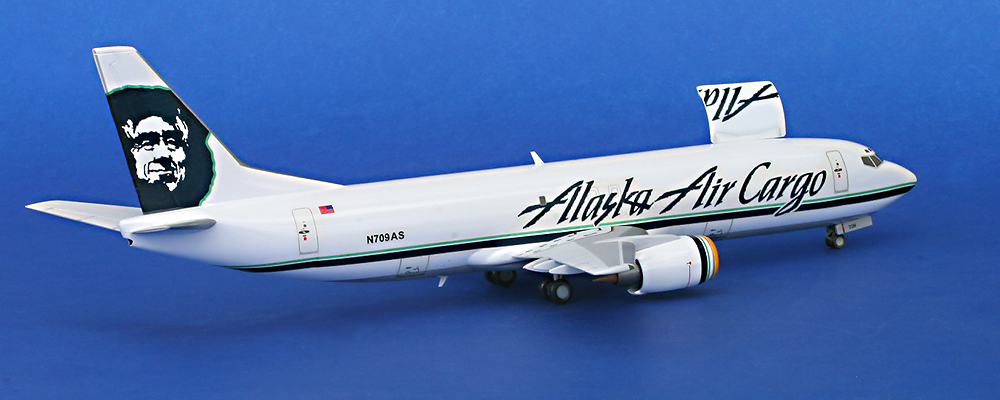 Next on the list were the wings. Nothing unusual here, just right out of the box. I like to build in sub-assemblies, body, wings/stabs, gear and engines. I find that in doing this, I get a neater finished model. I treat each part like one whole model. The wings were sprayed overall with Boeing 707 Gray. I mix this up from TS-26 white and a dab of TS-15 black. I have a real Boeing paint chip card that I match it to for the perfect match. Next came the Corrogard. Previously, I have used decals for this, but I tended to get some little bumps under the decal. So, I started spraying this also. This was mixed up like the Boeing Gray, but with a tad more black. The leading edges were also airbrushed using Alclad 2 Duraluminum.
The engines were next on the completion list. The Minicraft engines suffer from two large mounting pins in the upper nacelle. Not wanting to tackle this, I decided on a F.O.D. cover for the inlet. I had an extra nacelle in my spare parts container and this was cut down to about one half inch in length. This was used as a mold and I vac-u-formed a piece over the inlet. I then trimmed it to fit the polished lip on the engine. A coat of yellow paint and two decals made a unique and realistic look for the model. The nacelles were also sprayed with the TS-26 white. Before the engines were mounted to the wing I gave the wing a coat of Polly Scale flat. I streaked some pencil graphite very lightly with a fine brush to give it some grease marks. This was done to the flap, slats and spoiler hinges. This coating gives the graphite some grip, as it will not stick to a gloss surface.
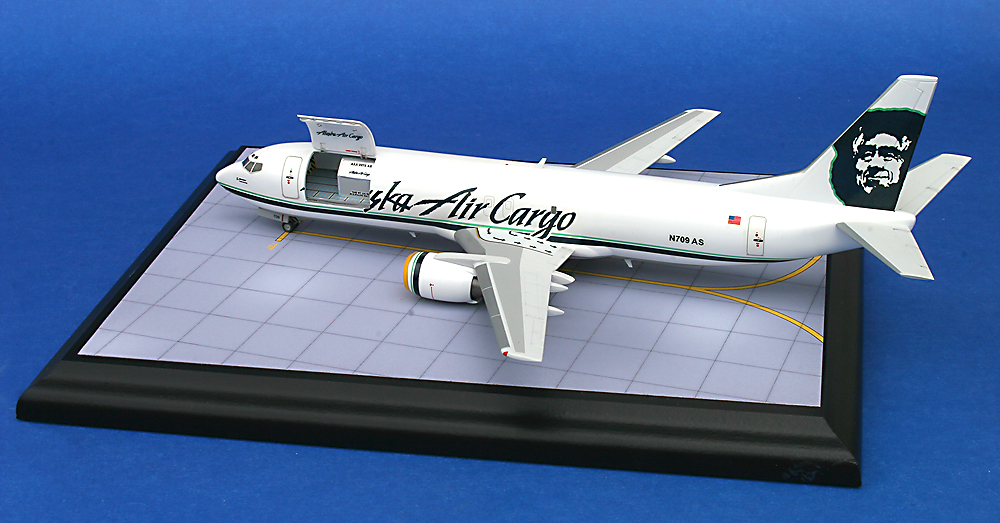 The last thing to finish up was the container can. While on the Alaska ramp, I photographed a can. The can number, weights and logos were done as decals along with the floor. The can was made from hard structural dense foam. I got the dimensions from Alaska Cargo's web site. It was painted gray and trimmed in Bare Metal foil, as the real can is aluminum.
All the pieces were assembled and the small final details were added. Antennas, nav and beacon lights, cargo can and finally, the cargo door.
I finished the model just in time for the IPMS Seattle Spring Show. After an all night building stint, I wasn't too confident on even placing. Happily, all the late night work paid off with a “First Place” win in the Airliner category.
