
Kinetic 1/48 T-45 Goshawk Built Up
By Gerry Nilles
Assembly
 The Kinetic 1/48 T-45 Goshawk kit is a straightforward build with the option of doing either an initial USMC T-45A or an upgraded USN T-45C. The differences in the two consist of several unique parts including the instrument panels, (the "A" version having the more traditional type layout where as the "C" is of the all glass cockpit variety). The forward instrument hoods are also different for the "A" and "C" versions, as is the small flat panel that goes directly above the exhaust nozzle at the base of the rudder. I should note here that the rear panel part numbers are not called out in the instruction, and that part B26 is for the "A" with B27 along with B29 for the "C" version.
As long as I am on the subject of the assembly instruction being a little vague in places I should also mention the placement of part C14 as shown on page 19. This part has no locating pins or any other guide as to how to position it correctly to the underside of the fuselage adjacent to the arresting hook housing. However, you can reference the last page of the instruction booklet, (the markings guide for the bottom of the aircraft), which shows its location very clearly. Other options of note are the choice of having the flaps and leading edge slats either retracted or extended individual landing gear doors for the down position plus a one-piece part for the completely close option and an attachment arm to pose the canopy in the open position.
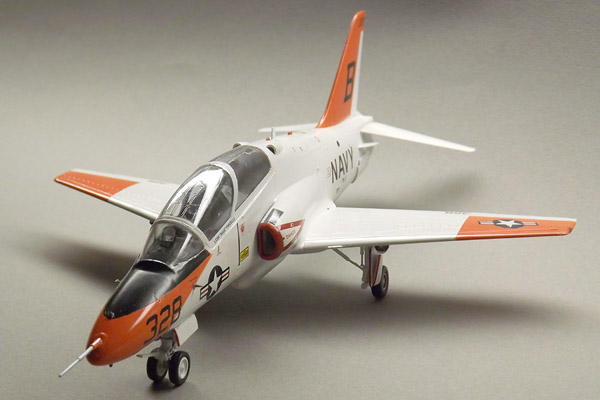
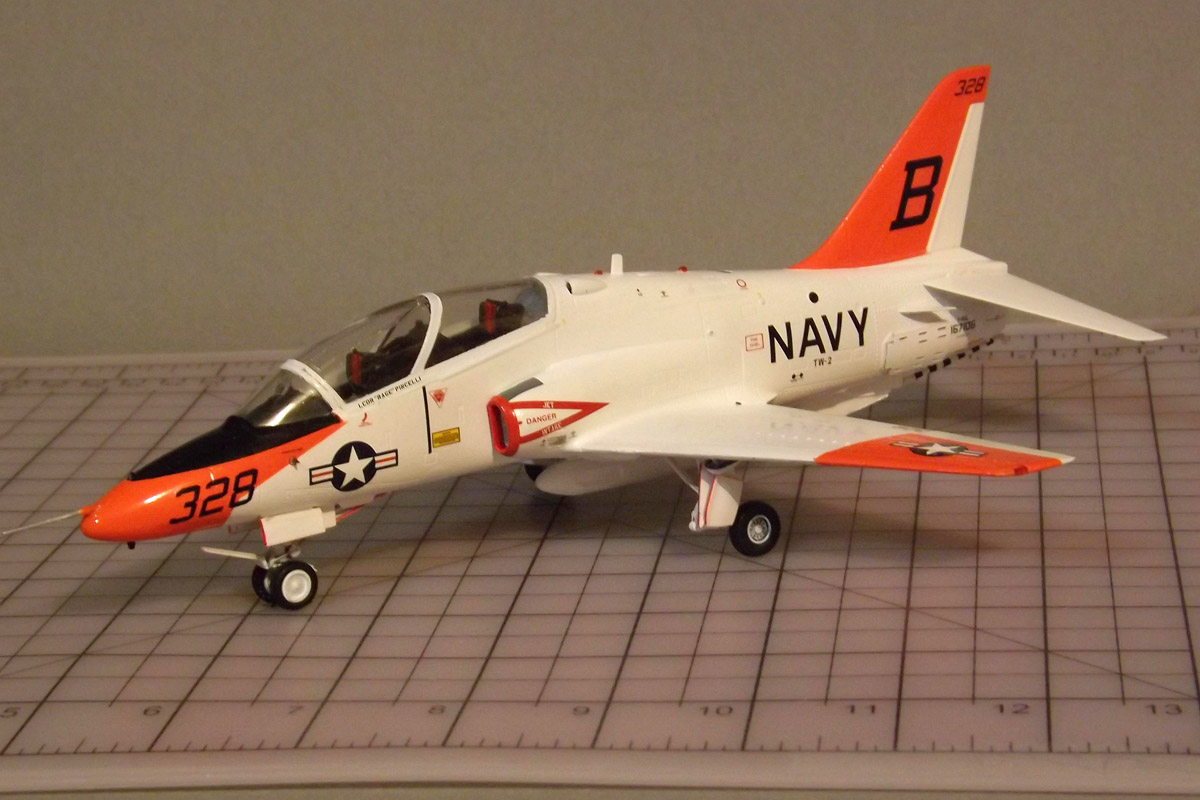
 However, the most interesting choice of parts is two separate nose gear struts with one being in the compressed parked/taxi position and the other in the ready for catapult launch with the oleo completely extended. This option along with the pose able flaps definitely suggests diorama potential. Another nice touch Kinetic has added is a number detail photos on the side of the box alone with a complete painting guide in color on the back. As for my built choice, and after having seen a number of photos of T-45 parked in various configurations, I decided to do this build in the completely clean look with both the main inboard and forward nose gear doors closed and the flaps retracted.
Construction
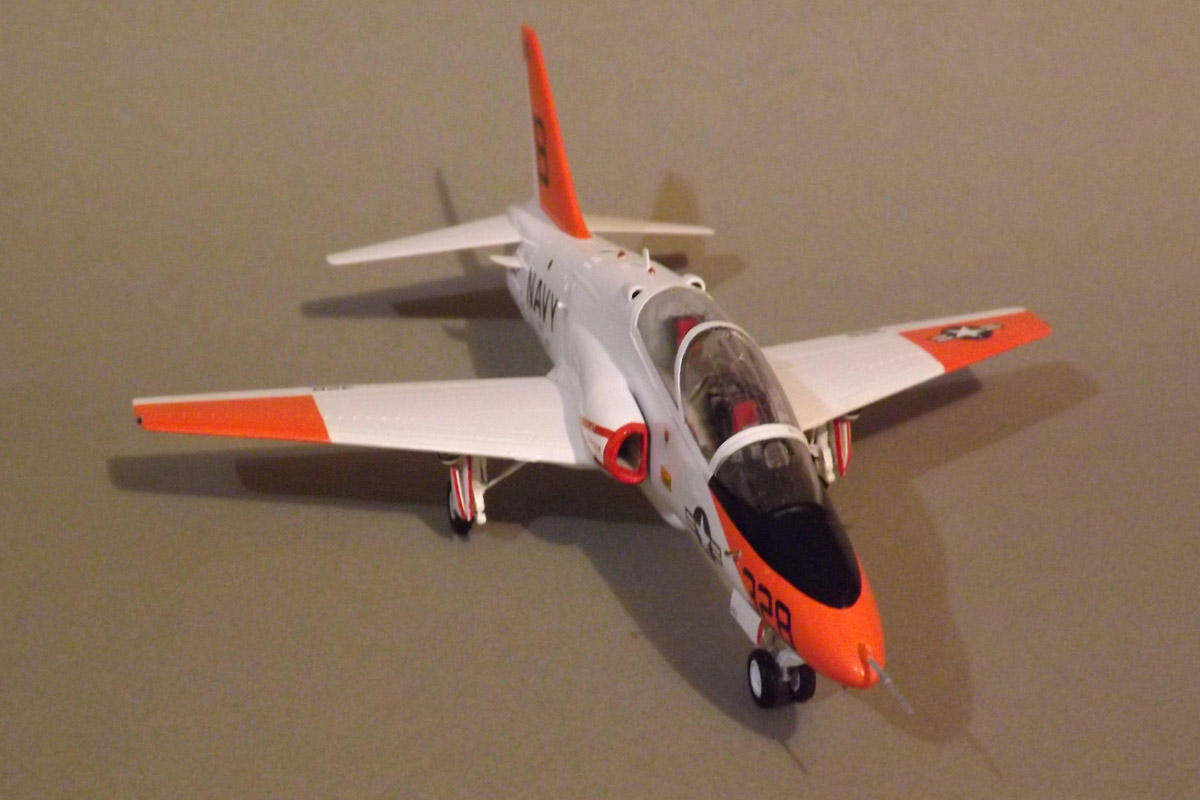 As mentioned above the construction of this kit is very straightforward; however, I did occasionally vary from the instruction sequence to avoid the potential of breaking off smaller parts while masking, painting, and the application of markings. In fact, I wish I had waited until very last to attach the horizontal stabilizers, because I managed to break both of them off during the above process. Their attachment point to the fuselage is a rather small tab, and the plastic used in this kit is a bit on the soft side, as such, it does not take much pressure for them to snap off at that particular joint. Also, and as long as I am on the subject of the horizontal stabilizers, I should mention that the instruction do not provide a guide as to the correct angle to position them. To solve this omission I simply went online, located a standard three view drawing of the T-45, and then made an angle template from the front view.
 Fit wise I would give this kit a seven on a scale of 1 to 10. The areas that presented some fit challenges were the cockpit assembly attachment inside the fuselage, the bottom of the fuselage, at the wing to fuselage joint, and the intake assemblies with the latter of these two areas requiring both filler, and some re-contouring. I should also mention that to get the flaps correctly in the retracted position some trimming is need but no filler. A word of caution regarding the cockpit assembly, as I noted above there is a fit problem in that the assembly is a bit too wide and as such, if not trimmed down, it is easy, because of the soft plastic, to cause the fuselage to bulge out along the canopy attachment location. So make sure you do a good dry fit in this area using the canopy as your guide. As for the rest of the kit assembly, it went together very well. Actually, the only real nit I have, which is typical for the whole industry these days, is no seat belts.
Finishing and Markings
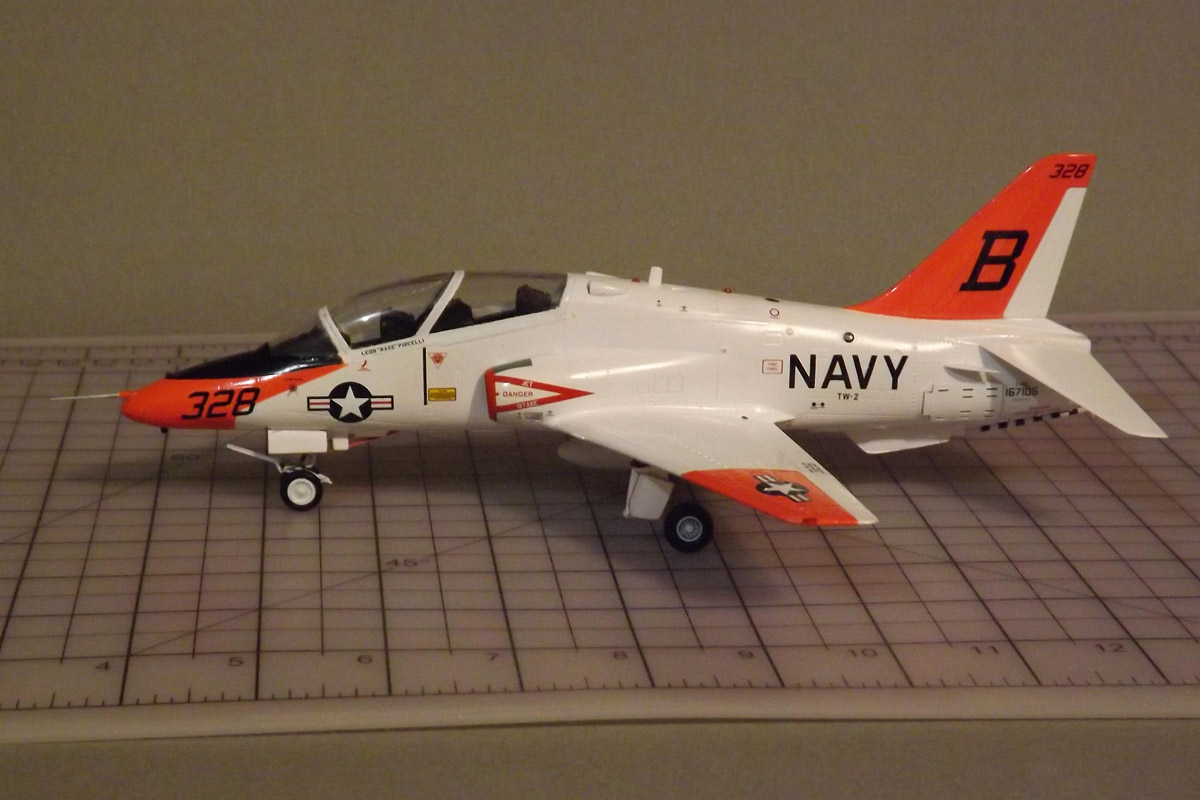
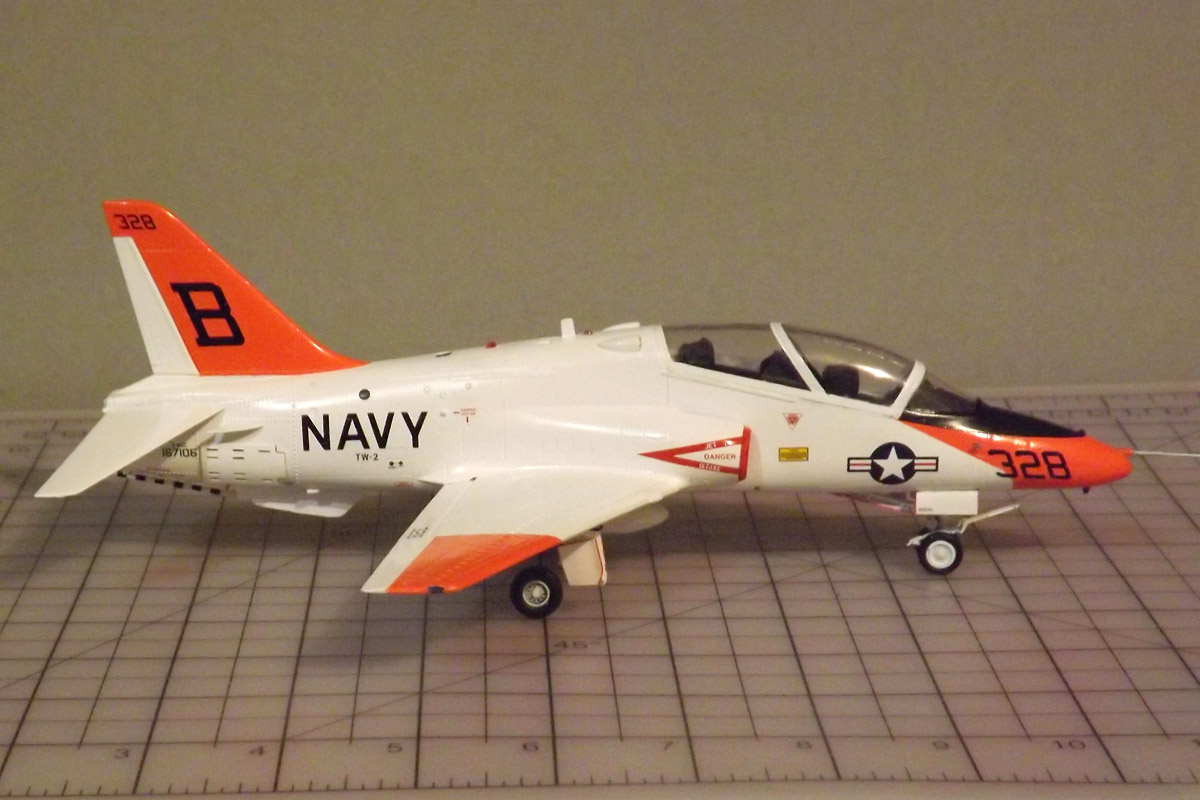
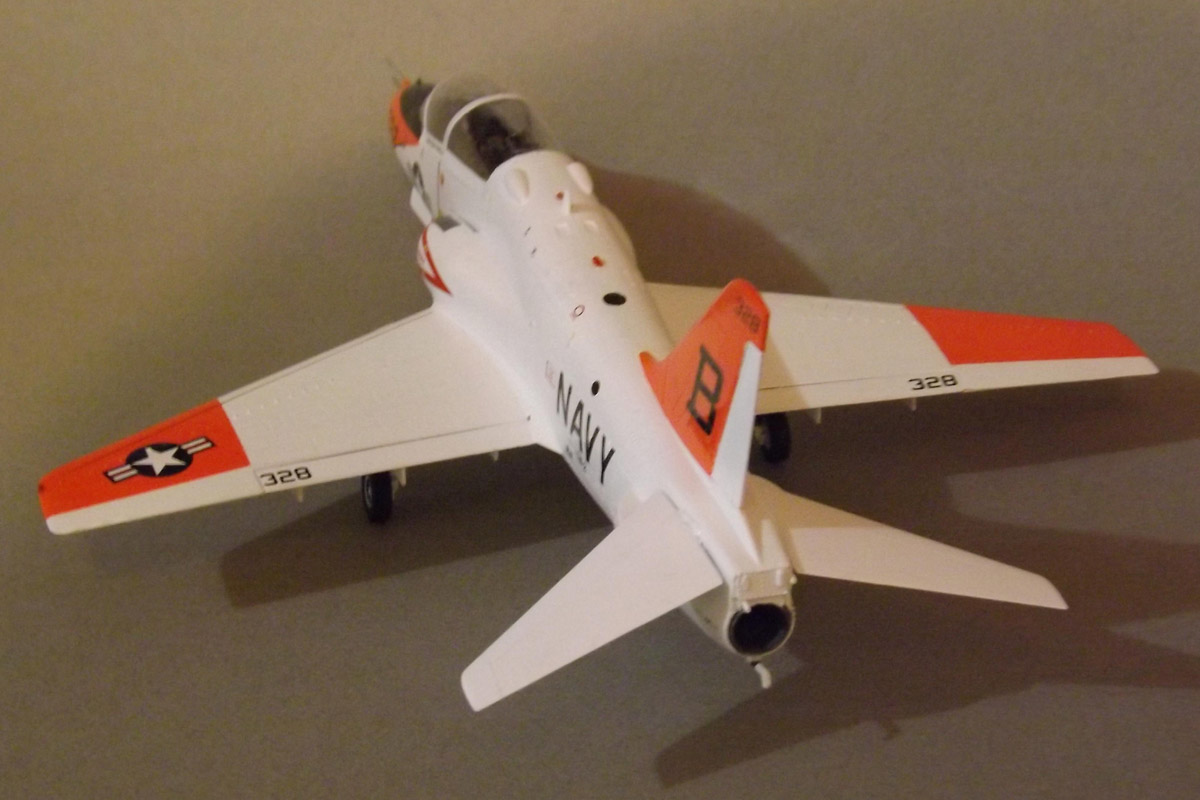 Regardless of which version you chose to do, either the USMC T-45A or the Navy "C" the paint scheme is identical as are over 95% of the markings. The only difference at all is the aircraft numbers and the choice of NAVY or MARINES. The decals provided with the kit are by Two Bobs and are of excellent quality. Probably the most unusual thing about this entire kit is the layout of the decal sheet, in that it is done by section such as "Left front fuselage", "Bottom fuselage" etc with no number callouts. Likewise, the instruction booklet has its last four pages dedicated to marking placement, using a full page drawing for each view right and left, top and bottom. Coupled with this are oversize drawings of every individual marking surrounding the particular view with a line leading to the marking placement location. This technique is very similar to the standard drawing practice of providing a detail enlargement in a circled with an arrow leading from the circle to the location of the particular detail. Overall, I found this system both easy to follow and easy to use.
Conclusion
This is a good kit that is easy to build with only a few areas requiring a little extra modeling effort. The decals are of top quality and the assembly guide is well done with only a few exceptions. Realizing that no kit is prefect, I feel that if this Kinetic kit is the only 1/48 scale T-45 every produced it definitely meets the acceptability threshold, but again that is just my opinion.