With Matt Bittner
Overview
 While many will pick up the Hasegawa Combo kits as a way to double up on some nice models, we decided to try something a bit different: same kit, different modelers. A great choice for a straight out-of-box subject is the Hasegawa P-51B, as the challenges of making it accurate are high. So, rather than fix the problems, it's easier to just build it OOB and let it be a good practice kit to hone your modeling skills. With their D-Day Marking Combo kit, Hasegawa has provided some colorful markings for their P-51B, so let's split the box up and have at it.
The Kits
The first step in splitting the kits up was to determine who got what marking options. Matt liked "The Iowa Beaut" with its olive drab upper surfaces, while I was more partial to an overall natural metal P-51. So, with a snip of the scissors, the decal sheet was separated and half the kit was sent halfway across the country.
The Build
As both of these were set out to be OOB builds for the most part, construction followed the instructions and was very straightforward. However, even with that, different modelers tackle things differently.
The Interior
 CBR: I started out by cleaning up the various cockpit parts, fuselage halves, and wings. For the cockpit, since the option I had featured the framed canopy in a closed position, I was not too concerned about going all out in terms of detailing. So I glued all the bits to the cockpit floor and sprayed all the bits with interior green. I then started detail painting the various bits and pieces, going by the 'add a splash of color for variety' rule. While the cockpit pieces were drying, I also used this time to carefully sand the mating surfaces of the fuselage halves. I find that doing that greatly reduces the need for filler.
 Back to the cockpit itself, the only addition I made was using some tape for seatbelts. The decal instrument panel was applied, and then with the tailwheel and cockpit floor in place on one half, I glued the fuselage together. Between the sanding job and careful application of glue, I ended up with a seam that required no filler, and a simple swipe of my JLC saw across the top and bottom rebuilt the panel lines.
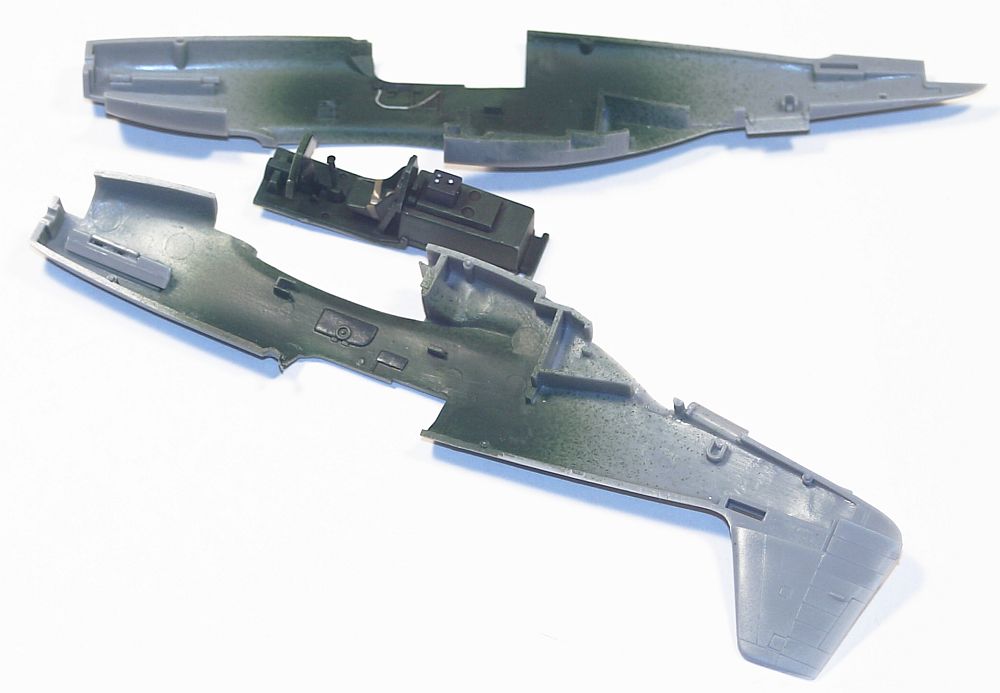 MB: The same as Chris, I glued everything down before spraying the interior color. I too only added tape belts to keep it an out-of-the-box build. However, I ended up with fuselage gaps that unfortunately came back after painting was finished, of course. Because of this I bought a new bottle of Tamiya Extra-Thin Cement to use from now on.
General Assembly
CBR: Building this Mustang kit is not too challenging, as the fit overall is pretty good. Continuing my trend of dryfitting repeatedly before gluing, with careful sanding of the mating surfaces, I was able to get the wings and tailplanes on without any need for filler. The chin scoop is a separate piece, as is the belly radiator intake, and the fit of these was a bit more loose. A bit of filler was needed on the radiator intake, while the gap with the chin scoop was fixed with a piece of thin plastic card. I also worked on sanding the mating surfaces of the wings, and while I got a nice trailing edge, I failed to see the slight step on the leading edge until after the model had been painted and decaled. Next time, I'll pay more attention to that leading edge.
MB: Since I glued the wings together prior to adding them to the fuselage, I had an issue with one of the leading edges, mating to the fuselage root. I had to pry it apart just a little to get it to fit correctly to the wing root. It was because of that I had to add thick CA to that leading edge to fill in the gap. However, this did help with the lack of seams to deal with at the wing-root area. There were a couple of places I added Perfect Plastic Putty but there was no sanding involved. Same with the horizontal tail pieces – just a little PPP and the seams were eliminated.
Also like Chris, I had gap-issues with the chin scoop but took care of everything with putty – the gap on my kit wasn't big enough to warrant adding plastic card.
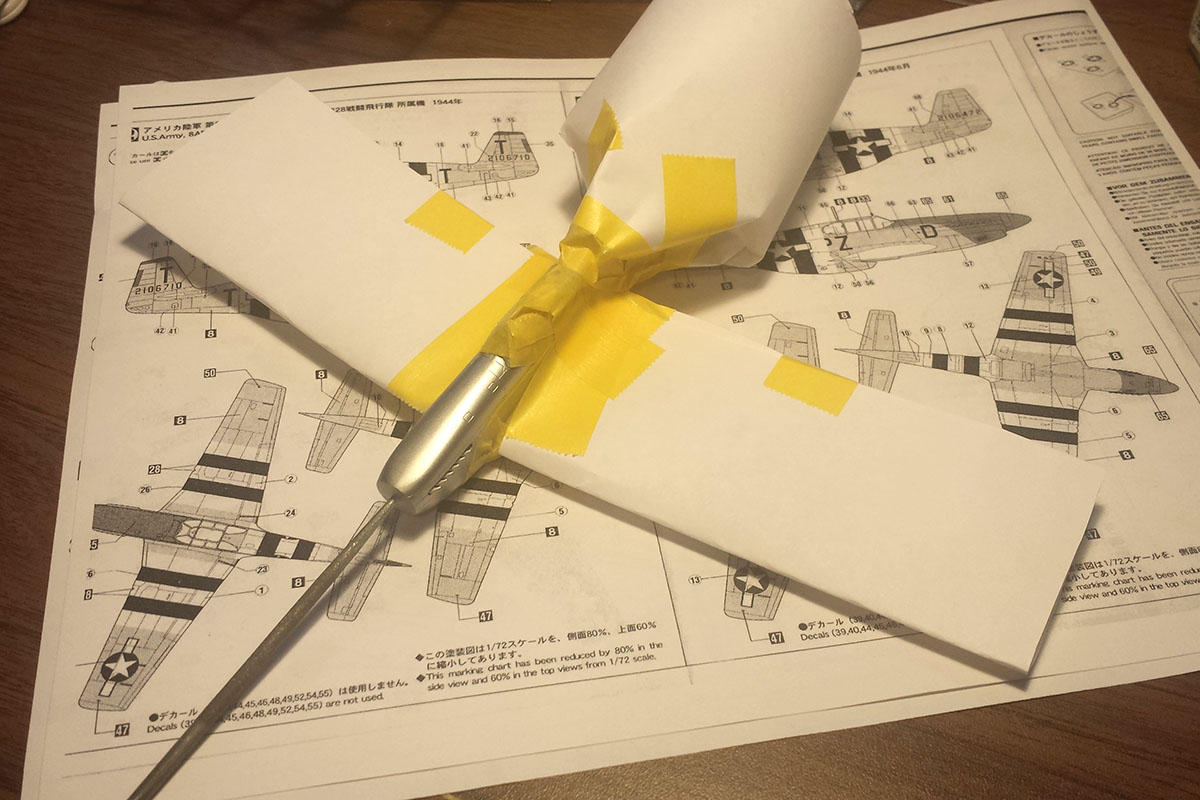
One area I wanted to point out, and Chris had the same experience. We both assembled the spinner and back-plate prior to adding the separate prop blades, which helped because there were gaps to deal with. With a little bit of goading we were able to easily "snap" the prop blades into the spinner afterwards with little fuss. This was extremely helpful because trying to deal with the seam between the spinner and back-plate would have been difficult with the prop blades in place.
Painting
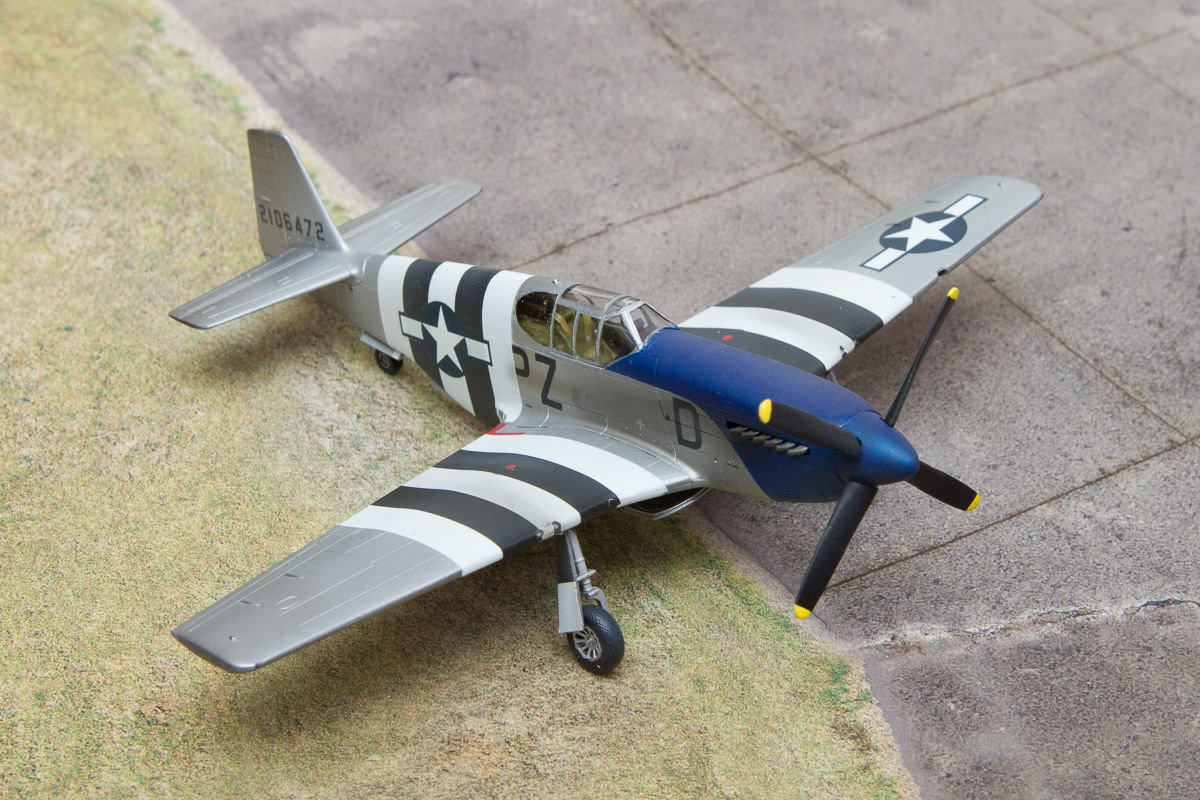
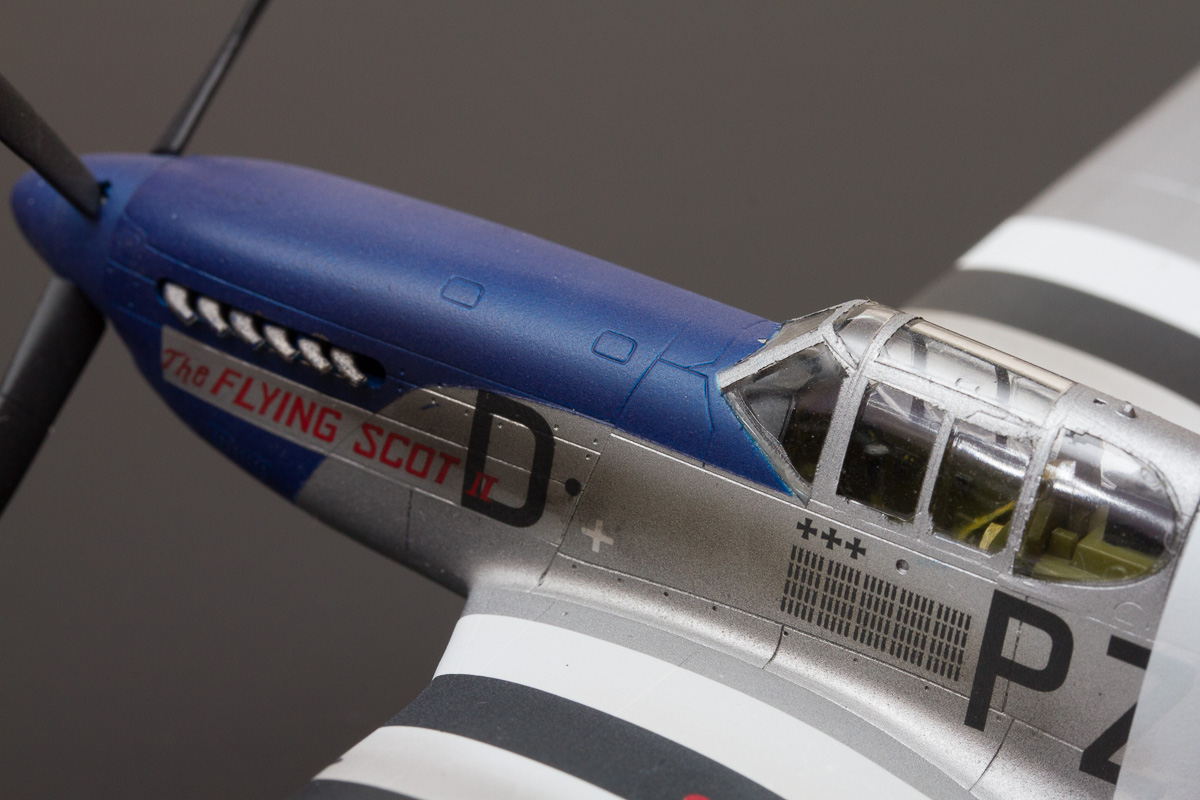
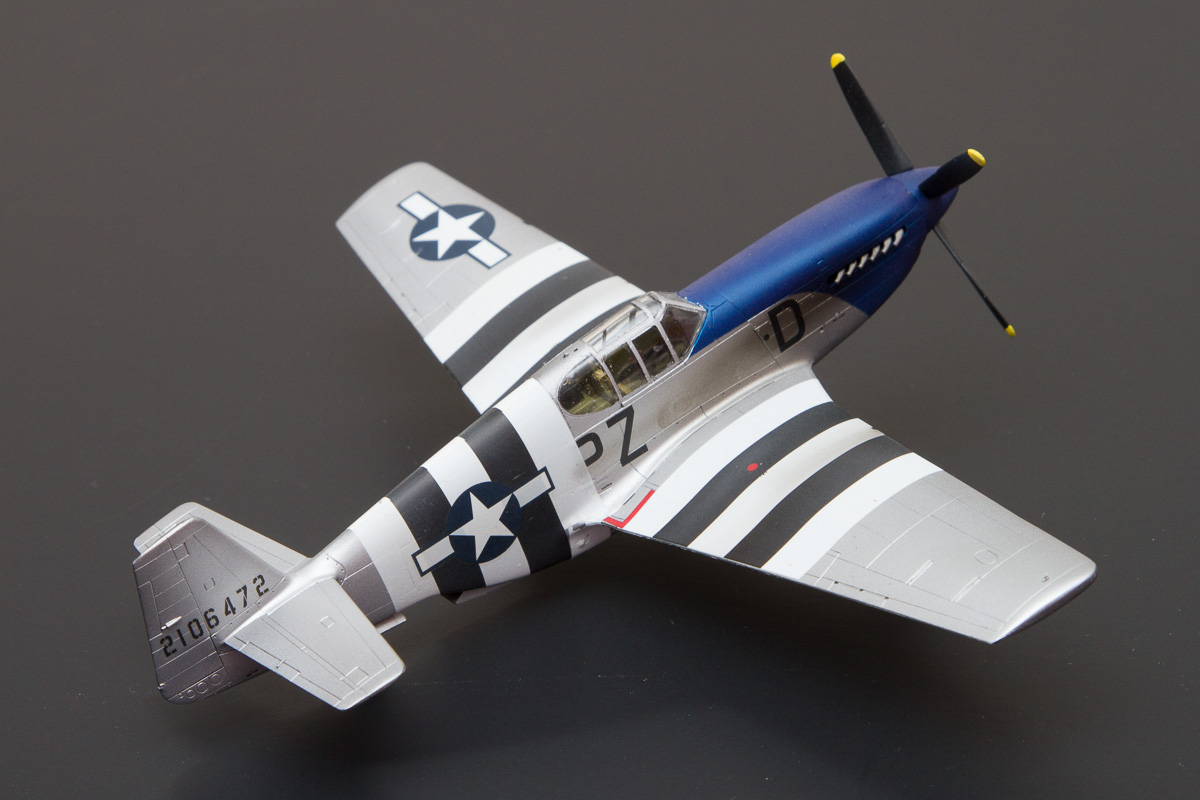
 CBR: Mustangs just look better in overall natural metal, and even better with full-on invasion stripes. Throw on a blue nose and how can you go wrong? The first step, of course, is to prep the model for the silver. I masked the canopy off with Tamiya tape (next time, I'll pick up an Eduard mask, it makes it so much easier!), then I laid down a coat of Vallejo Model Air black. After a couple bits of touch-up sanding, I hit the model with Alclad polished aluminum. Since the black coat wasn't glossy, this polished aluminum turned out to be a nice in-between shade of polished and dull, just about perfect for a Mustang out of England.
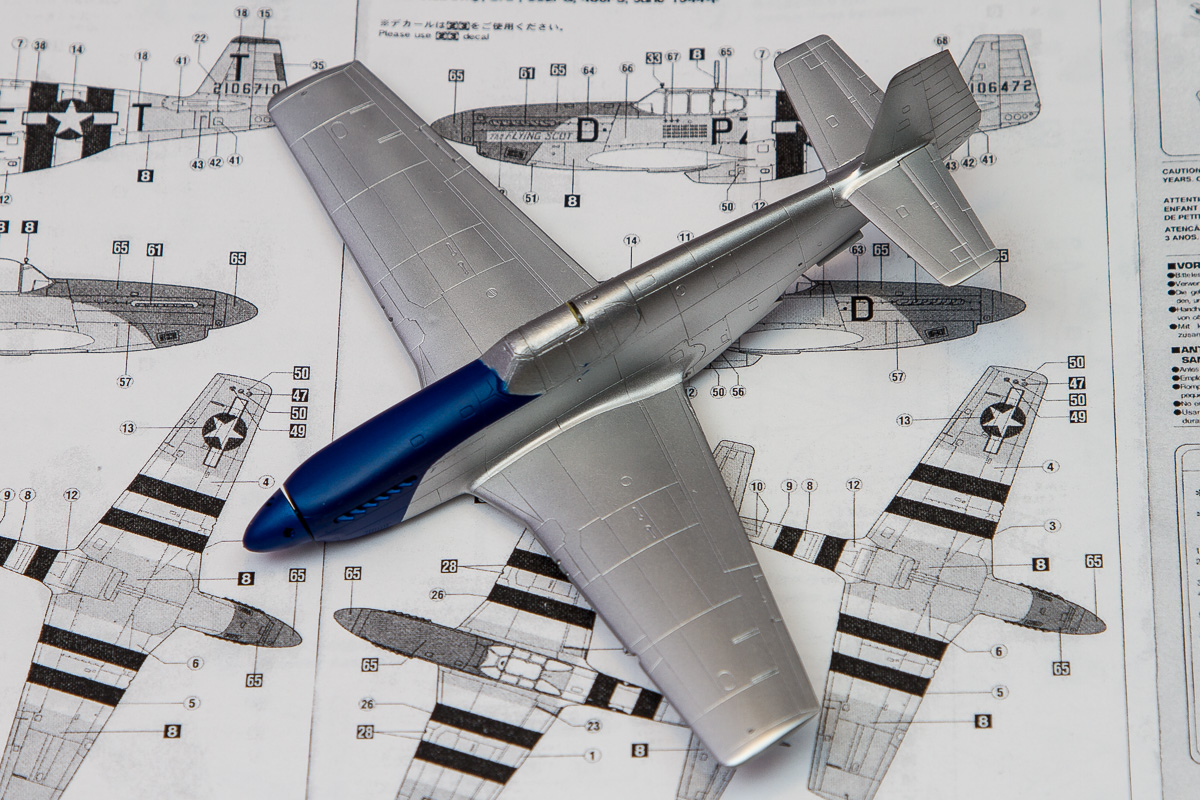 With the silver on, the next step was to get the blue nose on. I started this with some thin tape strips to get the right curve, then filled in with bigger pieces of tape. Finally, I covered the rest of the model with paper masks, to make sure every possible inch was covered to avoid blue overspray. Even with all that care, I still managed a couple of spots that the blue came through. For now, those areas remain, but soon I will paint some decal paper and cover them up (a cleaner way than trying to touch up with a brush).
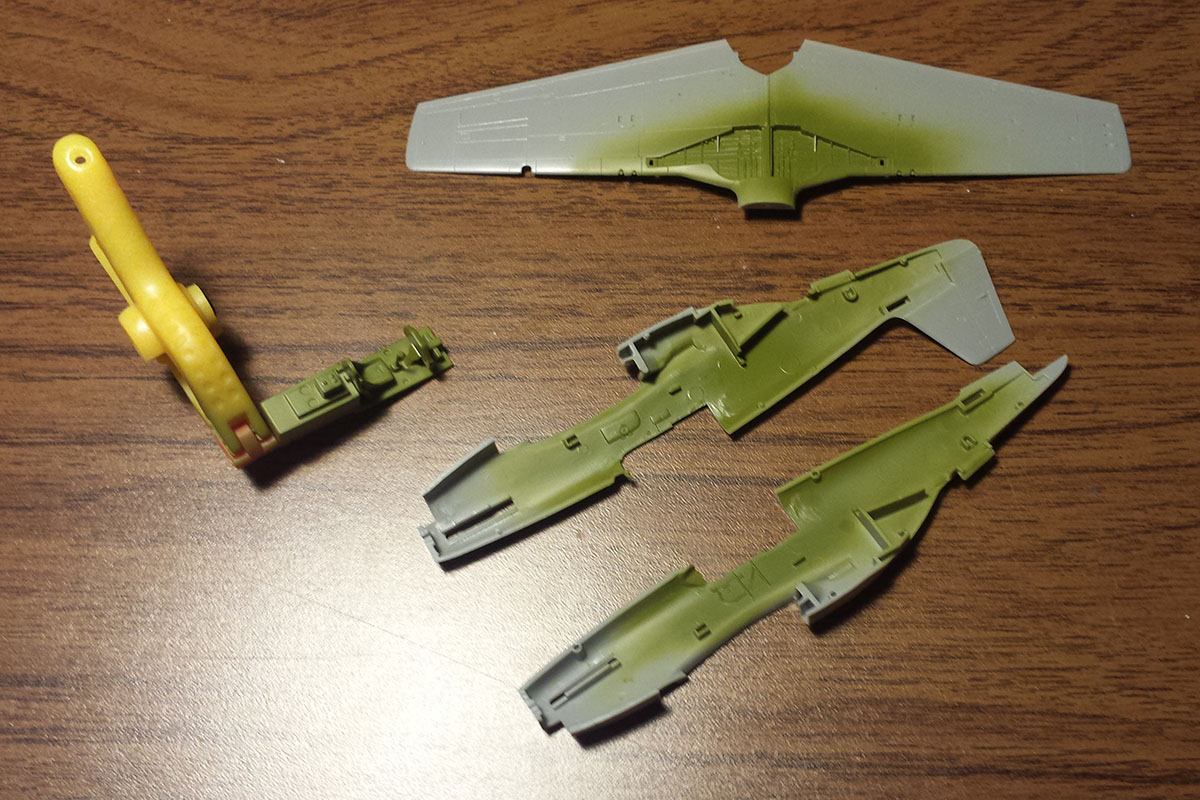
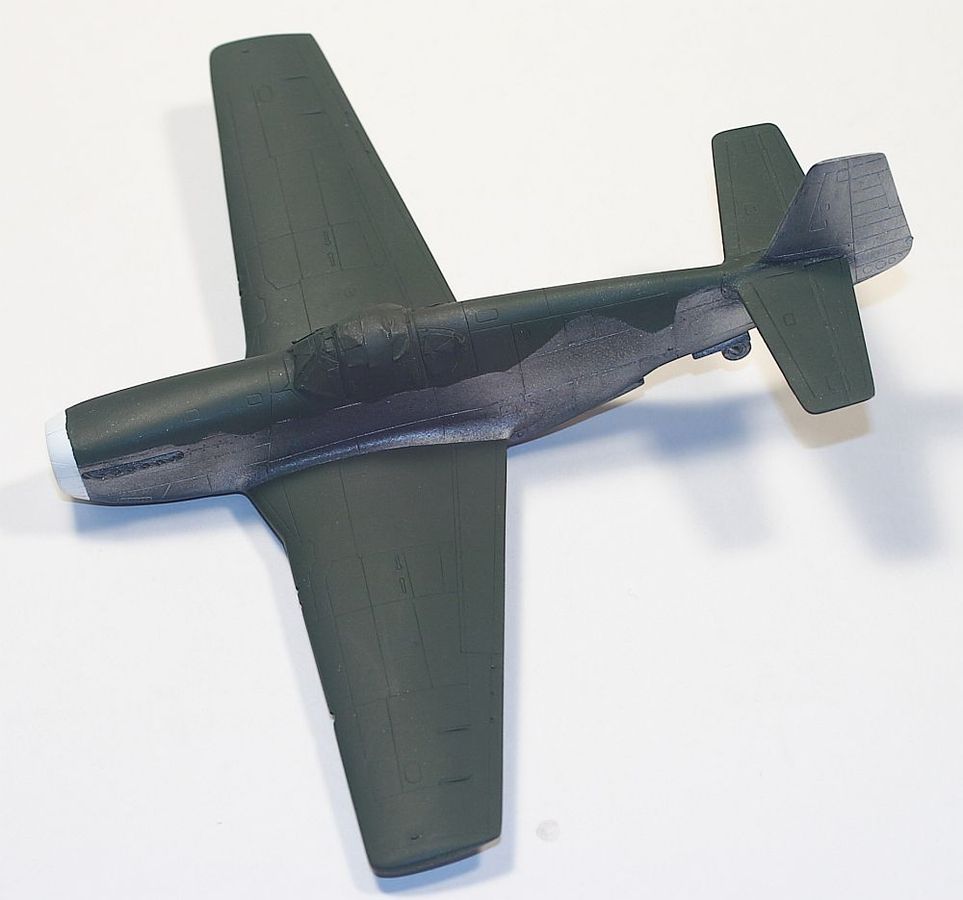
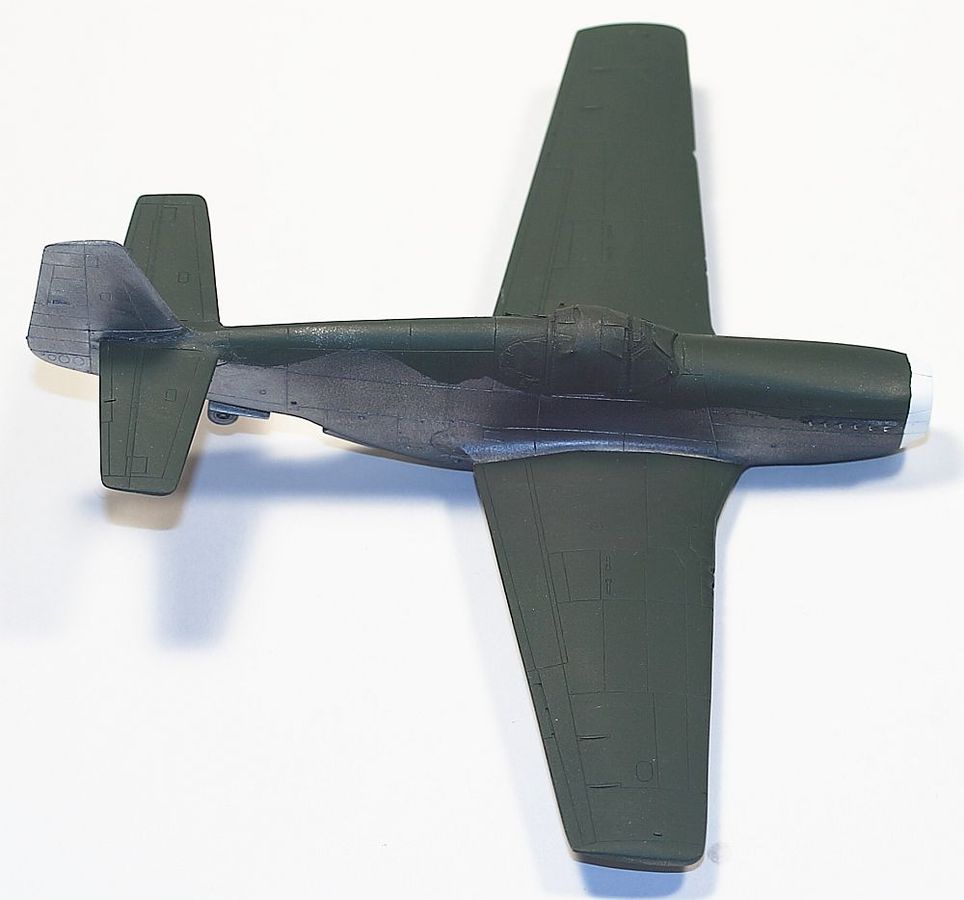
MB: Painting is where I totally messed up my build, and I blame no one but myself. Since this has natural metal areas on some of the fuselage and tail I sprayed Alclad's black primer over the entire model. Unfortunately the black did not spray well and it ended up "splotchy" and not smooth. I decided to "go with it" and just tried to smooth it out a bit. Unfortunately, both the "splotchiness" and the rough finish resulted in the Alclad Airframe Aluminum coming out more gray than natural metal. I used Vallejo Olive Green for the Olive Drab portions of the airframe and I think it looks great. Yes, it's not OD but there is thinking out there where when these were over-painted they were painted with UK paints and not US. That's about the only thing I like about the outcome of my painting.
|
|
From now on I will be sure I have a complete black primer coat (as opposed to coming out "splotchy") and it will be as smooth as possible. I will have to go over the primer with higher grade sandpaper/film until the paint is as smooth as possible. Chalk this one up to experience.
The Decals
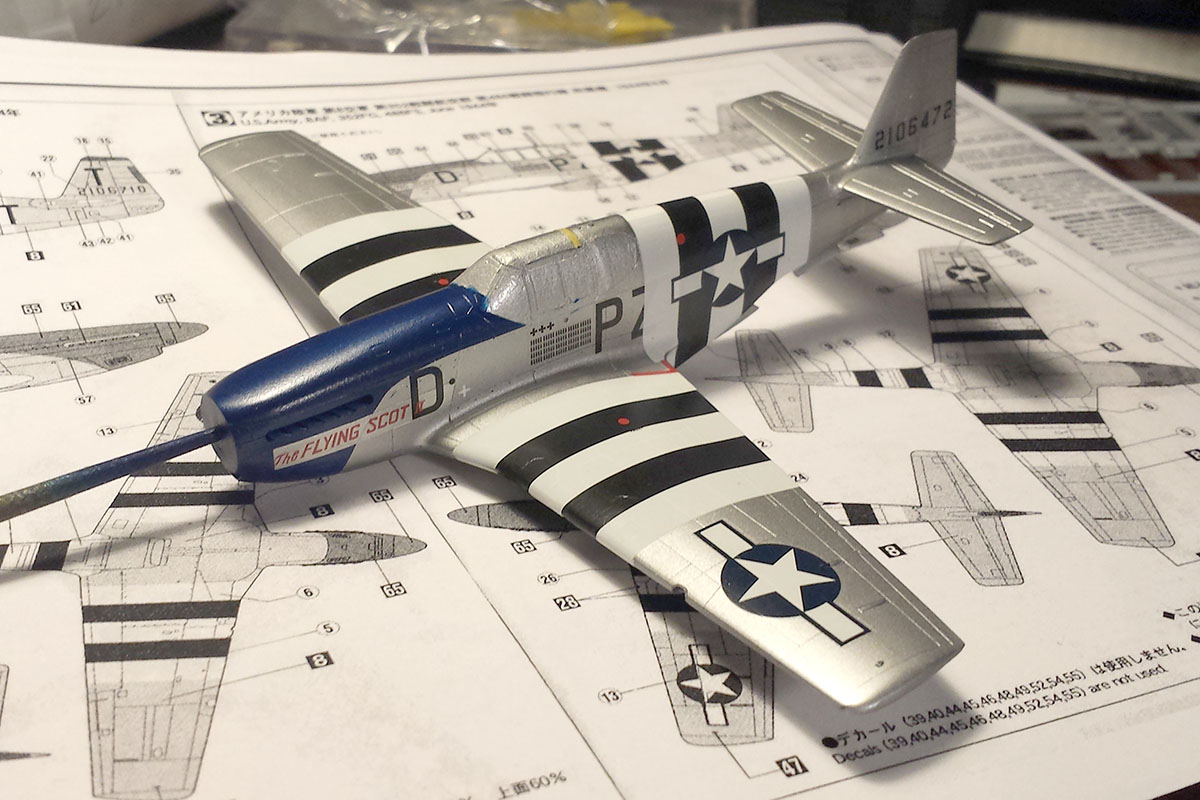 CBR: In the spirit of building this out of the box, I decided to use the kit's decal invasion stripes. These come in multiple parts, but I was confident in my decaling abilities. Plus, I was impressed with how well the instrument panel decal went down, so on these went. I started with the wings, applying the underside stripes first. If you're going to experiment, might as well try it in an area that is not readily visible. These went down quite well, so I went on to the fuselage. Here, the invasion stripes run over other decals, so I applied those first and let them dry. It was also at this point that I discovered that I forgot to mask off the panel behind the name on the nose. Silver-painted decal saved the day for that spot.
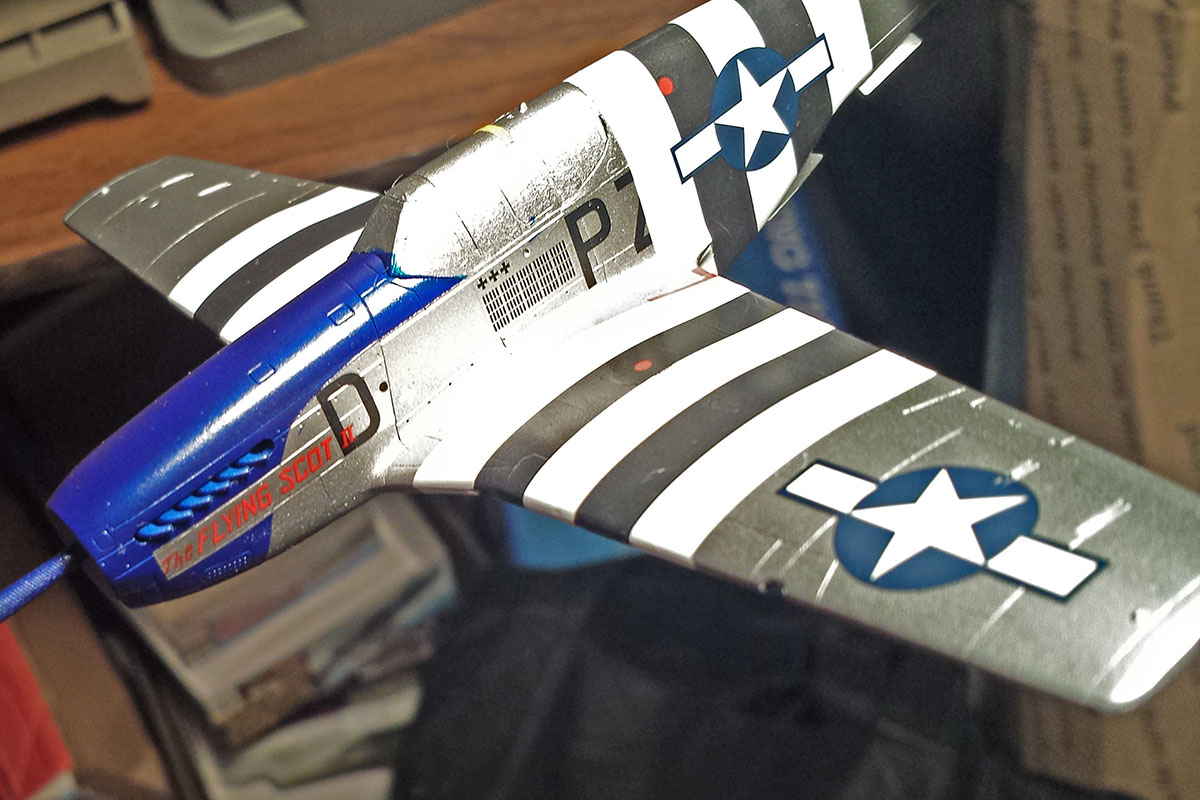 With the fuselage decals in place, it was time to apply the invasion stripes. Here the big problem with these stripes showed up: the white is translucent. Where the white stripes went over the black letters, the black letters were still visible. Even better, when I applied the national insignia, the black stripes showed up in the white bars of the insignia. Definitely not good. Further, on the top of the fuselage, the stripes overlapped, which resulted in a ¼" solid white stripe strip at the very top. In the future, I will definitely paint the invasion stripes, as then I would be able to ensure a solid coat of white.
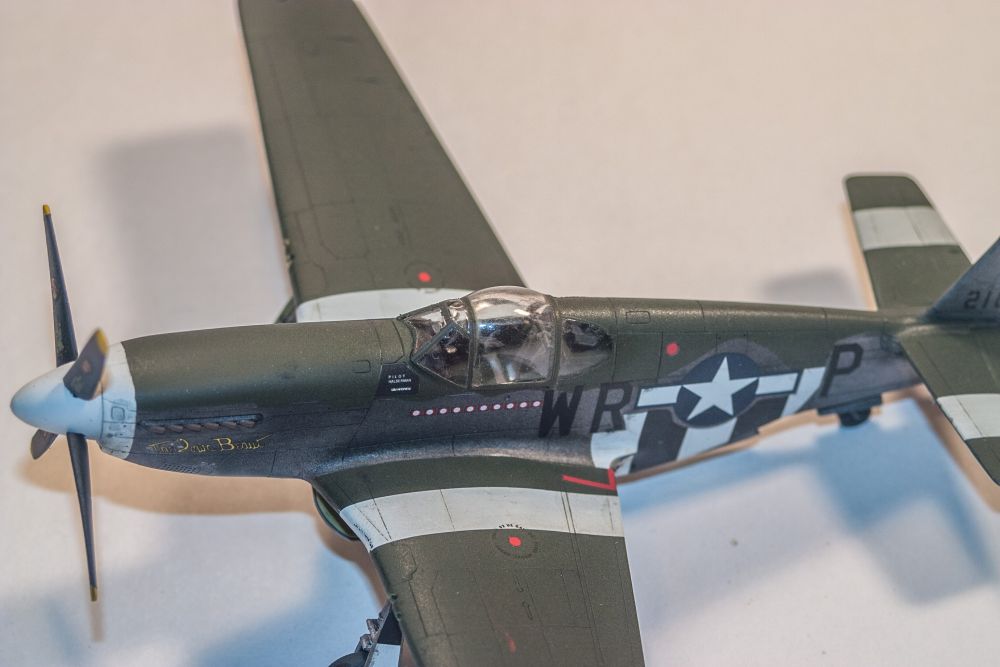 MB: Thankfully for my scheme I wasn't too concerned, as Chris was, on the decals overlapping paint areas. However, my invasion stripe decals, especially on the fuselage, did not conform well to the fuselage at all. Plus the instructions weren't as helpful as they could be with placement. If I was to do this all over again, I would paint all of the invasion stripes. Thankfully I decided to paint the white on the nose and spinner instead of using those decals and I'm glad I did. This area looks nicer than the rest of the areas covered by the invasion stripe decals.
In fact, I had quite the chore to get the fuselage invasion stripe decals to settle. I ended up using the Agama decal solutions as the Microscale solutions just weren't working. I tried using Solvaset as well but the Agama products worked best with these decals.
Final Touches
 CBR: For final bits, it was very straightforward. With the landing gear and propeller on, the last hurrah was to do some light weathering. I used the Iwata/Medea weathering set to add some dusting to the wheels, exhaust staining to the fuselage, and general toning down of the markings. As noted, I still need to go in and add a couple pieces of decal to cover up my blue mistakes, but overall, for an OOB build, it doesn't look too bad.
 MB: My weathering was limited to a panel line wash and dirtying up the landing gear. In fact, I used a new product from PS3 called "Armor Wash" that worked extremely well. PS3's products are primarily used in gaming, and "Armor Wash" does not mean a wash for "tanks", but a wash for plate armor and the like. I really liked how it worked and pooled around the detail as it's an acrylic wash.
Unfortunately "something" happened and there is "something" on the inside of my Malcolm-Hood canopy. I don't think it's glue because it doesn't look like glue, but it's something that really doesn't look good. Since this was a build meant for trying new things out, I stopped worrying about the kit and left it as-is.
Conclusion
 While many will pass on the Hasegawa 1/72 P-51B for its wing issues, it does build up into a nice little model and opens up some potential for trying new techniques. The dual kit combos offer up an even better solution, as in one box you have two test subjects. As it had been a while since I completed a model, I decided to use this one as a good step back into the hobby, and thus didn't try too many new things. For Matt, he saw this as a good time to practice with Alclad, and learned a few useful bits there. Both of us came to the conclusion that, for invasion stripes, it's far better to paint them on than try to use decals.
Overall, it was a useful experiment, and we both have another Mustang to put on the shelf. Thanks go out to Hasegawa USA, both for the review kit and for doing these nice dual kit combos.