 |
|
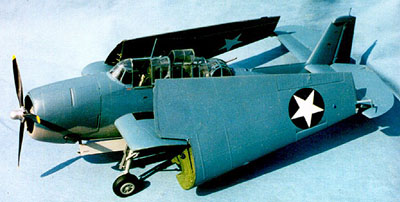
When I first saw KMC's wing-fold kit for the Accurate Miniatures Avenger, I thought "how cool." On impulse, I bought it from a dealer at a local show and took it home. On opening it and examining what was there, I was thoroughly daunted by the idea of actually attempting the project. There was every likelihood this would be a conversion that would never be completed. Then at the 1998 IPMS-USA National Convention, I saw the kit built up at the KMC table - proof that at least one other modeler had done it. Willy Peeters told me that KMC had an article on their website on how to do the kit. When I returned home, I looked it up. Yikes! It was possible to do this. When KMC provided a review copy of their TBF-1 conversion, and Bill Bosworth at Accurate Miniatures offered to provide a second set of Avenger wings, I finally decided to throw caution to the winds and undertake the job. The KMC Kits: Accurate Miniatures' TBF/TBM-1C Avenger forms the basis of the conversion. For the TBF-1, KMC provides a replacement starboard cowling and forward fuselage, which gives the .30 caliber fuselage-mounted machine gun carried by the first Avenger; this is a beautiful piece of cast resin that fits perfectly. Additionally, the conversion provides the second cockpit, which was filled with electronic gear in later versions of Grumman's torpedo bomber; this includes sidewalls, a new cast resin floor for the entire cockpit, and a seat with a molded-in seatbelt. The wing-fold kit provides the inboard wing stubs in cast resin, which includes the wheel wells and all items of the wing interior with beautiful molding. All the interior parts for the outer wings are done in photo-etched brass. The modeler is required to cut off the outer wings from the A-M kit, which is fairly easily accomplished by scribing over the break line with a No. 11 X-acto blade, per KMC's illustrated instruction. Construction:
The TBF-1: The main exterior differences between the TBF-1 and the TBF-1C as created by A-M are: the .30 caliber machine gun in the upper right fuselage; the fact that the second cockpit has a seat in it; and differences in the windows down in the radioman's compartment, at least if one decides to do an early-early TBF-1 (the windows are the same as in the regular kit for any TBF-1 past the first 200). I put in the forward radio compartment windows and puttied them over. When doing something like this, a modeler should be ready to putty, file, sand, and putty again, until a smooth surface is achieved where the window used to be. In my own case, this took going over the area with putty followed by rat-tail file three times. I also cut off the The forward cowling provided by KMC is an excellent resin casting that has the necessary changes for the nose gun, otherwise indistinguishable from the original part in the kit. The resin parts were glued to the kit fuselage half with cyanoacrylate. KMC provides a resin cockpit floor that completely replaces the A-M part. I installed this on the bomb bay roof part, installed the resin side panels and parts in the rear cockpit (after sanding off the One thing I have learned with the A-M Avenger is to only glue one side of the base for the gun turret, leaving the other side unattached inside the fuselage until I am ready to install the turret after painting the model. This allows me to push open the fuselage at that point enough to slip the turret into position. Everything is then glued tight. Since I had the second cockpit, I decided I would open the canopy. This is a The TBF-1 conversion was now finished. I gave one final thought to just attaching the normal wings and forgetting the wing-fold, but decided not to wuss out. Folding The Wings: The one thing that concerned me was that the KMC conversion article calls for eventually gluing the outer wing to the upper surface of the stub wing, along the horizontal section of the "S" fold. While this will provide a stronger joint, the result is the wings would sit wrong: they will be too high out at the tips. There is definite space I studied the photos of the built-up model some more, and saw that there was a compartment in the wingtip where a cable was stored, which was attached to the horizontal stabilizer when the wing was folded, to steady it. Here was the solution! I have folded the wings of Corsairs (twice) before the Tamiya kit ever came out, and have had a lot of fun grabbing them by the wingtips and shaking them for people, with no damage. That's because nothing you see in the model is structural: I have steel wire running from wingtip to wingtip through a tunnel built into the upper inside of the wings and epoxied in position. Everything else is just for show. I saw I could do something similar with the Avenger. The Secret Revealed: I used .010 piano wire for this. Once the outer wings were cut off, and thinned down preparatory to installing the etched brass interior, I built a "tunnel" inside the upper KMC provides all the interior of the outer wing in photo-etch brass. Anyone who has done a photo-etch cockpit will have no problem with it. Take your time, and all is easily accomplished. Once the wings were built, I test-fitted each wing, cutting and filing as necessary to get them to go together right. I then installed the wire and cut it to the right lengths. The wing would ride on this wire, which was anchored at the stub wing and the tip of the horizontal stablizer. The proper angle of the wing would be achieved by gluing it along the hinge line. Painting The Model: I tried a set of EZ Masks for the first time. These are pre-cut vinyl masks that are As an early Avenger, this airplane would be light grey lower and blue-grey upper, which I did with my personal mixture of Gunze Sanyo paints. I cut and masked the wavy demarcation line, allowing over-spray by running thread along the cut, 1/16" away from the edge, which results in the edge not coming down and making a "hard" demarcation line. As usual, I used drafting tape - a low-tack masking tape that will never ever pull up the paint beneath it when removed. Decals: At the time I did this model, there were no decals for the TBF-1 that I was aware of, Final Assembly: With the ordnance in the bomb bay and the open doors installed, as well as the open radio compartment door and the landing gear, I was ready to "fold" the wings. A bit of cyanoacrylate over the hole in the stub wing, and over the hole in the leading edge of the horizontal stabilizer, and the wing was in position. I rotated it until it matched up I even picked it up by one outer wing. Once. For about 30 seconds. All other handling since has been by picking it up at the nose. Does it look good? Yes. Was it a challenge? You bet your sweet bippy it was! Do I like the result? Indeed I do. Would I do another one? Not in this lifetime! You, however, can do this easily if you follow these instructions and those provided by KMC. This is definitely something for an advanced modeler to attempt, and even with this roadmap you should be ready to fiddle with things a lot. |
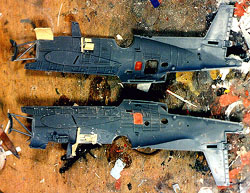 I decided to start with the TBF-1 conversion, since with two sets of wings I could still have an early Avenger even if I didn't end up folding the wings. As usual, KMC's instructions are easy to follow and informative.
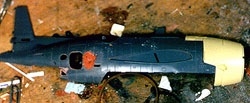 forward cockpit coaming on the right fuselage half, since this area would be replaced by a resin part.
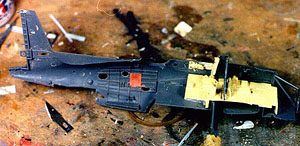 kit-supplied detail in that area), then shot the forward cockpits bronze green, and the radio compartment and bomb bay interior green. As noted by Accurate Miniatures, all TBF-1s made by Grumman had cockpits in bronze green, while TBMs from Eastern Aircraft were overall interior green. I painted all the other parts their respective colors - bronze green or interior green, did the detail painting, and installed the fuselage interior.
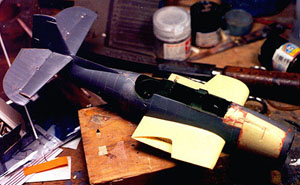 dangerous operation, since the kit canopy is very thin and too much pressure, or sawing too quickly, would result in fatal damage. Fortunately I had a spare canopy just in case. With careful cutting I had the canopy open and ready for later use.
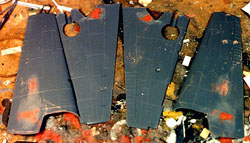 between the upper surface of the stub wing and the horizontal line of the "S" according to all available photos of Avengers with folded wings. The problem is, going for realism would result in a connection that would be too fragile. What to do?
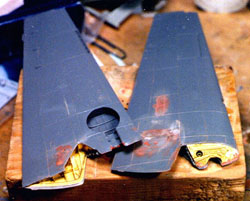 wing half. The wire would come out of the wingtip at the location shown in the photos for the cable connection. At the other end, it would exit behind the hinge, inside the area the triangular door covers when the wing is extended, which is not visible to any observer when the wing is folded. I heated a paperclip and melted a hole into the solid resin casting of the stub wing, which would take the wire when the wing was installed. Once I figured this out - and it took several days of thinking and fretting to come up with the solution - the rest was easy.
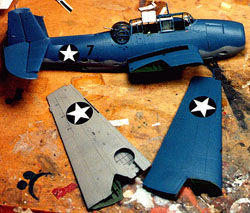 applied over the clear areas, like I usually do with masking tape, and then one paints the canopy as usual. I like them better for a model like the Avenger than I would Fast Frames (and in any case there are no Fast Frames for the Avenger).
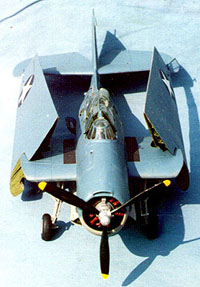 so I decided to do an "anonymous" aircraft of VT-10 aboard U.S.S. Enterprise at the time of the invasion of Guadalcanal, August 7, 1942. This required early war insignia, and a simple set of numbers, all of which came out of the decal dungeon, and I used the stenciling that comes with the Accurate Miniatures decal sheet. I have since discovered that Yellowhammer decals have done the TBF-1 that was the sole survivor of the VT-8 detachment at the Battle of Midway. If one elects to do a later version of the TBF-1, marking possibilities include the tri-color and Atlantic schemes. I sprayed Future overall, applied the decals, and sprayed Future over them when dry. Finally, I applied Testor's Dullcote in thin applications until I got the suitably flat finish one would see on an airplane subject to a salt-air environment.
 with a head-on photograph of an Avenger with its wings folded, then applied cyanoacrylate along the hinge. With a repeat of the process on the other side, the airplane was almost complete. I added small details along the hinge line - which also hide the connection even better - and the model was complete.