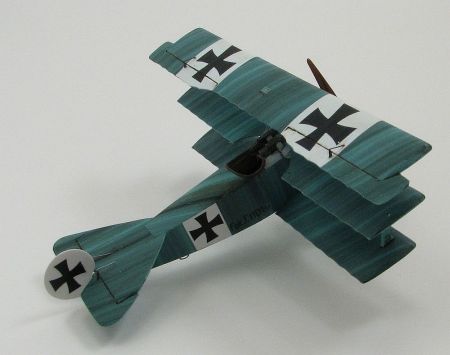
Eduard 1/72 Fokker F.I with Gunsight Graphics Streak Decals
By Matt Bittner
Introduction
Due to the amount of information on the infamous Fokker Triplane, I won't go into much detail about the aircraft. Instead I'll mention there were three prototypes built prior to the production, Dr.I version. Two of these prototypes were made famous (or maybe even more infamous) by two of the more highly decorated German WW1 Aces: Herr Richtofen, flying F.I 102/17 and Herr Voss, flying F.I 103/17. The later even more famous than the first in regards to the F.I prototype version. It was in the F.I Voss lost his life, and it is his F.I that garners the most discussion in terms of one single airframe. Was the cowl of his aircraft olive, or was it yellow? Something we'll never know until a time machine is made. Both have their proponents. And there is one modeler I know that actually built his Voss F.I with two cowls: one yellow, one olive. That way he can replace the cowl as the mood fits: and as he displays his model for one of the two camps. Ingenious, I feel.
Building Intro
|
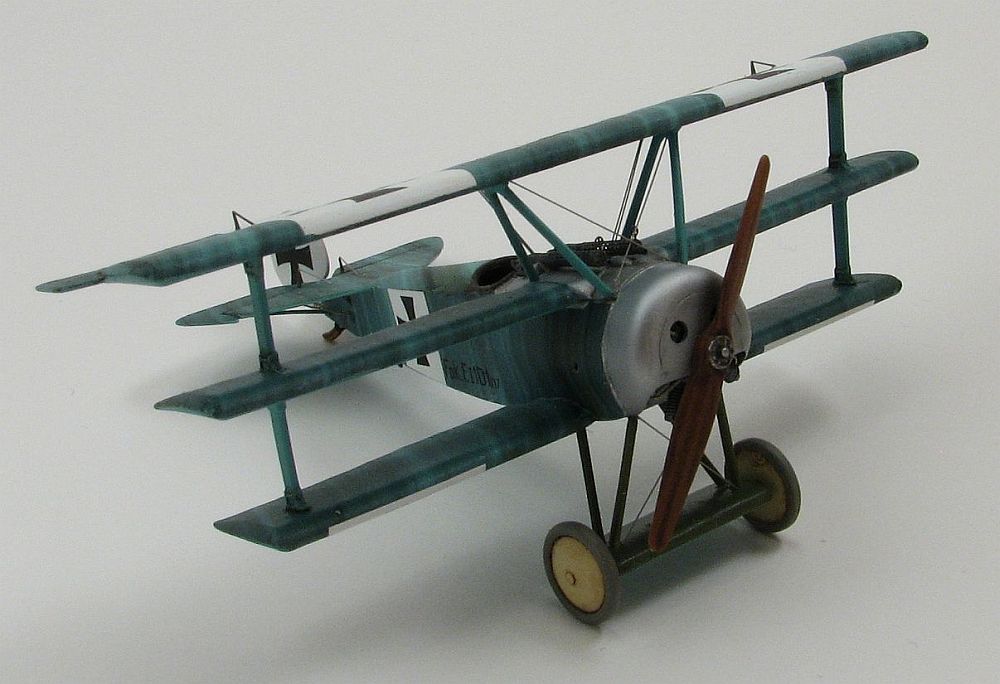
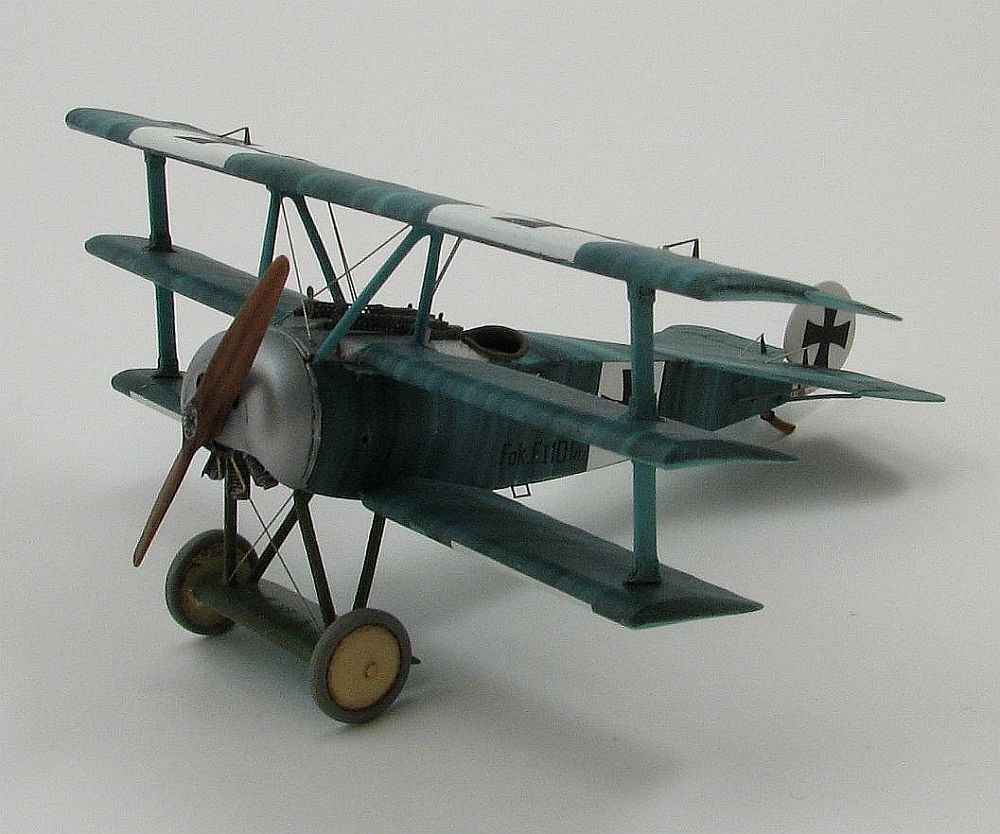
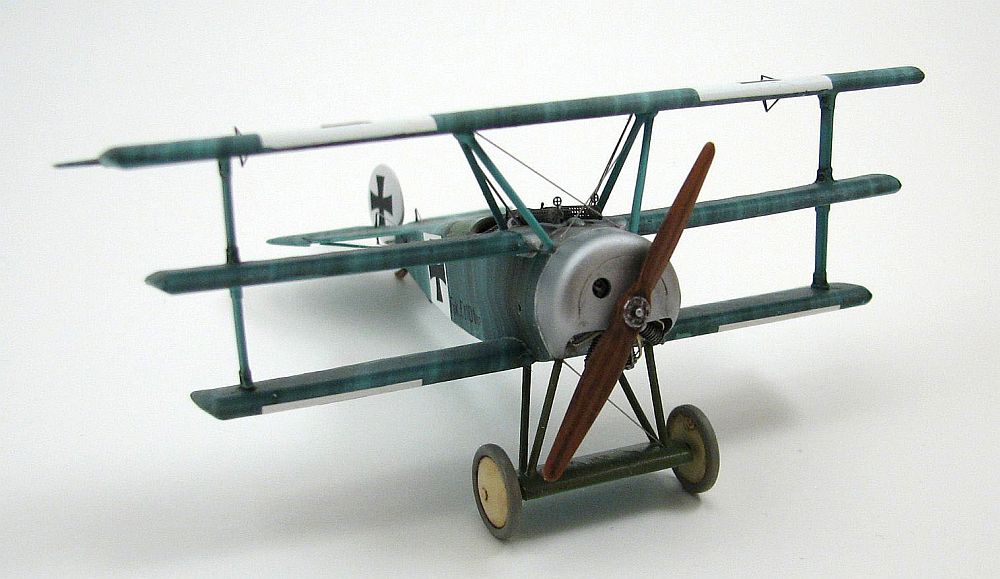
It's because of the reason everyone tends to model either Richtofen's or Voss' F.I I chose to finish mine as the first prototype, F.I 101/17. I also chose this one because the colors are - for the most part - known, and because those colors are different than the other two. F.I 101/17's cowl and upper, forward fuselage were left au natural in their aluminum finish. In addition, the wheels were left in Clear Doped Linen (CDL), and (I believe) the undercarriage axle wing and struts were left in olive.
|
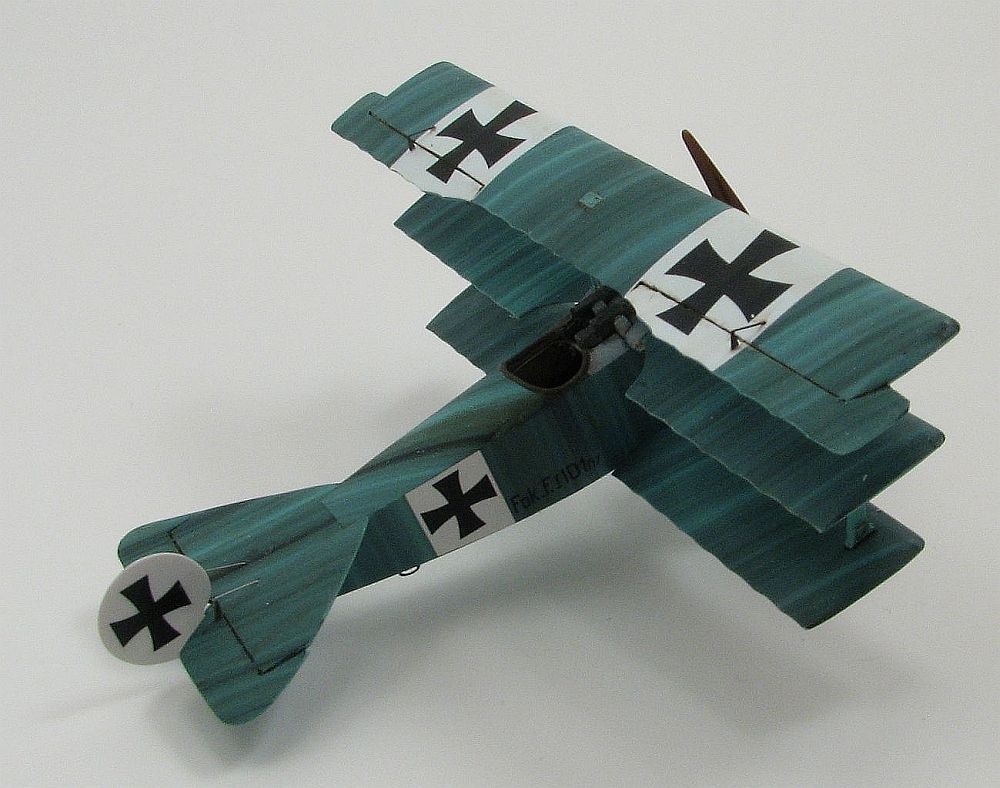
I think there is now speculation the F.I prototypes were not delivered in olive-streaking over turquoise: I think there are some that believe the F.Is were finished just as the Dr.Is were, overall CDL with the olive streaking and turquoise undersides. Personally I'm not convinced of this thinking, believing the airframes, overall, were turquoise. So this is how I finished my F.I.
This was also the perfect opportunity to try out one of the new streak-decals recently released on the market, these put out by Gunsight Graphics. I've had the Eduard F.I sitting in-progress for a number of years, so what better chance to bring it "out of hiding" than to use it in conjunction with these new decals.
|
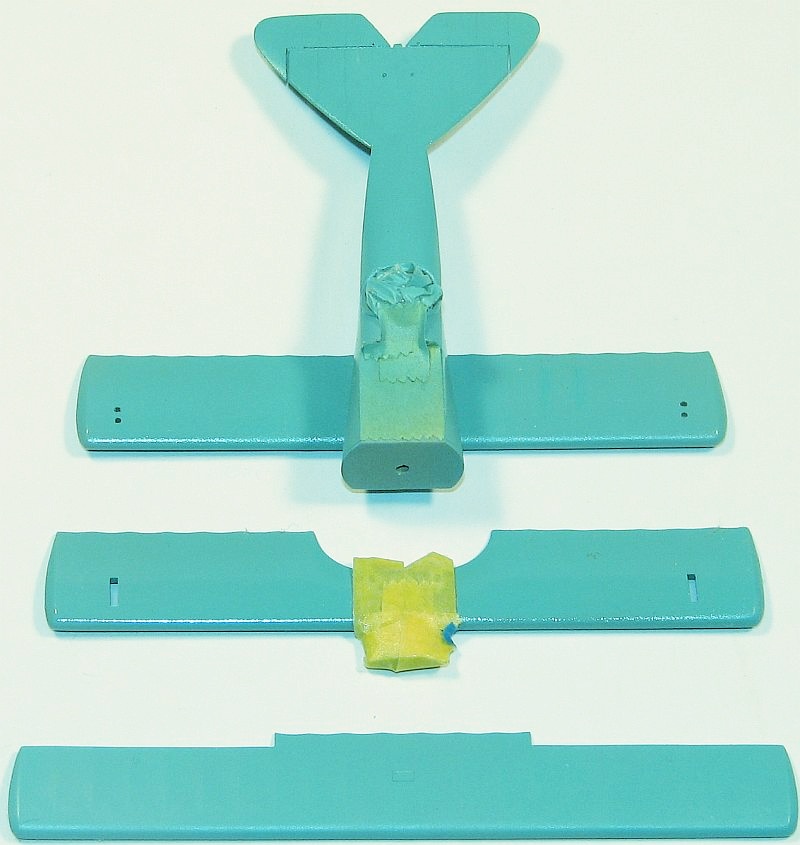
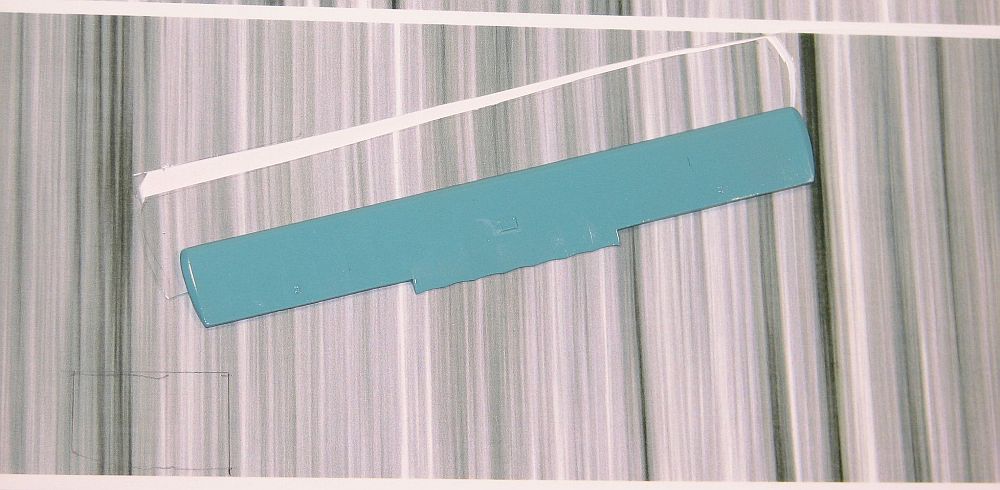
I chose the 1/72 Eduard F.I for a couple of reasons, first is because it was originally given to me to review, and next because the kit was coupled with the (unfortunately out of production) Rosemont resin correction set. The F.I differed from the production Dr.Is in the areas of the cowl, ailerons, wing-tip skids and horizontal tail. The cowl was shaped a little differently, the ailerons were longer on the F.I, the wing-tip skids did not exist, and the horizontal tail had a more rounded appearance. Unfortunately Eduard captured only one of these changes: the wing-tip skids' holes were cast over. The other changes Eduard missed. (Just to add, the Roden F.I only captures the aileron difference, by supplying separate ailerons. Roden's F.I misses all the other changes as well.) It's because of these missed changes that Rosemont released their upgrade set. That set consisted of an entirely new upper wing, new horizontal tail and new cowl. Unfortunately the Rosemont wing had a molding-flaw: one aileron was short-molded and everything released from this mold has this short-cast aileron. Since I had to fix this aileron anyway, and since it's easier to glue plastic-on-plastic (wings-to-struts), I decided to cut the ailerons from the Rosemont resin wing and use these on the Eduard injected, plastic wing.
|
The Eduard F.I was released as a "profi-pack" kit, which came with masks and photoetch. This kit was released early enough the masks are still the vinyl type and really don't work. I tried using just the wheel masks (paint the wheel/tire CDL, then use the provided mask to mask the wheel and paint the tire) but there were two problems with the wheel masks. First and foremost they don't fit. Yes, the masks that Eduard created are too small for the Eduard wheel. Odd. Then when I discovered this, I also found out the adhesive on the vinyl mask was stronger than I anticipated, and it pulled the paint from the wheels. So, I did not use the masks at all after that fiasco.
Construction
|
The kit starts with building the photoetch cockpit and once folded and painted, installed in one fuselage half. I had no issues at all with this area and once the cockpit finished construction continued quickly. There was a little putty needed on the fuselage underside seam, but not much. I did glue the lower wing to the fuselage, and it was here a little more putty was needed. But unlike my other Fokker Dr.I builds, I didn't attach the middle wing. That was because of the streak-decals. I did glue the horizontal tail to the fuselage, and you'll need to pay close attention to the holes the stabilizer control cables go through, as one is a little out of place.
|
Now I could start painting. Since I have it in my stash, I used the MisterKit Fokker Turquoise, thinned with primarily Future (and a drop or three of windshield-washer fluid). I have found that adding Future to MisterKit paints help with their "strength". The Future gives the paint a little more "bite" and also makes the paint a little "harder". Of course you'll need to wait longer for the paint to dry, but if it helps to add strength, then it's time well spent. I also used a combination of Alclad and Polly Scale "aluminum" for the metal areas, and MisterKit's German CDL for the wheels.
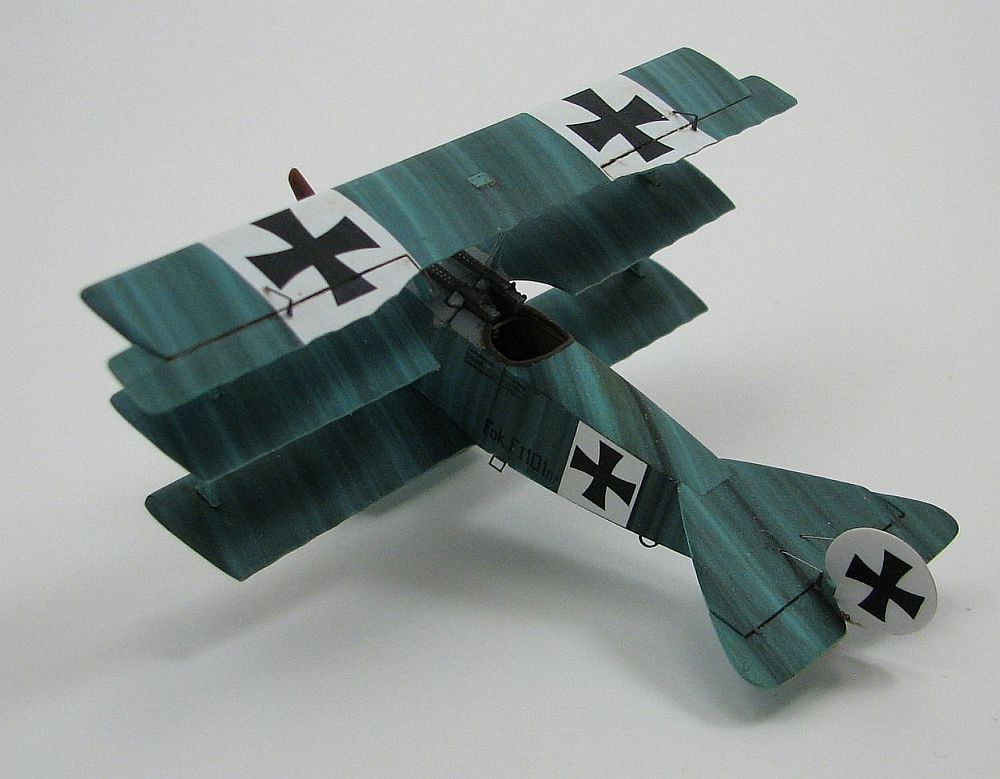
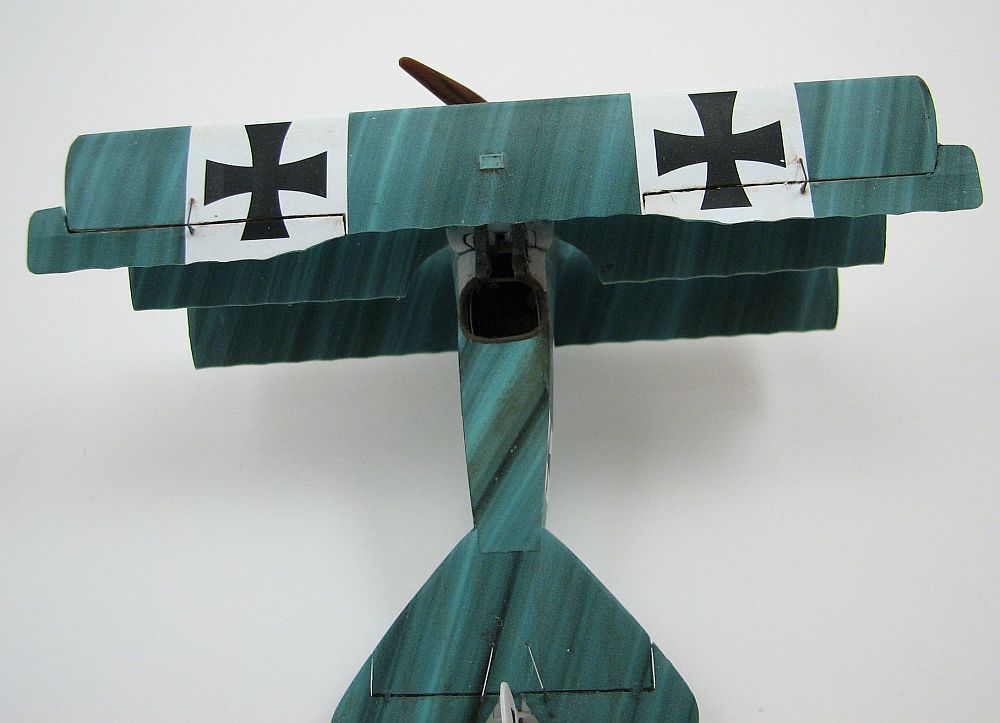
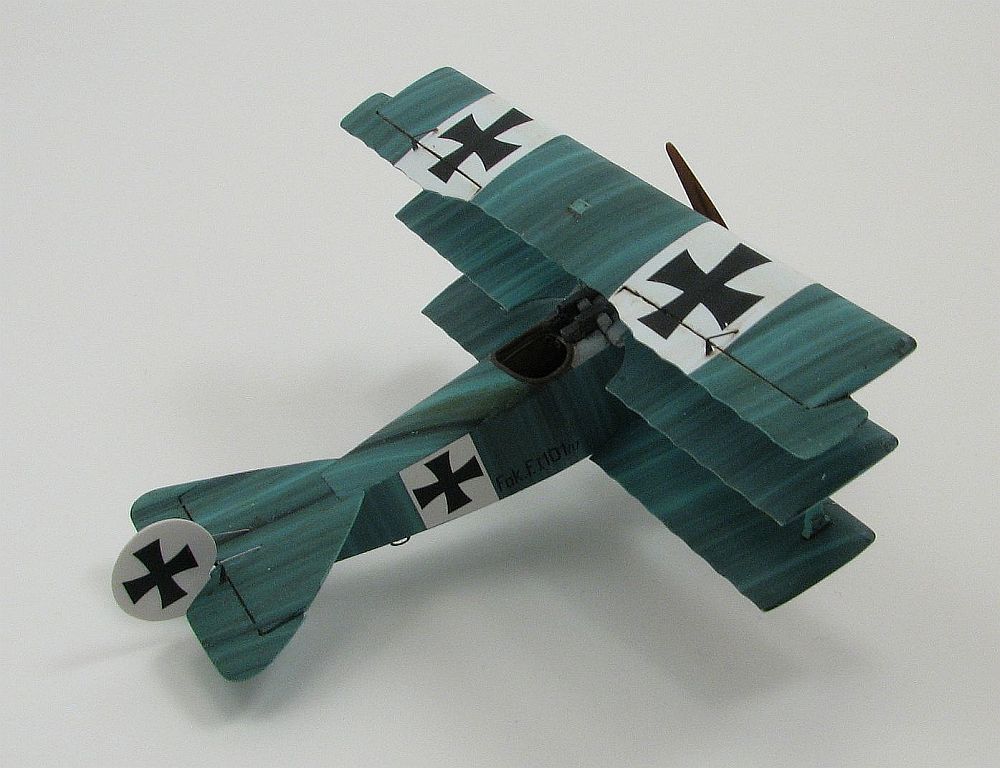
I did paint the Alclad first and masked it (and kept it masked) until after the dull coat (as I wanted the original "sheen" the paint afforded). Once all painting was done, then I gave the model a heavy coat of Future, since the entire upper surfaces of the model were to be decaled. After waiting more days than necessary (again, "once bitten, twice shy") then I could start the decal process using the Gunsight Graphics streaking-decals. First I determined the angle of all surfaces (watch the angles as they're different between areas). While the wings were the same basic angle, I decided to "change it" just a little between the three wings to make the model a little more dynamic. I also covered the ailerons separate but the one area I skimped on was the horizontal tail. The stabs were supposed to be covered separately, but I was lazy and wanted to finish the model, so I covered the entire horizontal tail with one decal. Again, the angle was different than the rest.
|
Using the Datafile Special drawings as a guide, I cut out decals for the turtle deck again, making the angle different than the rest. For the fuselage sides I was able to trace the kit (as I had an extra Eduard Dr.I) but it was easier to use the Datafile drawings as a guide for the turtle deck. Now that I had all the decals cut out for all surfaces, I could commence.
Even though I had a good, gloss coat via the Future, I still had problems with the decals. I decided not to use any decal solvents which could have been an issue. Using just water ensured ease of decal movement, but it might have bit me in the end. Once the decals were down and starting to snuggle, I ended up using Agama's Hypersol on all decals. I have Solvaset, but it wasn't strong enough to remove all the silvering.
When dealing with the wing ends, you'll need to do some slicing to get the decal to bend around the tips. Not a huge issue, but one to be aware of.
|
I decided to take Gunsight Graphics' advice, and dry brush some olive on areas to give a dissimilar appearance. You can see some of those areas in the photographs. This also helped with those areas that due to my ham-fistedness, I rubbed some of the decal color away.
I did apply more Future over the streak-decals. That way I had a better surface to apply the kits' decals to. This time it worked, and there was no silvering with the kit decals.
One thing I did leave off, and I'm unsure how I'm going to replicate it, was anything to represent the underside fuselage stitching. I may draw this in at a later time but I'm unsure of when.
Conclusion
Unfortunately you can't get an accurate 1/72 Fokker F.I out of the box with any kit, Eduard or Roden. Also unfortunate the Rosemont F.I correction set (heck, any Rosemont set) is out of production. It's too bad "someone else" (like Loon, for example) wasn't able to purchase the Rosemont masters before the shop closed its doors. That just means those that have the Eduard kit without the Rosemont set have more work ahead of them: fixing the ailerons, horizontal tail, and cowl. You might be able to use the Roden ailerons on the Eduard kit (and I think you get both sets of ailerons in a Roden Dr.I kit) but the rest will have to be scratched (tail) or modified (cowl).
|
Using the Gunsight Graphics decals - for me - was hit and miss. I'm almost positive it was because I didn't use any decal solvent under the decal and the areas I had the most difficult with were the wings. I thought it would be difficult to not only get the decals into their correct position, but also in the case of using "wet" Future under the decals (like I have in the past) would not afford me much time to squeeze that Future from the center of the decals out the edges. So, I opted for no solvent under the decal and I think that was the reason why I had difficulties. I have read other reviews where those using the Gunsight Graphics decal had no problems what-so-ever. Might just be a PEBDAC issue (Problem Exists Between Decal and Chair).
My thanks to Rosemont - now demised - for the Eduard F.I and their correction set (unfortunately the kit and set were in my pile for far too long - my apologies to Barry). I would also like to thank Gunsight Graphics for the review decals. I have more from the sheet they sent, and I will be using it on another Triplane (or maybe even D.VII) build. Just not anytime in the near future. This is my fourth Triplane, so I think I'm burned out for awhile. Or, at the very least, the next Triplane will be one with NO streaking, decal or otherwise.
