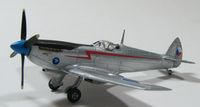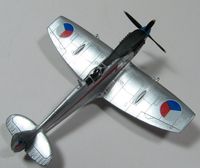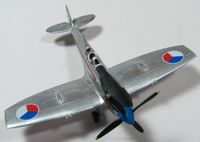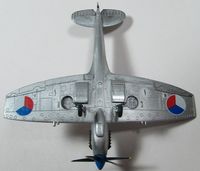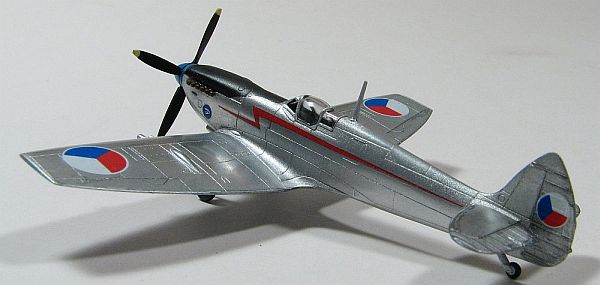
Eduard 1/144 Spitfire Mk.IXe E-Day Special
By Matt Bittner
Introduction
I truly am enjoying 1/144, especially when we get state-of-the-art kits in this scale. Even the ones that require a little more work are still turning out to be fun, and when it comes down to it, that's what it all means. Having fun.Sure, you still need those kits that require work, otherwise how are you going to keep your modeling "chops". But when you have too many of the ones that require work, and are becoming burned out on AMS (and even AAMS), then you need something to pull you back, and help you realize why you started this hobby in the first place.
The Eduard 1/144 Spitfire Mk.IX is just such a kit. It has no cockpit detail, but if you want some you can purchase Eduard's fold-up photoetch cockpit set. If you leave out the cockpit, and paint the interior black, then you really won't notice unless you're an IPMS judge with the dreaded flashlight. The kit practically falls together and there really aren't any pratfalls to building this kit.
Construction
Since there is no cockpit that comes with any form of the Eduard 1/144 Mk.IX kit, you're down to scratchbuilding, using their photoetch cockpit, or not worrying about it at all. For this build, since I really wanted to finish it quickly (at least for me), I decided to paint the interior of the fuselage halves black, and sprayed the prop at the same time. Once the paint was dry, then it was time to glue the fuselage halves together.And they went together like a dream. There was some scraping on the seams to eliminate them, but there is no putty in the fuselage seams at all. Once I restored what panel lines I scraped away, then it was time to glue the one-piece wing on. With careful dry-fitting before hand, you can get a seam that doesn't require much work. In fact, except for one area, I was able to do the "wet-and-swipe" method with Apoxie. After mixing up Apoxie, and applying it in the wing-to-fuselage-root seams, I wet a stiff brush, and carefully removed the putty from the outlying area. This works for seams such as this because while you still remove a little bit of putty from the seam (never getting it completely flat), it's perfect in this case because the seam lies on a natural panel line. I was also able to do the "wet-and-swipe" on the forward, underside wing-to-fuselage seam. However, it was the back seam that required a little work, in which I allowed to dry and sand away. Even so, it only required one "take" with the Apoxie, and once panel lines were restored, it was finished.
Next up were gluing on the horizontal tails. While there is a little bit of a gap with these, I didn't think it was enough to warrant putty. I may change my mind with the next one, but again, I suspect it will be just like the wings, and able to "wet-and-swipe" my way to a perfect seam.I finally added the wing underside radiators and those were easy to glue on as well. Now I had a model ready for painting.
Oh, one thing. You will break off the molded-on antenna. I was super careful with it, and still managed to break it off. Twice. This is probably my one peeve with this kit, because having a separate antenna would alleviate this worry.
Because I had the Dual Combo release of this aircraft, I used the masks that came with that release and a blessing they were. After dipping the canopy in Future and attaching it to the model after it dried, I then applied the masks. Before moving on to the rest of the painting, I sprayed the canopy frames black, to eliminate any color coming through the canopy.Since I was finishing a natural metal aircraft, I decided to spray primer, and since this was 1/144, I used Vallejo Gray Surface Primer. Once dry, I then sprayed Alclad. I started with just "Aluminum", but thought it too dull, even for 1/144. Then I tried "Polished Aluminum" and still wasn't please with how it was coming out. After consulation with another good friend, I started to polish the entire kit, which removed all traces of Alclad, but left the primer. Starting at 3600 then going to 4000, 6000 and finally 12000 grit polishing clothes, I had a surface that was super slick and super shiny. Then I sprayed another round of "Polished Aluminum" and it was now it really started to look good. However, you can tell in a couple of places I wasn't able to get the primer super-smooth, especially around bumps (like the wing cannon bumps) and other areas that were difficult to get to with the polishing clothes. Still, I do like how it came out regardless.
The landing gear were sprayed with Talon Aluminum (and these could even be interior green) and the tires (again, using the Eduard masks with the Dual Combo kit) were sprayed "scale black" after masking the wheels. The fuselage was masked so the area in front of the windscreen was sprayed black, and unfortunately I wasn't very careful with the masking because you can see where I had to do some touch-ups. The propeller tips were dipped in yellow and the spinner sprayed blue, and the model started to come together.I also tried to do a wash on the control surface panel lines, as well as the fabric covered areas of the tail. I used the Vallejo Air Gunmetal, and while I thought it was working well, I didn't like how it ultimately turned out. So, that's where I stopped, and while I didn't like how it was working, in the end I'm pleased with it in how it provides a contrast to the rest of the model. I definitely did not want to do anything else with the panel lines, though, hoping lighting would take care of it.
While I was working on it, I knew where I was handling it because the paint was rubbing off. I'll definitely want some cotton gloves if I ever do another natural metal finish. I re-sprayed some of the rub-off areas, and other areas I used some SNJ Aluminum Powder to accomplish touch-ups.Conclusion
It's not perfect, but I do like how it turned out. It's a very easy kit to assemble and looks great when finished. I'm looking forward to starting another, this time using the Eduard photoetch with it. My next goal is to work on a base that will allow me to swap Mk.IXs however the mood strikes. I'll just be sure to use some cotton gloves.
My extreme thanks to Eduard for allowing me to build this kit. It was a true joy!

